


April 30, 2021
VVDI Mini Key ToolOverview: available with Wireless remote generation, Wired remote generation, Chip generation, the method to change the language and view the newest version number.
First connect VVDI Mini Key Tool
Click "Selectâ€, and it will search for devices.
Long press the power button of the Mini Key Tool, and you can see the serial number on the screen, which means it has been turned on.
Meanwhile, you can see the icon of Mini Key tool in the Xhorse APP, tap the device icon to connect the device.
You will hear two beeps, it means it has been connected.

Next, let’s demonstrate how read and generate the chip.
Put the chip into the keyhole of Mini Key Tool.
Click on "Read transponderâ€.
Okay, now the chip is recognized.
Then click on "Generate Transponderâ€.
Choose a chip type to be generated, for example, generate ID46 chip, soon, the chip is generated successfully. Go back to click on "Read transponder†to read this chip, it is already the 46 chip that is generated just now.


Next, generate wireless remote.
This is awireless remote, put it into the keyhole of the Mini Key Tool.
Then select the car model you want to generate.
I have smart card so it will generate smart remote.
If it prompts failed to generate, please adjust the position of wireless smart remote, because the coil position may not be able to sense the chip.
Ok, generation succeed.


Next, generate wired remote.
This is a wired remote, just remove its cover and you will see that there is a chip interface which can be connected to this remote programming cable.
Then you can generate keys by selecting "Vehicle remoteâ€, select the model you want to generate, click "generateâ€, after the generation is complete, click OK.


Finally, check the version and change the language
Just click "Device information†to view the latest version.
If there is the latest version, it will let you update as soon as you open the software and you do not need to enter "Device information†to update.
How to change the language: Click "Select†and then "Language†to change the language you want.


Enjoy!
Posted by: xhorsevvdi at
03:59 AM
| No Comments
| Add Comment
Post contains 372 words, total size 11 kb.
April 28, 2021
As known, we already releasedmultiple adaptersfor Xhorse Mini PROG, let’s have a look at what they look take BMW CAS4+ and Land Rover RFA for example. And then demonstrate how easy Mini Prog is used.
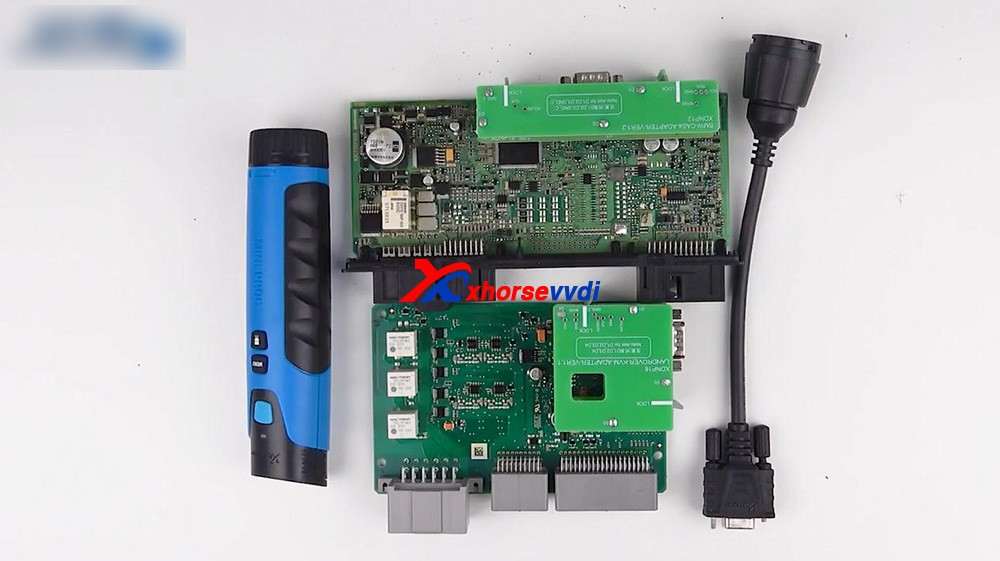
Here we go:
ConnectMini Progand the cable, after inserting it, just roll Mini Prog to lock it.
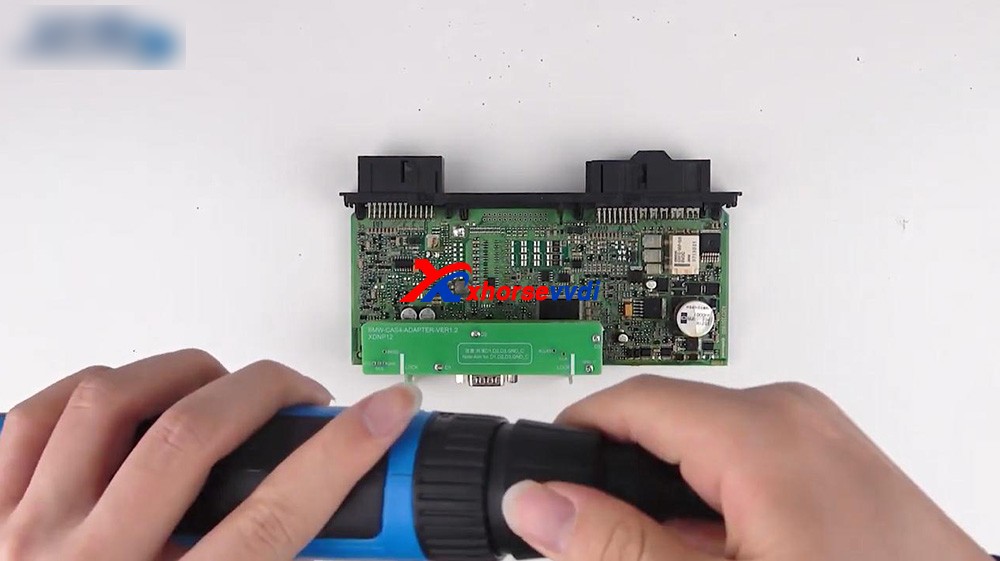
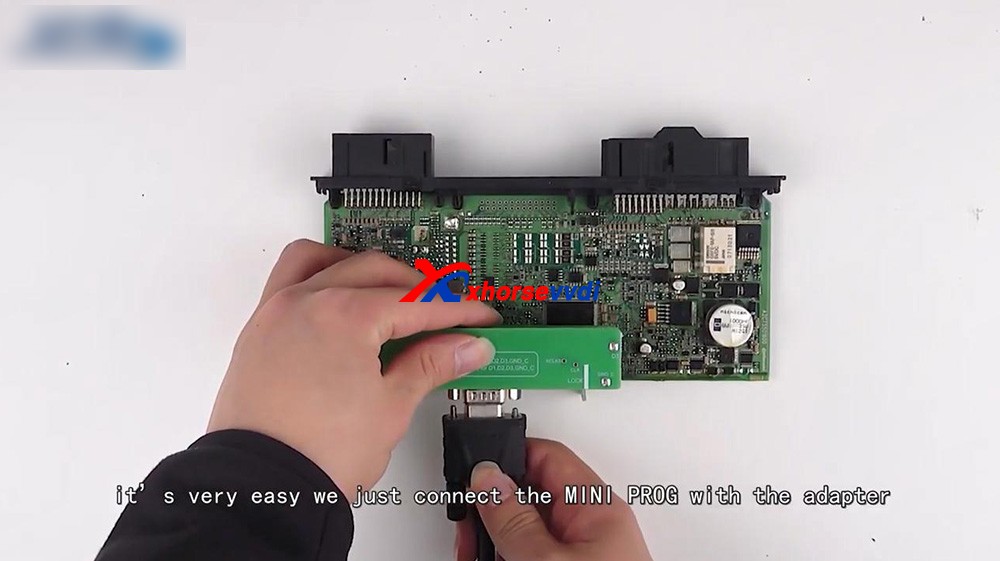
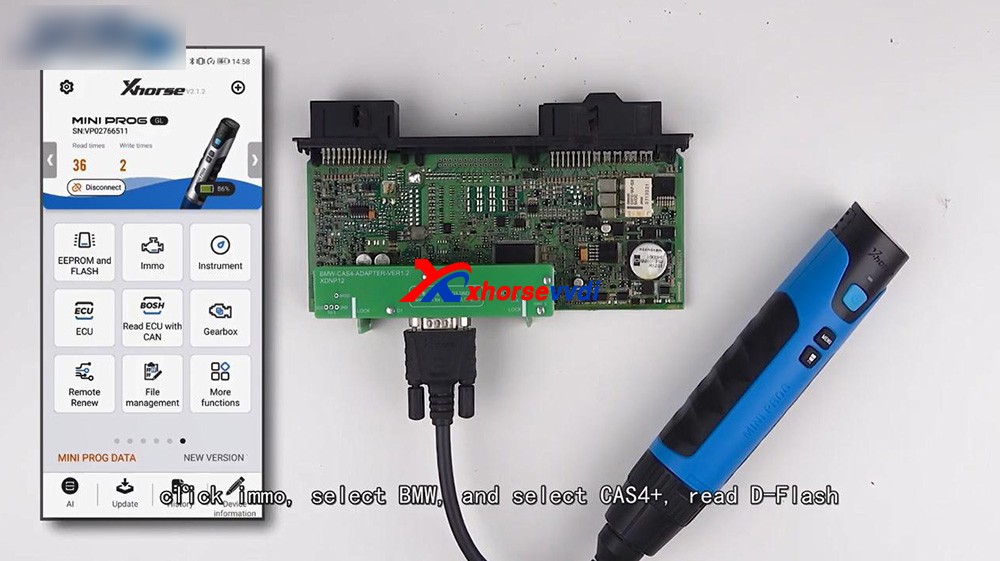
1. Firstly, read the CAS4 in BMW by Mini Prog.
It is very easy, just connect Mini Prog with the BMW CAS4+ adapter via cable and pay attention to the position of plug.
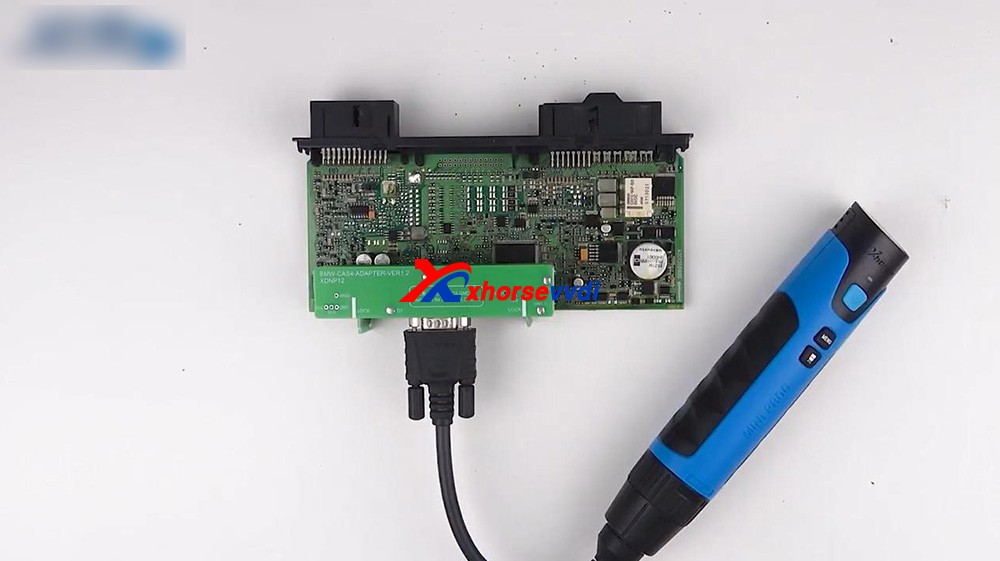
After that, we operate in Xhorse Application.
Connect Mini Prog to phone via Bluetooth.
Click on "Immo", select "BMW" and select "CAS4+" to read D-flash.
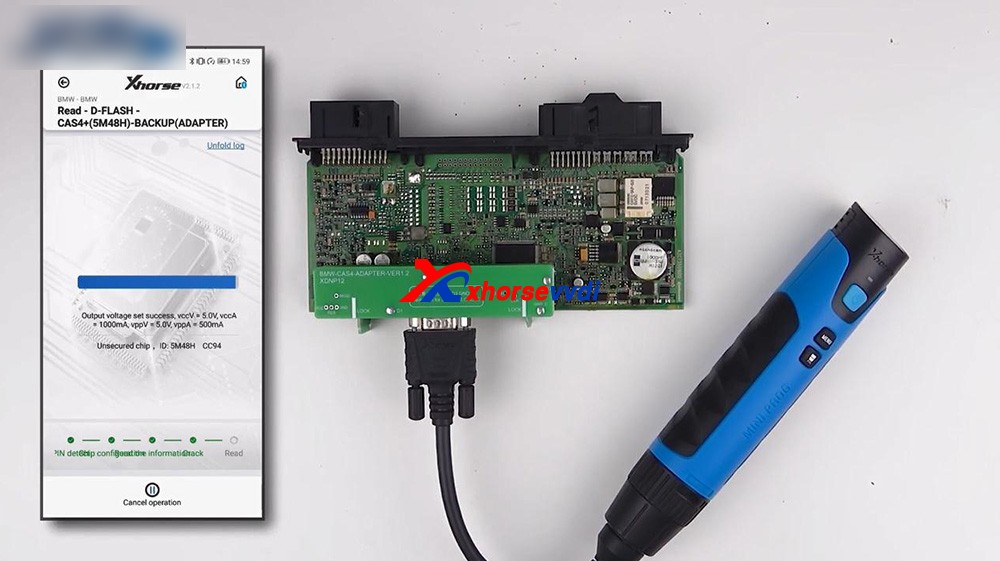
Okay, you can rename the file and find it in file management.
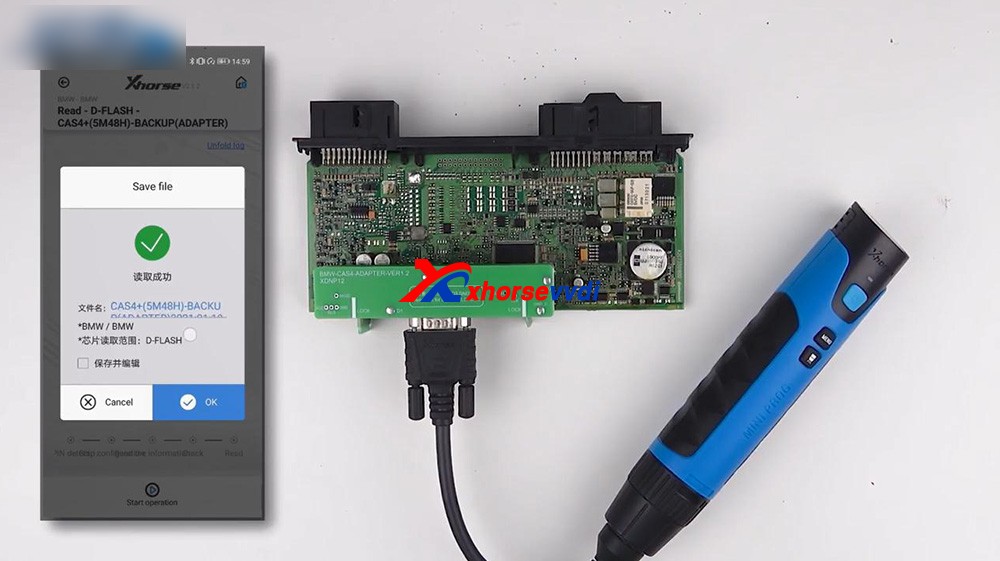
After we get the data, we can load it to VVDI2 which will help us program the key.
For your information, if all keys lost you should get ISN from the engine.
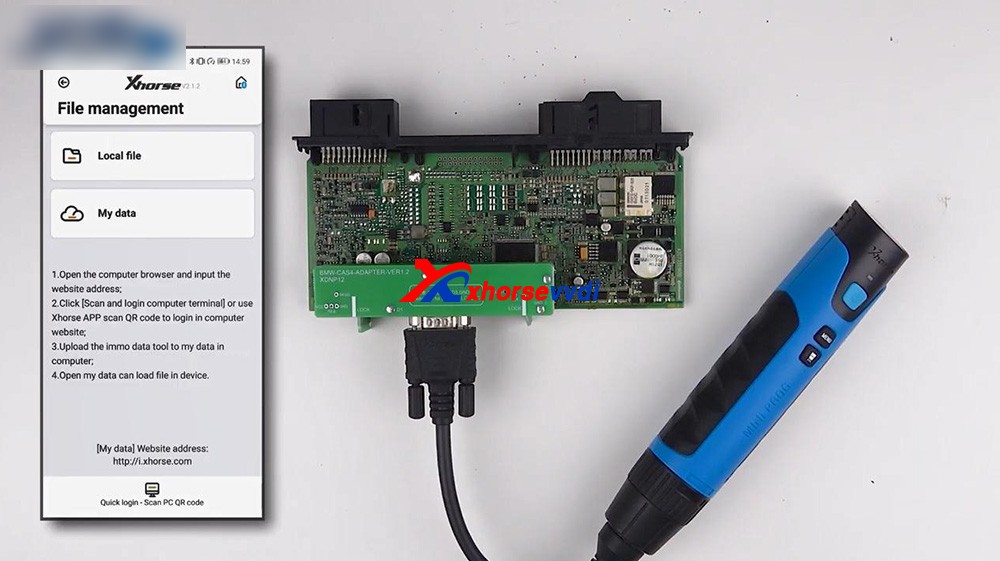
Next
is back to Mini Prog menu and select "File management", click on "Local
File", and then "Mini_Prog" folder, then "CAS4 df.bin" is contained.
2. Next one is the RFA of Land Rover.
Let's take a look at the Land Rover RFA adapter connected to the PCB, it's very stable.
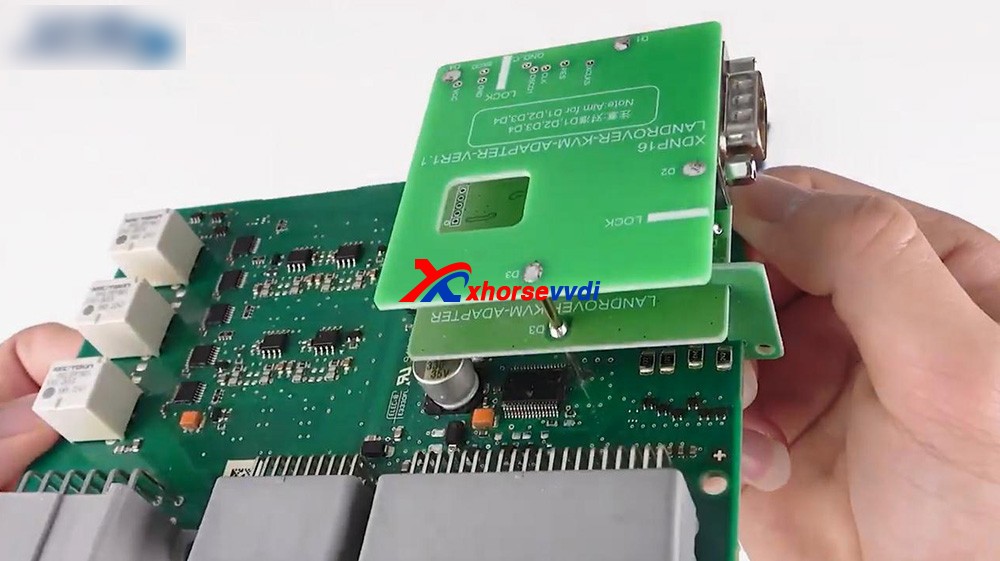
Then connect Mini Prog to the adapter.
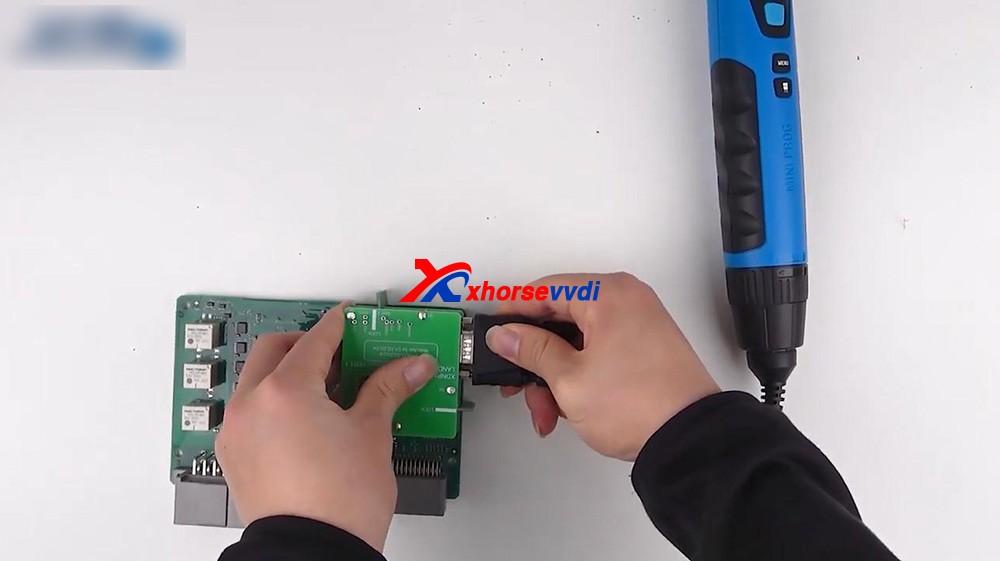
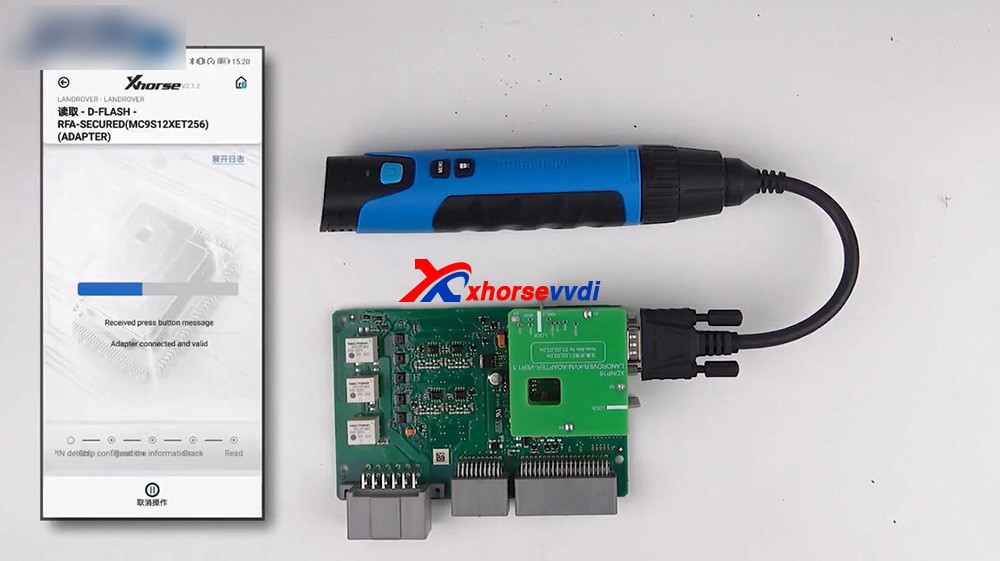
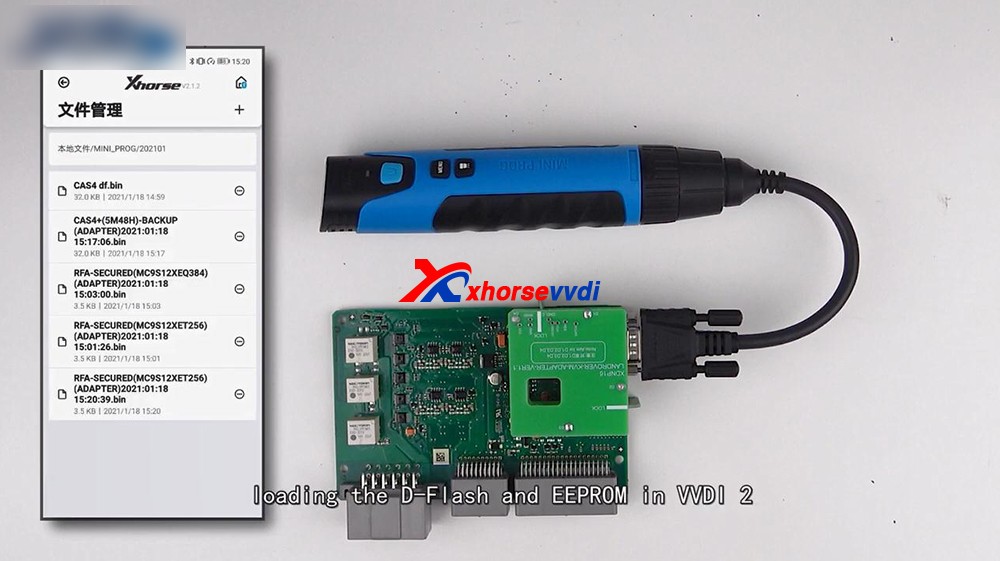
Click on "Immo", select "Land Rover" and select RFA, read the D-FLASH and EEPROM.
Now we have the D-flash data of Land Rover.
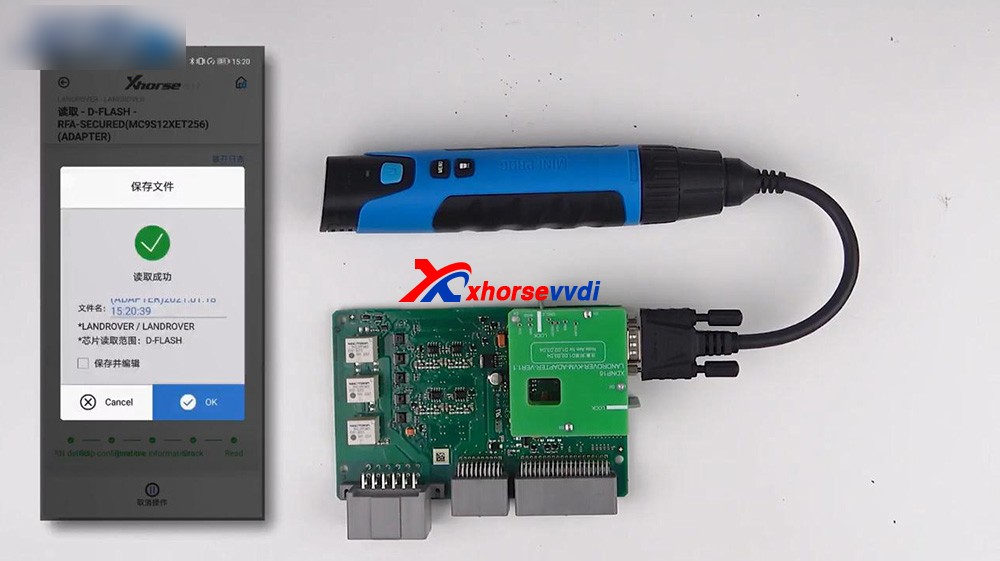
We can also find the file in "File Management".
3. Loading the D-flash and EEPROM inVVDI2, and you can program the key for Land Rover.
Alright, thanks.
Sharing a trust web:https://www.auteldiag.com/
Posted by: xhorsevvdi at
03:22 AM
| No Comments
| Add Comment
Post contains 275 words, total size 4 kb.
April 26, 2021


Posted by: xhorsevvdi at
03:52 AM
| No Comments
| Add Comment
Post contains 124 words, total size 4 kb.
April 25, 2021
Trying to generate Fiesta (Old Type) KeylessGo ID63 remote usingXhorse universal smart keyand smart key, But once generated it, still reads as id46 no change .
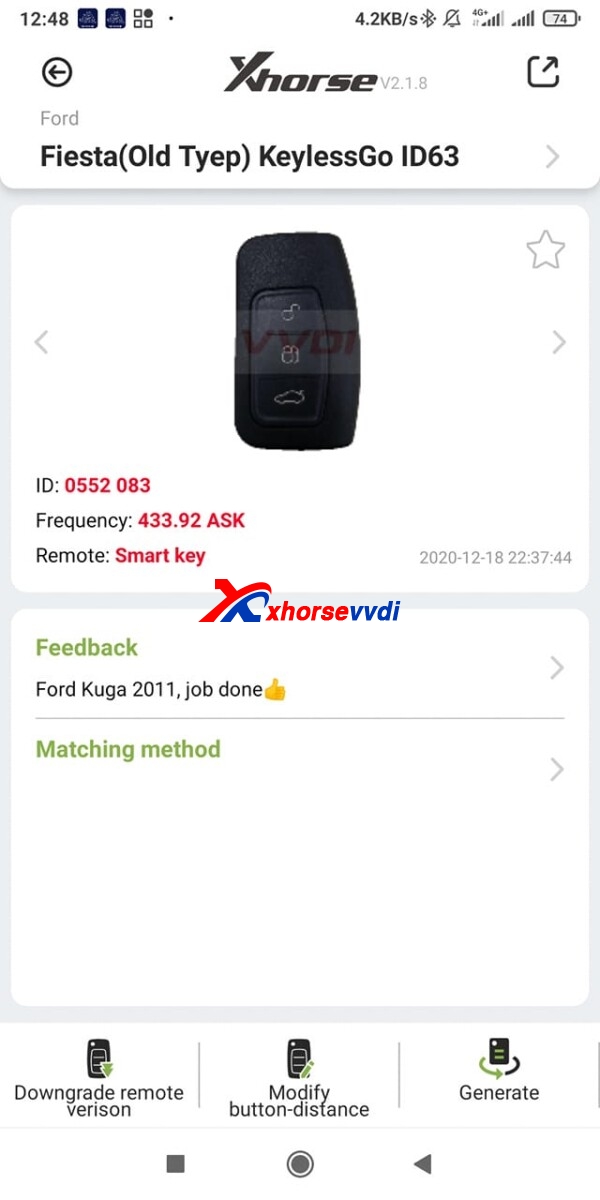
Advice:
You need a separate transponder in the key, the remote function is the keyless part transponder is emergency blade for start.
Just program remote and leave them with a HU101 key blank cut with transponder inside for emergency start.
Finally,it worked
Just added chip first them added remote works fine, just no emergency start as no place to put chip in remote.
They have old key with emergency blade and chip anyway as was remote that was playing up
So he’s was happy.
Hope it helps!
https://xhorsesupport.blogspot.com
Posted by: xhorsevvdi at
01:39 AM
| No Comments
| Add Comment
Post contains 127 words, total size 2 kb.
April 21, 2021
- VVDI Prog can read the EEPROM dump file
- VVDI2 transponder programmer software program chip.

To identify the chip that needed reading

if we couldn’t see what number chip it was,spaying the chip with some brake cleaner did the trick, and don’t worry, this is safe and won’t cause any damage
once it dried we desoldered the chip and soldered it to the eeprom adaptor included with VVDIProg

Connect vvdi2 andVVDI prog(with EEPRO Adaptor mounted) to PC by USB

Change type to "1-EEPROM & Flash†>>Change brand "MICROCHIPâ€>>
Change Chip to293/lc/AA66A (8PIN)
Then click read 05

Once the chip has been read save the state your PC

Select vehicle by changing area factory car and type
load the file that you saved Prior to this step
select key destination


Pick PCF 7936(PCF 7946) as your transponder type


Add another new key need load the new data file,
Press OK to save the new dunmp file


Write new data to the chip

after Operation success, then verify
check success

Resolder EEPROM to CIM, reassemble CIM unit and install back into the car, once complete reconnect the battery
Check the spare key, it works
Posted by: xhorsevvdi at
07:54 AM
| No Comments
| Add Comment
Post contains 314 words, total size 6 kb.
April 19, 2021
Xhorse Solder-free Adapterswill
help key tool plus / mini prog to read BMW CAS, Porsche BCM, Landrover
KVM, Volvo KVM/CEM, etc IMMO data reading without soldering.
Today, Xhorsevvdi will share you how to use it on VVDI keytool Plus Pad, Take theLANDROVER FOR KVM-ADAPTERas exmaple
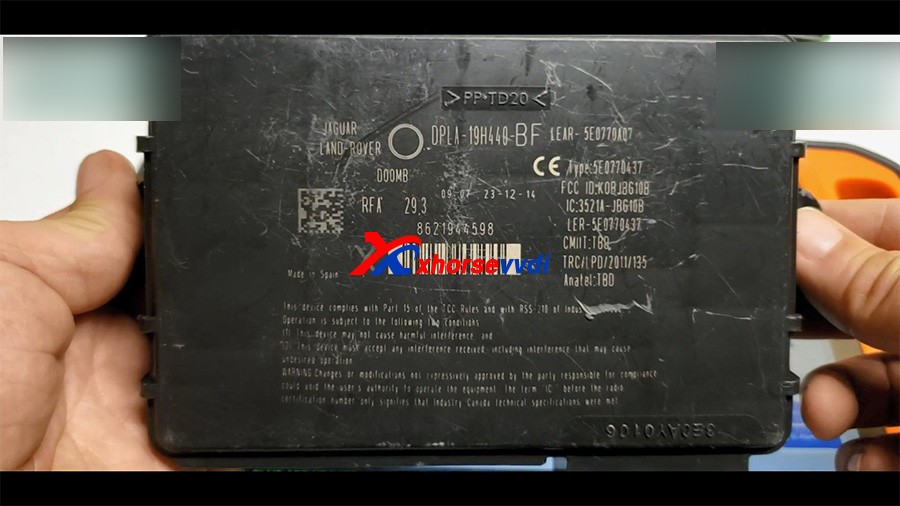
HaveJaguar / Land Rover KVM 2015-2018 with all keys lost,don't
worry, Xhorse VVDI Key Tool Plus is the decent solution with one extra
XDNP16 Land Rover KVM adapter. This article demonstrate how to program a
new key in step by step
Look at the KVM module removed from Jaguar / Land Rover.
Look at the Xhorse XDNP16 Land Rover KVM adapter (Additional purchase)
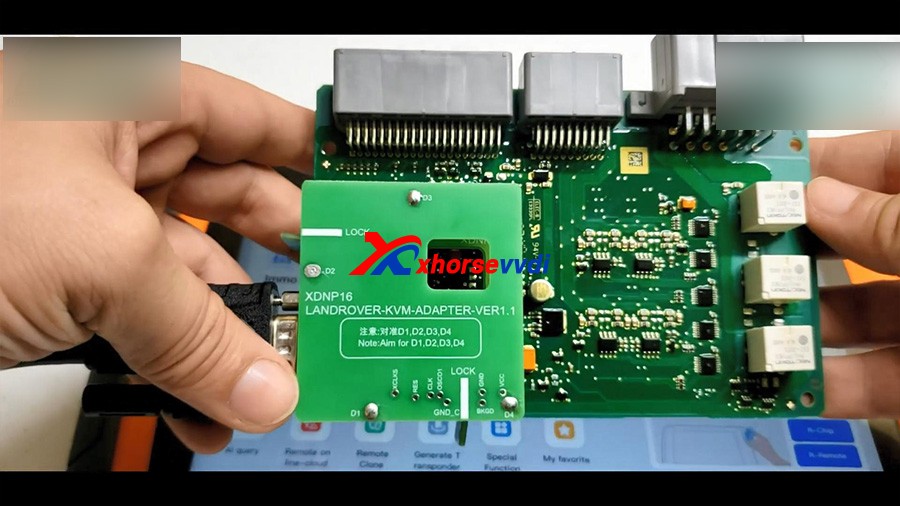
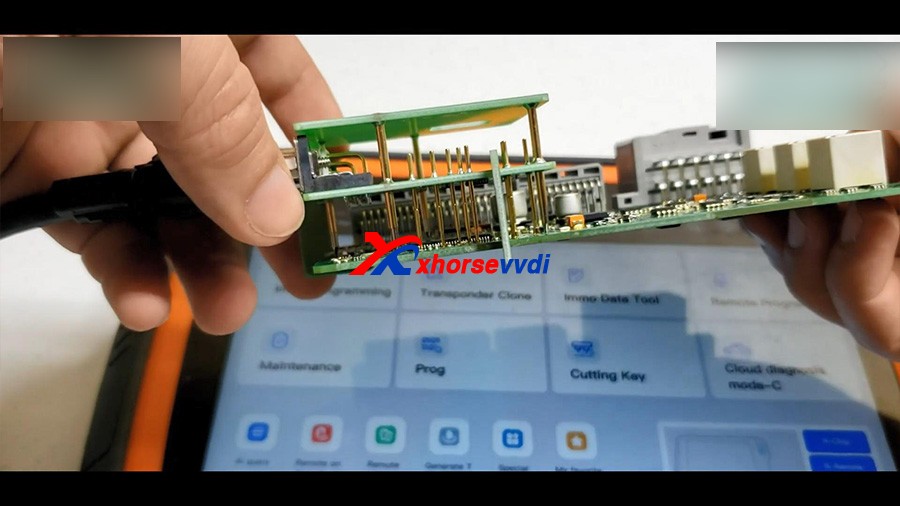
Plug the adapter to Xhore VVDI Key Tool Plus.
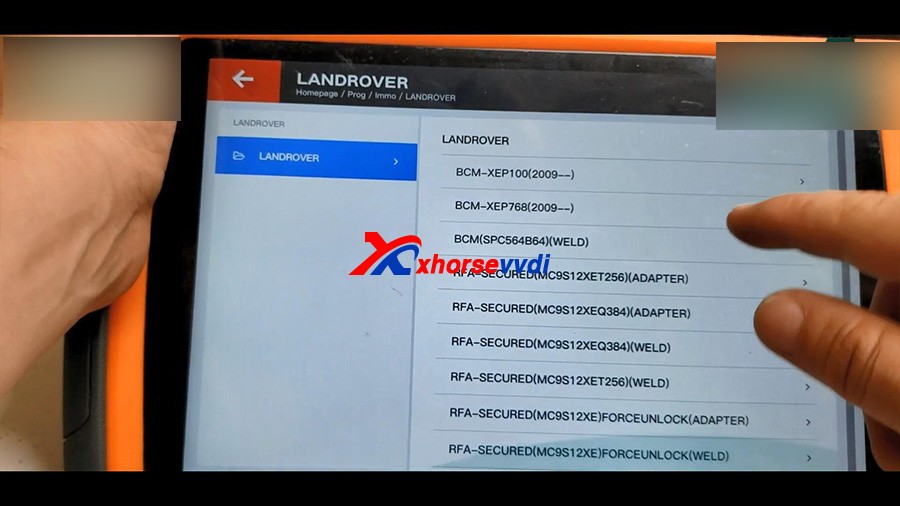
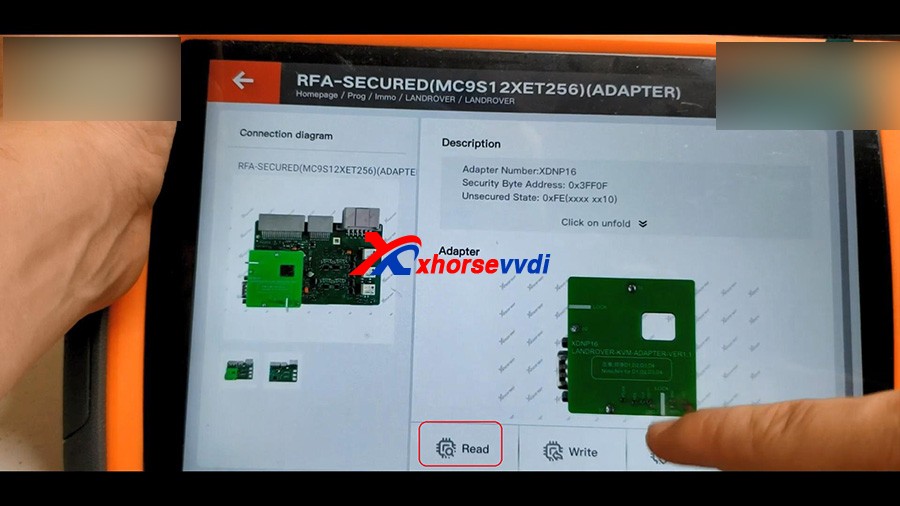
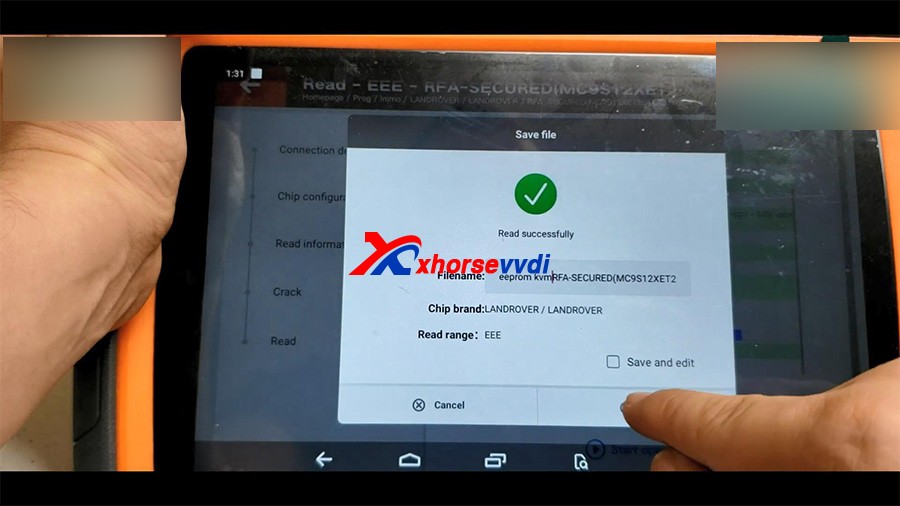
Tap"Prog" -> IMMO -> Land Rover -> RFA -Secured (MC9S12XET256) (Adapter)
1. Read D-FLASH
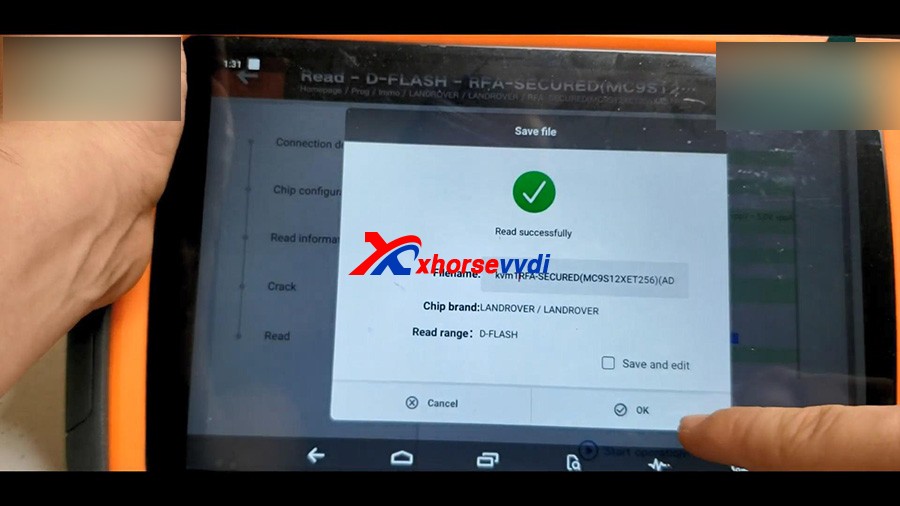
Read -> select "D-FLASH" -> Begin -> Read successfully and save file.
2. Read EEE
Select "EEE" -> Begin -> Read successfully and save file.
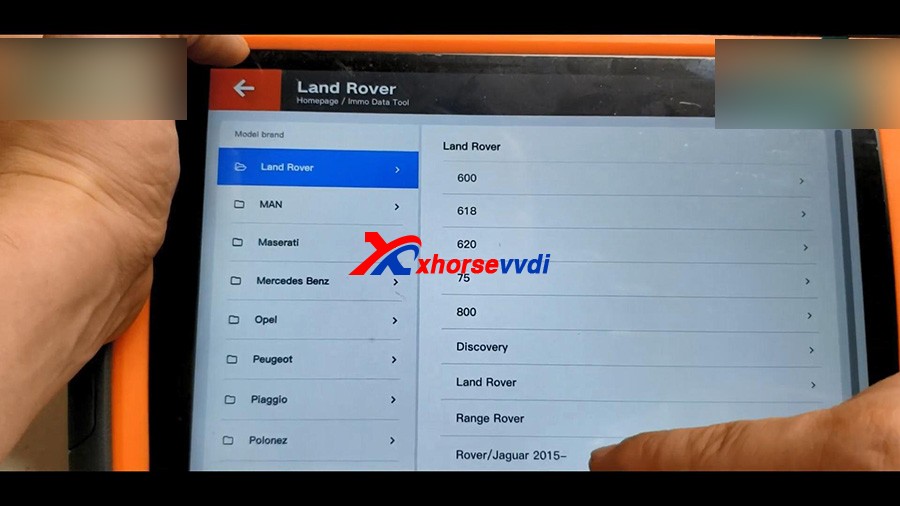
Back
to the home menu of key tool plus, click on "Immo Data Tool" ->
Europe -> Land Rover -> Rover / Jaguar 2015 - MC9S12XET256 /
MC9S12XEQ384 - Begin.

Please load FRA DFLASH, click OK to continue.
Select the D-FLASH data that is read above and load it.
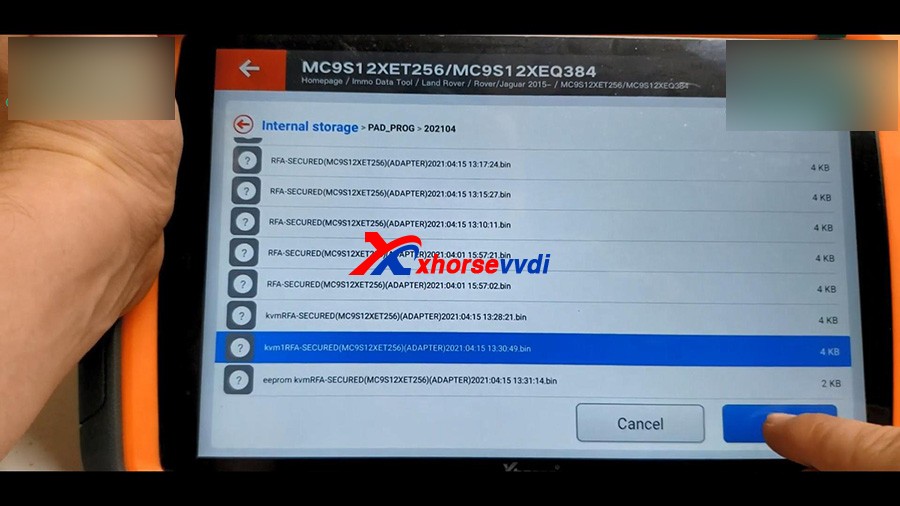
Next is to load RFA EEPROM.
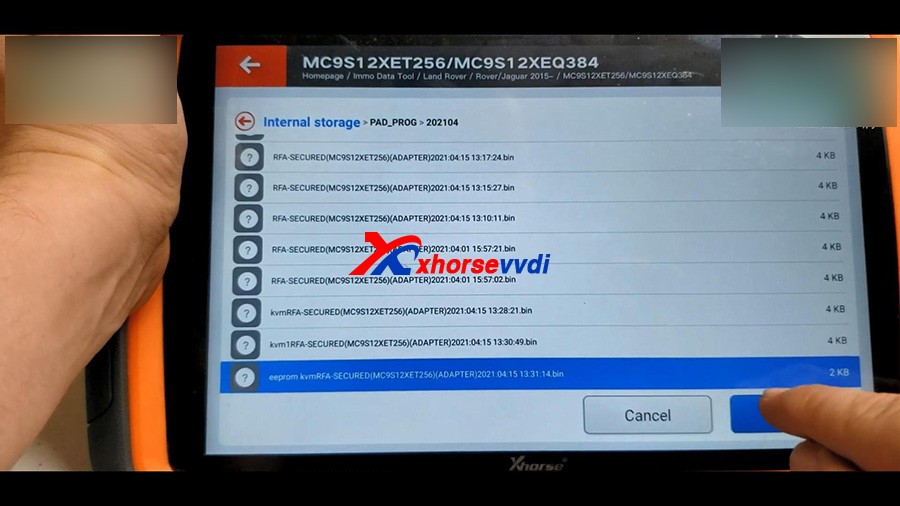
It prompts : Do you want to load BCM DFLASH?
If not update this file, the emergence start in CJB/BCM will not work when new key without battery, we click on "No" .
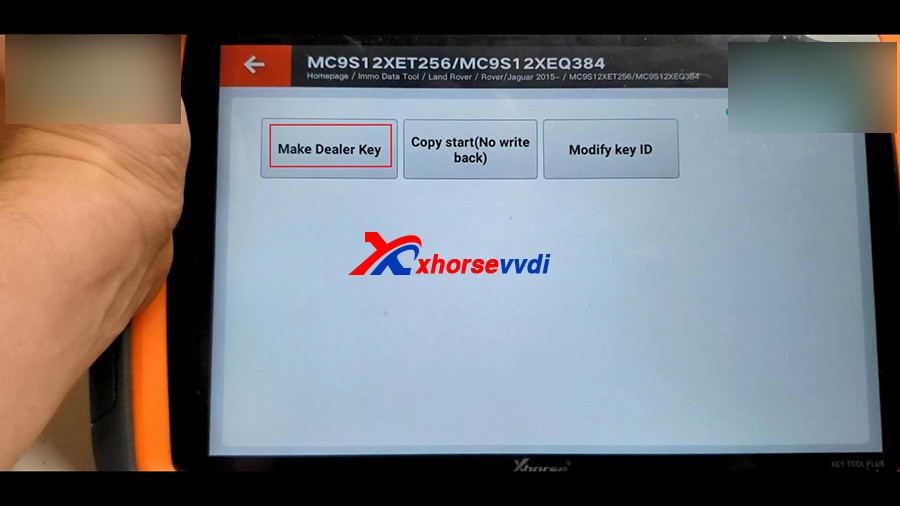
Next is to Make dealer key.
Tap "Make dealer key".
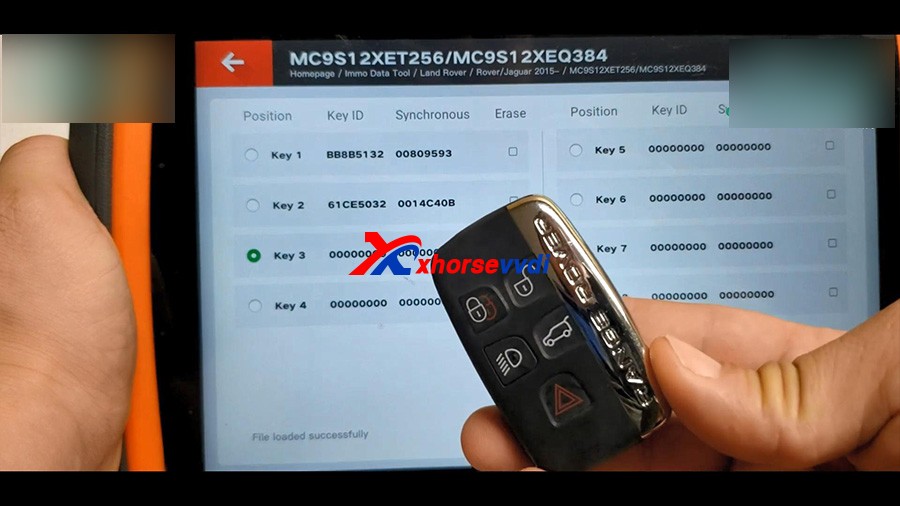
Tick off "Key 3" and put the new key into the keyhole of Key Tool Plus.
Start to make key...
Then select "Save here".
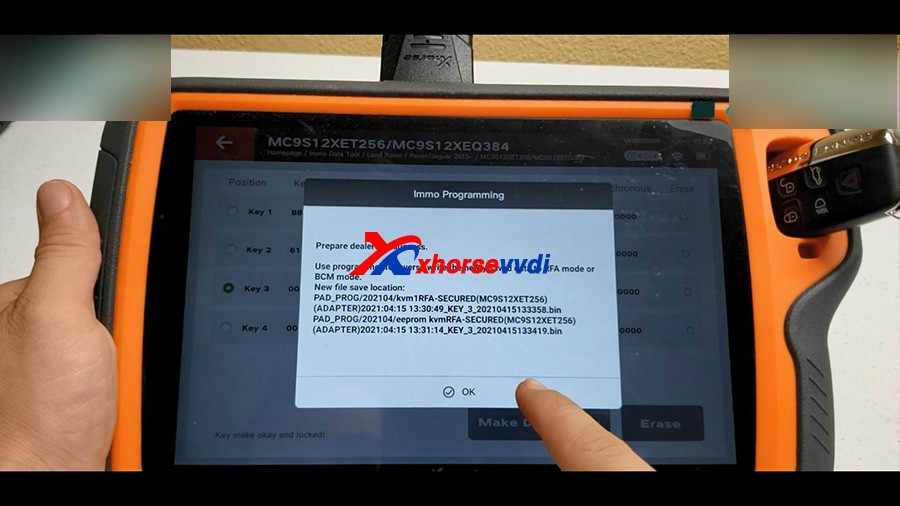
Prepare dealer key success.
Use programmer to reverse write the newly saved data to RFA mode or BCM mode.
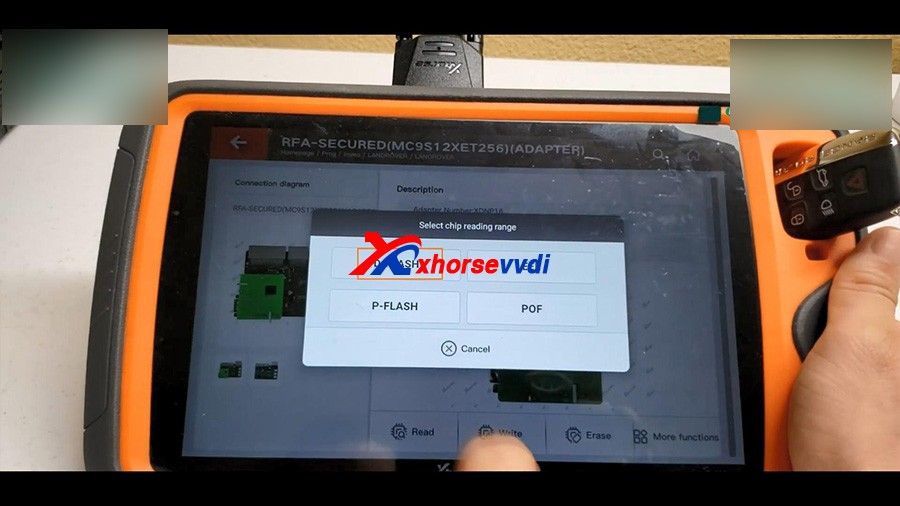
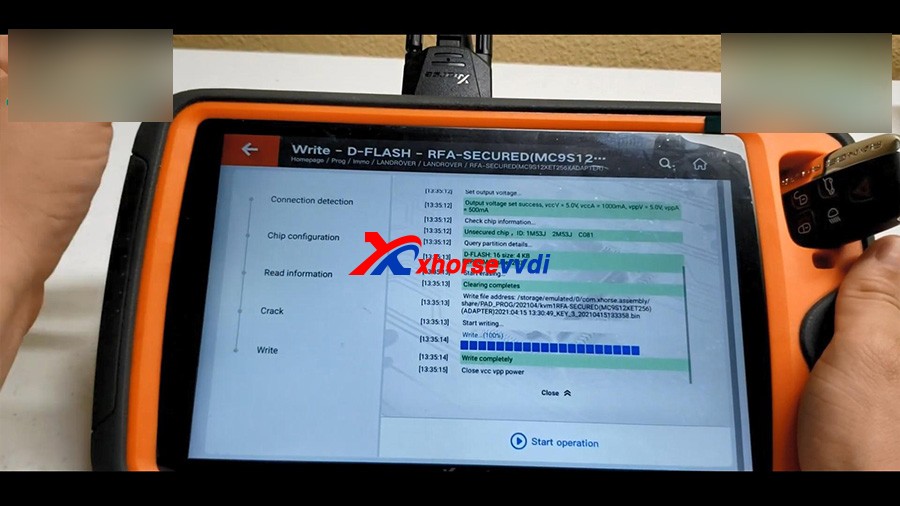
Back
to the home menu of the pad, click on "Prog" -> Immo -> Land
Rover -> RFA -Secured (MC9S12XET256) (Adapter) ->Write
->D-FLASH -> Begin -> select and write -> Write complete.
In the same method, to write EEE.
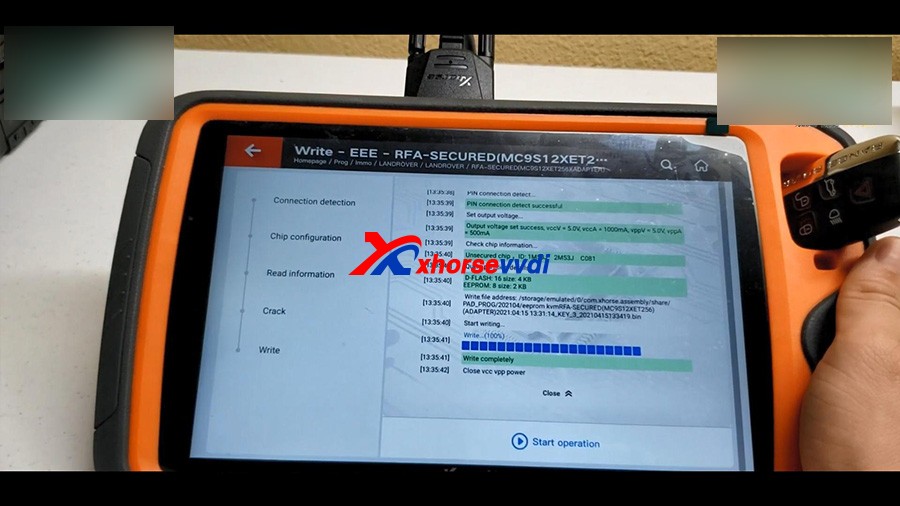
Alright, the job is done!
We have a new working key.
Posted by: xhorsevvdi at
09:35 AM
| No Comments
| Add Comment
Post contains 359 words, total size 5 kb.
April 15, 2021
UsedVVDI KEY TOOL PLUSand Xhorse universal smart key to add Mazda CX5 Smart Key successfully, firstly "remote program†and then "Immo programmingâ€, finally test whether the key can start the car, the whole process is simple, easy and pleasant.
Prepare:
Plug VVDI KEYTOOL PLUS into the OBD2 port of Mazda CX5, and then turn on igniton.
Login the personal account.

Step 1. remote program
Select†Remote Program†-> Asia -> Mazda -> All remotes -> Mazda 2button ID49 2380


Have remote information (ID: 0522 386, Frequency: 433.92 FSK, Remote: smart key), and then it tells the matching method: Please take out the PCB and remove the battery to match.


KeepXhorse universal smart keyclose to the coil of key tool plus and it will write the data, wait until it reads 100% and burn success.


Step 2. Immo programming
Back to the home menu and select "Immo programming".
Select Asia -> Mazda -> CX5 -> -2016 -> Start programming -> add a key.


Click on "OK†to confirm the original car key is a 2-button key and you need to program with the 2-button smart key.

Please switch ignition on.

Reading data… wait a few seconds and you can see "Completed to read password…â€, tap "OK†to continue.

Current number of smart keys:2, tap "Yes†to continue.

Step on brakes when automatic-shift, step on the clutch when manual-shift, and keep the maker end of the smart key close to the start button.

Alright, key matched successfully, current number of smart keys: 3, click "Ok†to confirm.

Complete the following steps after program is successfully:
Switch ignition off, then step on brakes, click the start button by the smart key to be added to start the engine for 3 seconds, then switch ignition off.

Step 3. Test whether the new key can start the car.

Alright, the job is done.
Thumb up VVDI KEY TOOL PLUS and Xhorse universal smart key.
Source:http://blog.xhorsevvdi.com/xhorse-vvdi-keytool-plus-add-mazda-cx5-smart-key/
Posted by: xhorsevvdi at
06:33 AM
| No Comments
| Add Comment
Post contains 333 words, total size 11 kb.
April 07, 2021
Hi,guys,Xhorsevvdi shows your How to use Xhorse Dolphin XP007 Key Cutting Machine to calibrate Clamp, and to make key here
Step-by-step:
To calibrate the clamp of Xhorse dolphin XP007 manual key cutting machine, you will need 2.5mm probe.

Now stick the probe in and tighten up.

we use a No.25 key blank (HON66) for the calibration.
Insert the key into the clamp and tighten up.
Then we will use a guiding block.


After
that, we will need to pay attention to this two indicator lights
(needle leveling and battery meter), this is a prepositioning switch
knob, if it's down, you can move the probe.
If it is up, the probe is stationary.
Keep the probes at the same height level.
Roll down the handle to see if the two lights are on simultaneously.
This knob is used for Micro-adjustment.
Turn the knob counter-clockwise, it will go down, clockwise will lead to going-up.
if the two lights go on at the same time, it indicates the height is ready to go.


You
can also try to press different positions, if one light is out, but now
you press harder, it's on. It is perfect normal and there's no need to
adjust again.

Now we will turn to horizontal collaboration.
And we'll do X-Axis calibration first, to start, the probe needs to touch the edge of the key.

If the needle leveling light is out, roll down the handle and rotate the handle clockwise.
There are two screws in position 1 and position2 and we need to adjust the screw.

Now
the battery meter light is out, we need to tighten the screw in
position 2, if the l needle leveling light is out, we will need to
tighten the screw in position 1.
Now try to slide the jaw.
Both lights are on, tighten the left screw, now X-axis calibration is done.

Next we move to y-axis calibration.
Keep the handle fixed for y-axis calibration, we will need to adjust the position 3 and position 4.
Now the needle leveling light is out, we'll need to loosen position3 and tighten position 4.
When both lights are on, the clamp calibration is finished.

After calibration,we will try to duplicate the key for you guys and demonstrate how Dolphin XP007 works.

Enjoy!
Credit to http://blog.xhorsevvdi.com/how-to-calibrate-xhorse-dolphin-xp007-clamp/
Posted by: xhorsevvdi at
08:52 AM
| No Comments
| Add Comment
Post contains 390 words, total size 10 kb.
32 queries taking 0.0486 seconds, 107 records returned.
Powered by Minx 1.1.6c-pink.

