


August 30, 2022
V5.1.9 VVDI Prog is released, here is the free download link from xhorsevvdi.com
1.Free Download V5.1.9 VVDI Prog Software
Password:123456
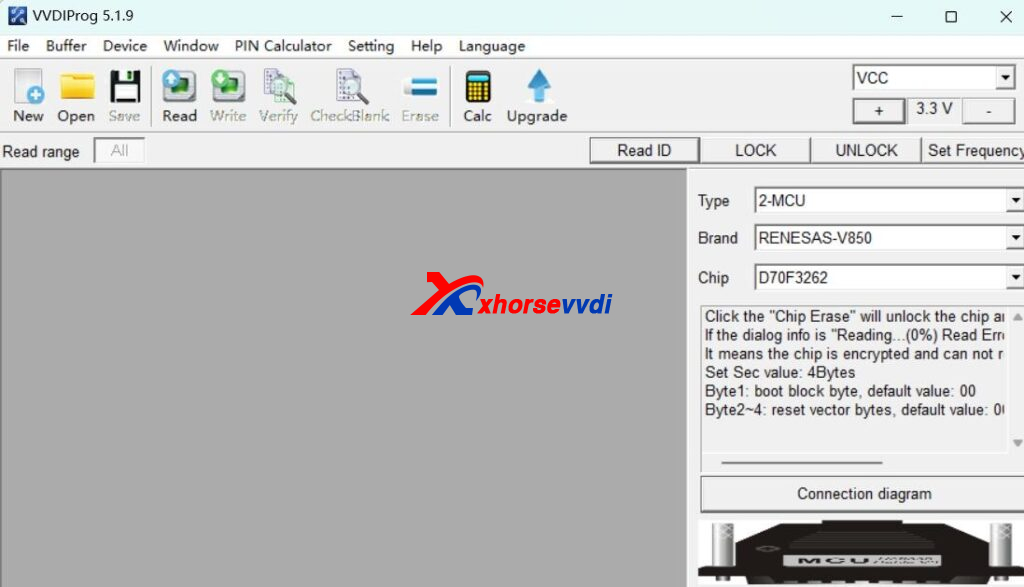
2.V5.1.9 VVDI Prog Update
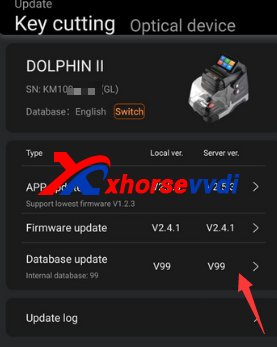
v5.1.9(2022-08-29)
*ThisversionDON'tneedupdate firmware
+AddD70F3260,
D70F3261,
D70F3262,
D70F3263,
D70F3264,
D70F3265,
D70F3266,
D70F3270,
D70F3271,
D70F3272,
D70F3273,
D70F3274,
D70F3275,
D70F3276,
D70F3280,
D70F3281,
D70F3282,
D70F3283,
D70F3284,
D70F3285,
D70F3286,
D70F3287,
D70F3288,
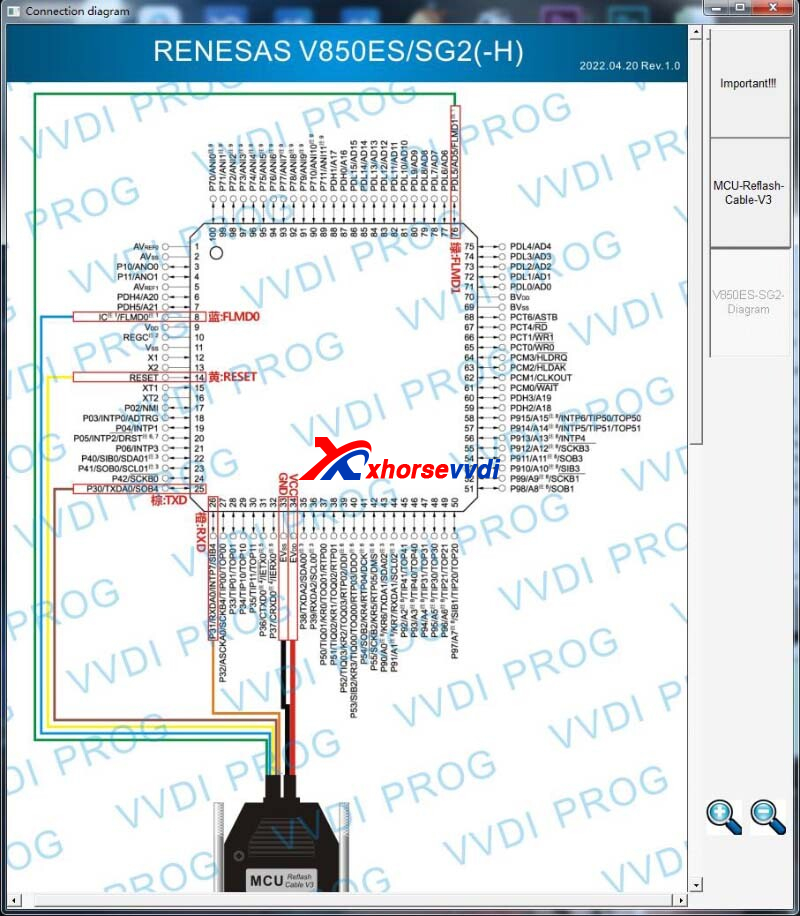
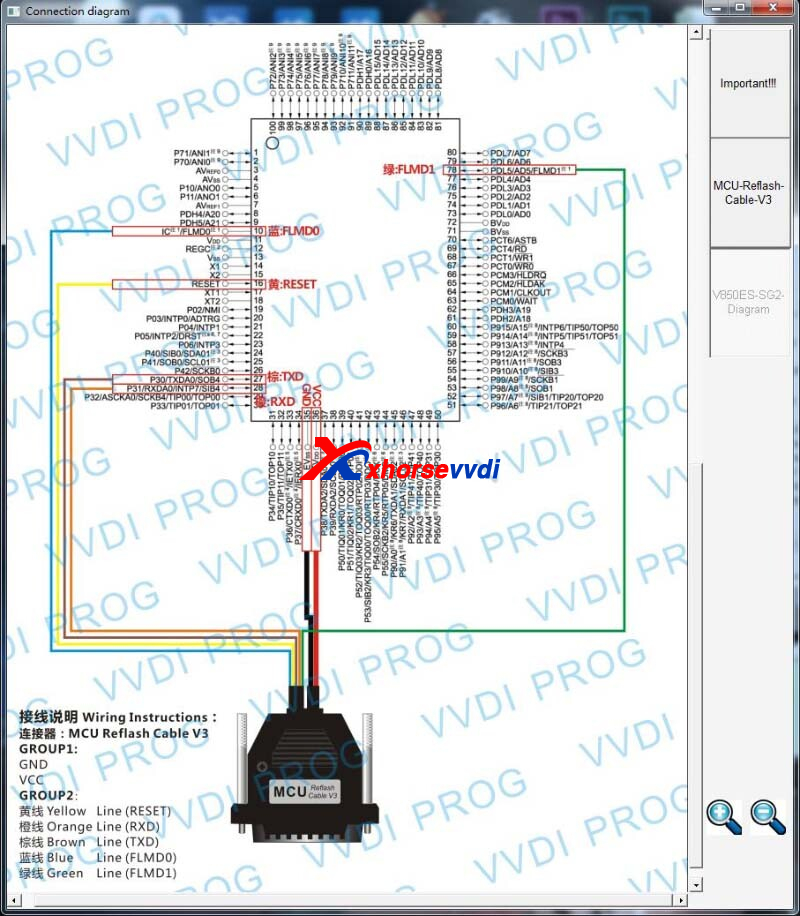
optionsin
<2-MCU>-><RENESAS-V850>
https://www.xhorsevvdi.com/
Posted by: xhorsevvdi at
09:31 AM
| No Comments
| Add Comment
Post contains 65 words, total size 2 kb.
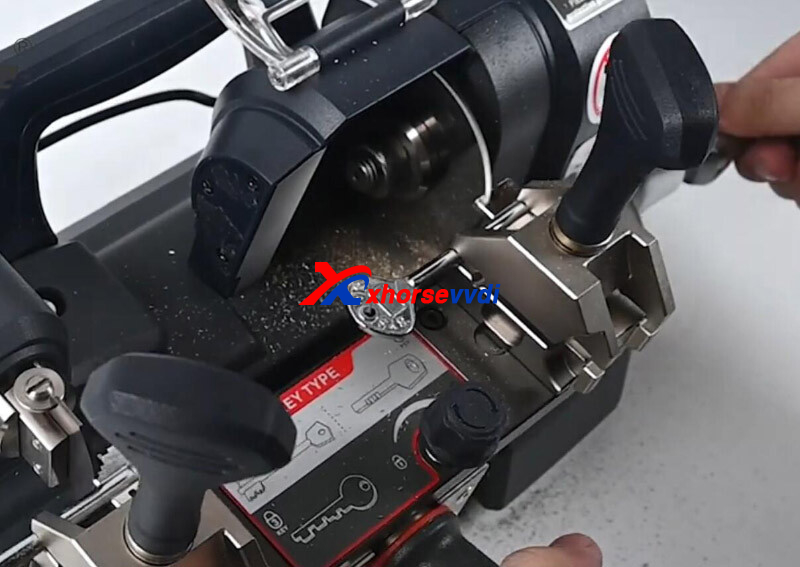
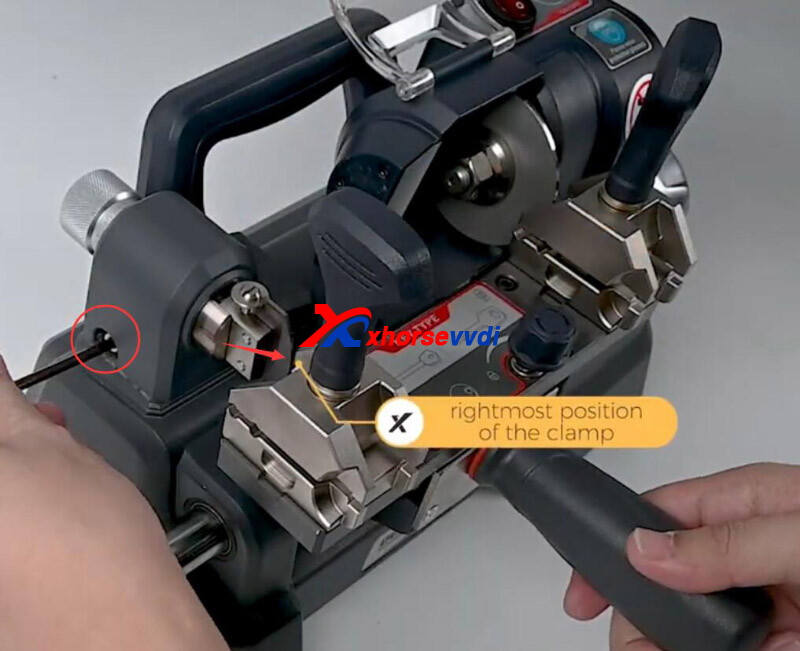
In this article, we will show you how to cut a bit key using the new Dolphin XP0008 Key Cutting Machine.
Prepare a new key blade for duplicating the original one.
Adjust clamp to side A.
Loosen right clamp, insert new key blade, and tighten it up.

Put the original key into the left clamp in the same way.

Make sure the original and the new keys are aligned perfectly. (If you are not clear about this procedure, please check Dolphin XP008 Installation and Calibration Guide)
http://blog.xhorsevvdi.com/dolphin-xp-008-installation-and-calibration-step-by-step-guide/
Then turn on Dolphin XP008.
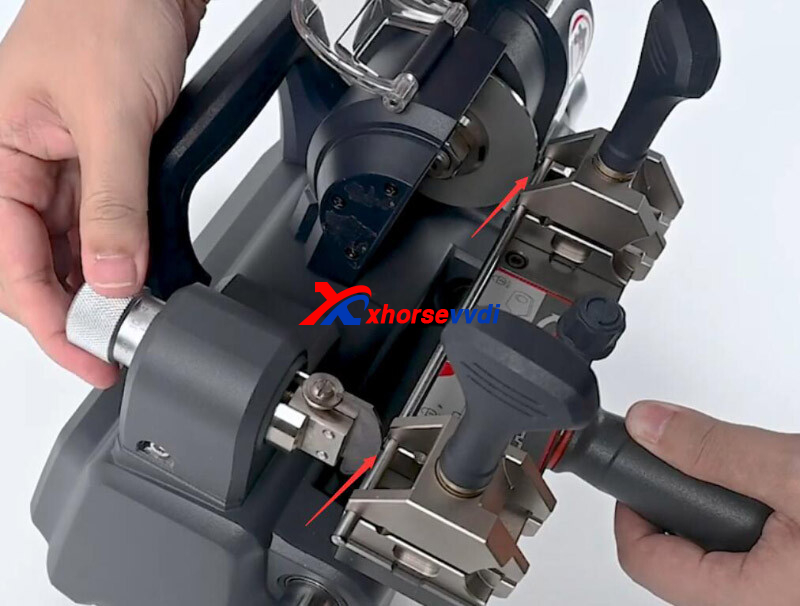
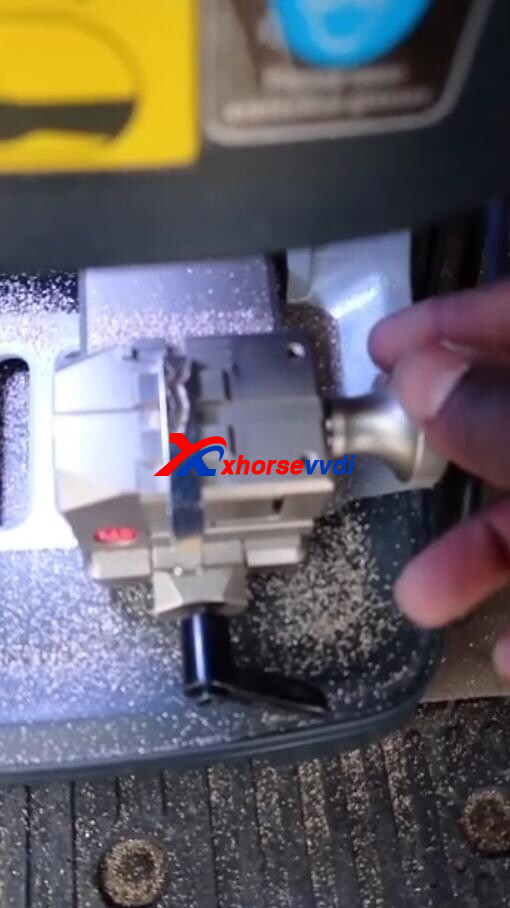
During cutting, push clamps a little harder in order to cut bittings completely, and rotate the handle to move clamps to left or to right.
When we finish cutting this side, turn off the power.
Loosen right clamp, and turn the new key to the other side.

Same to the original one.
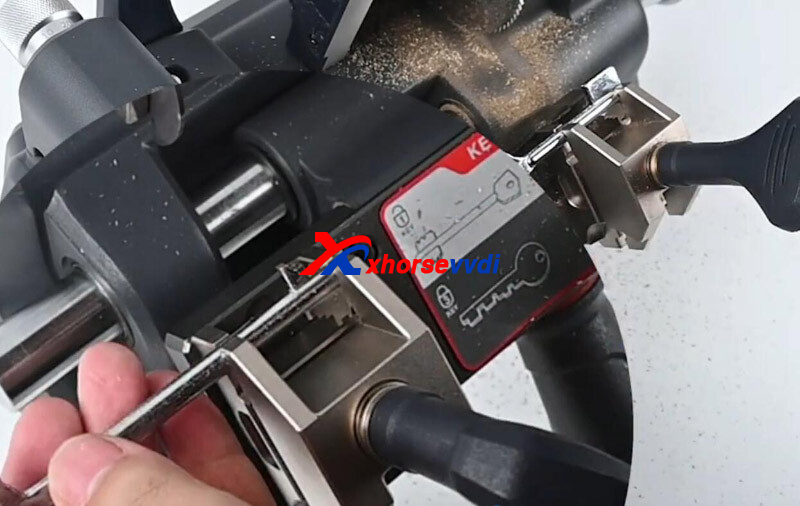
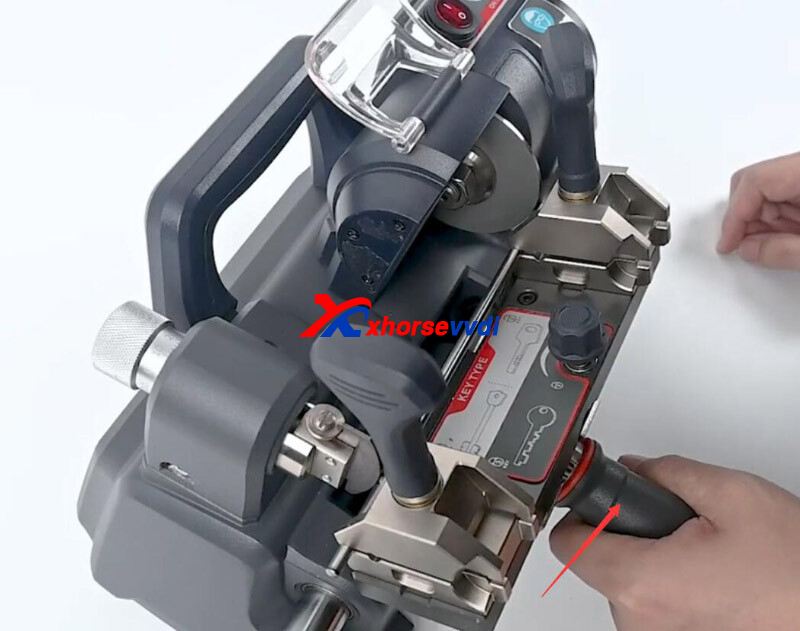
Turn on the machine to cut the other side on the same way.
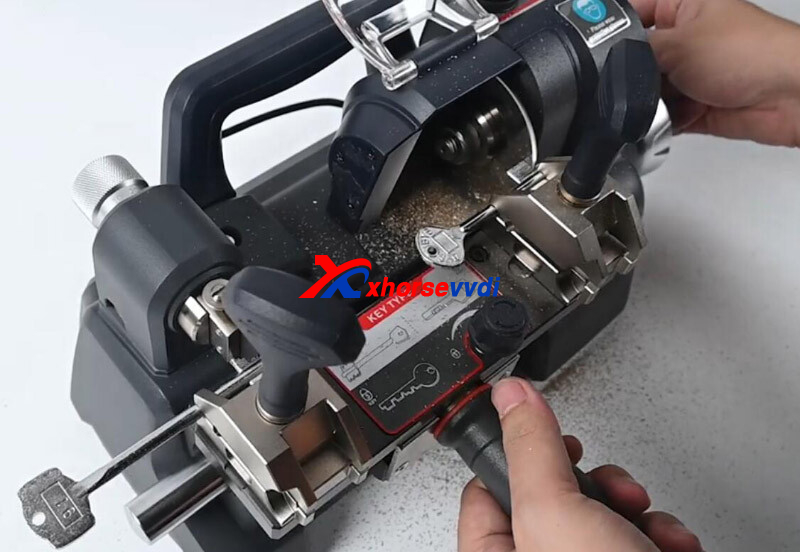
When we finish cutting both sides, turn off the power.
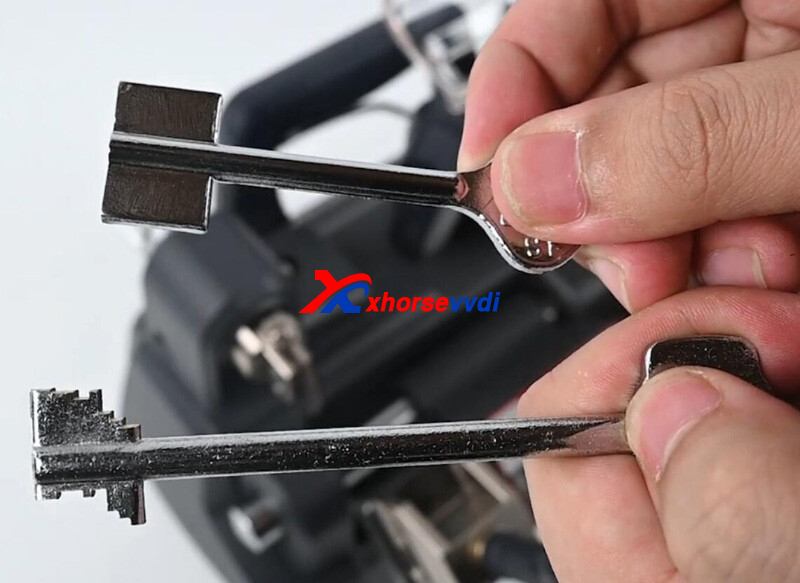
Key comparison.
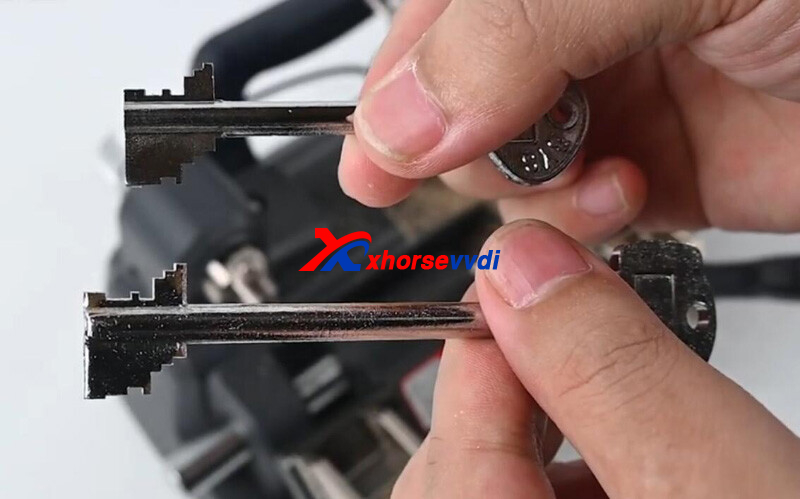
Done. That's how we cut a bit key using Dolphin XP008 Manual Machine.
http://blog.xhorsevvdi.com/how-to-cut-bit-keys-using-dolphin-xp-008-manual-machine/
Posted by: xhorsevvdi at
09:30 AM
| No Comments
| Add Comment
Post contains 193 words, total size 4 kb.
There are 17 letters and numbers on VIN of VAG models, and what information could we acquire from them? Here we will share with you.
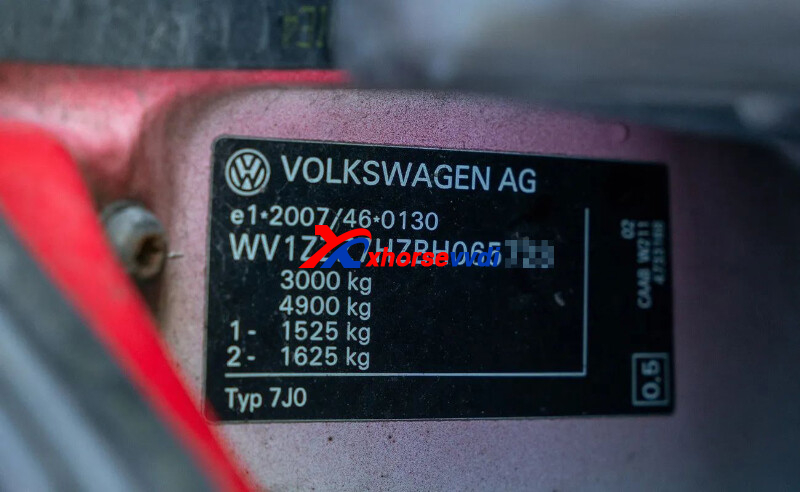
1.Country and Company of Production
To check the first 3 digits,
WAU= German Audi
WVW=German VW
LFV=FAW
LSV=SAW
W=Germany
L=China
A=Audi
V=VW
2.Year of Production
To check the 10th digit,
1=2001, 2=2002... 8=2008, 9=2009, A=2010, B=2011, C=2012, D=2013,E=2014, F=2015, G=2016...
3.Model
To check the 7th and the 8th digits,
3.1 Audi
4E=A8D3
4H=A8D4
42=R8
4B=A6(C5)
4F=A6L(C6)
4G=C7(C7)
4L=Q7
4M=16Q7
49=16 S4
8E=A4(B6ã€B7)
8k=A4L,(B![]()
8W=16A4 B9
8R=Q5
8U=Q3
8V=New A3
8P=Old A3
8X=A1
8Z=A2
8T=A5
8J=TT
3.2 VW
0R=16 Touran
0S=Golf Sportsvan
18= Lavida
13= Scirocco
1F=EOS
1G=JDW
1J= Bora
15=New Bora
16=Bettle
1K=Sagitar /Golf MK6
3D=Phaeton
3C=CC/ Magotan
3E=Phideon
33=Santana
5G=Golf MK7
5N=Tiguan
5U=Saveiro
5Z=FOX
7H=Multivan
7N=Sharan
7L=Touareg
7P=New Touareg
9C=New Bettle
9F=Passat
A4=New Passat
AA=UP/UP-E
BS=New Jetta
BR=New Santana
BM=Lamando
4.Assembly Factory
The 11st digit means Assembly factory.
5.Order No
The 12nd-17th digit mean order number, id est, the amounts of this batch.
Good Key Programmers and Adapters for VAG Models:
VVDI Audi Encrypted BCM2 Adapter
Posted by: xhorsevvdi at
09:29 AM
| No Comments
| Add Comment
Post contains 195 words, total size 3 kb.
August 25, 2022
V5.1.8 VVDI Prog software is released! Get V5.1.8 VVDI Prog software free download link from xhorsevvdi.com.
1.Free Download V5.1.8 VVDI Prog Software
Password: 123456
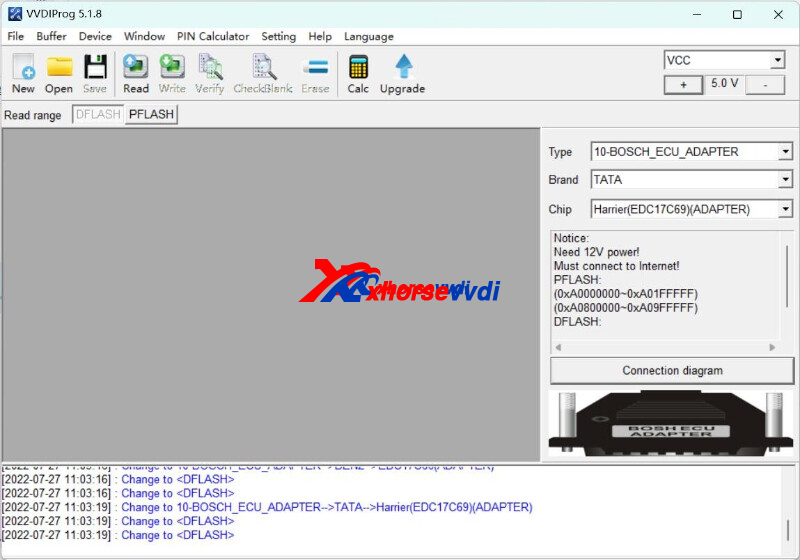
2.V5.1.8 VVDI Prog Update Info:
v5.1.8 (2022-07-27)
* This version DON't need update firmware
+ Add R7F701421, R7F701424, R7F701425, R7F701426, R7F701427, R7F701712, R7F701713 options in <2-MCU>-><RENESAS-RH850>
+ Add R5F100_Data_4KB_Read_SECURED option in <2-MCU>-><RENESAS-RL78-G13>
+ Add CC2530F128, CC2530F256, CC2530F32, CC2530F64 options in <2-MCU>-><TI-CCxxxx>
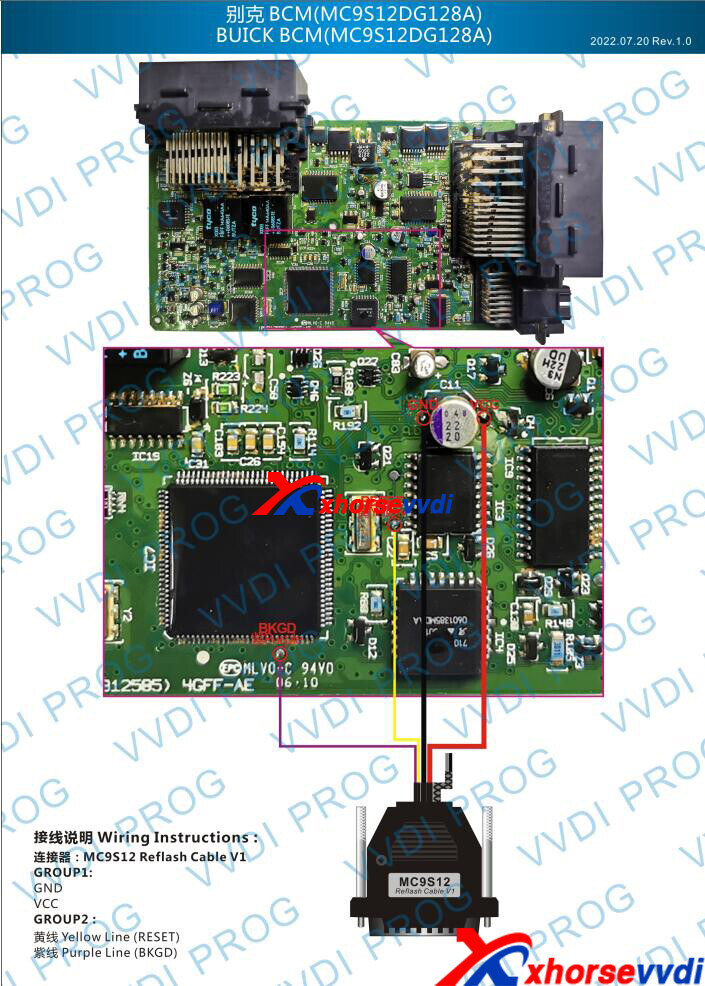
+ Add BUICK BCM(MC9S12DG128A), option in <4-IMMOBILIZER>-><BUICK>
+ Add BMW F35 EPS(D70F3483F1) option in <8-OHTER>-><BMW>
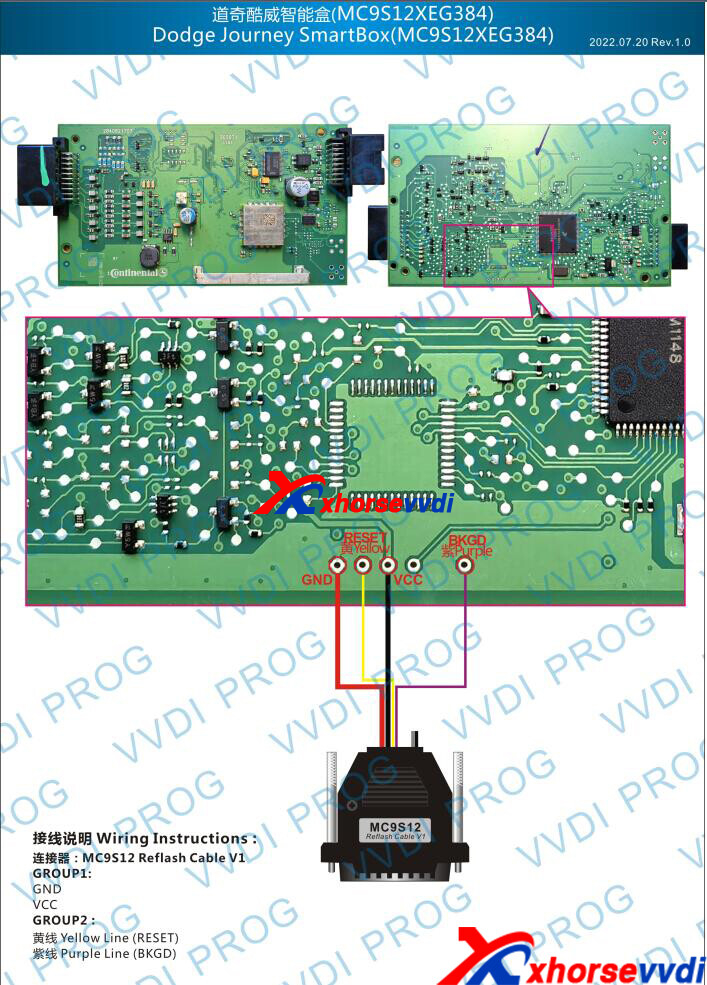
+ Add Journey SmartBox(MC9S12XEG384) option in <8-OHTER>-><Dodge>
+ Add HONDA AVANCIER(D70F3506), URV EPS(D70F3485) options in <8-OHTER>-><HONDA>
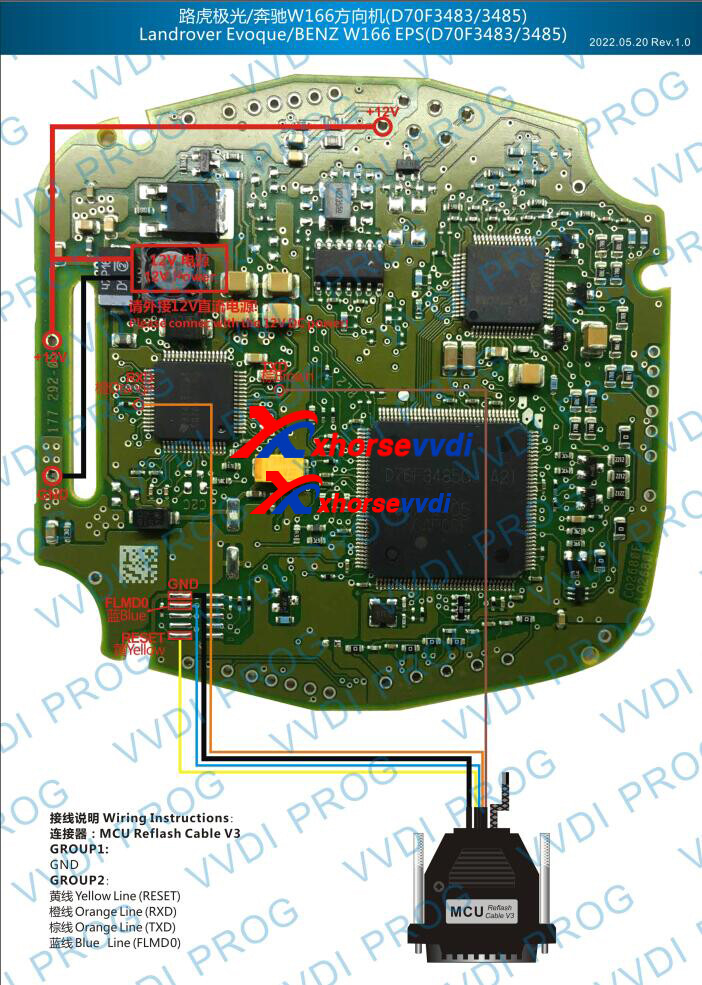
+ Add Landrover Evoque EPS(D703485), RFA_SEC(9S12XEG384), RFA_SEC(9S12XEG384)(ADAPTER) options in <8-OHTER>-><Landrover>
+ Add Harrier(EDC17C69)(ADAPTER) options in <10-BOSCH_ECU_ADAPTER>-><TATA>
https://www.xhorsevvdi.com/
Posted by: xhorsevvdi at
10:38 AM
| No Comments
| Add Comment
Post contains 123 words, total size 2 kb.
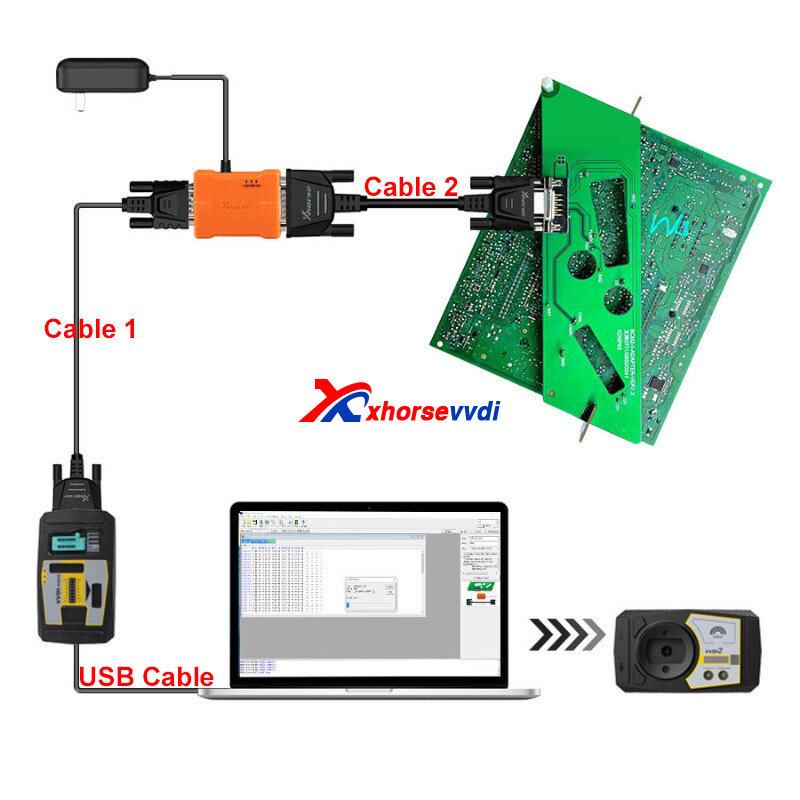
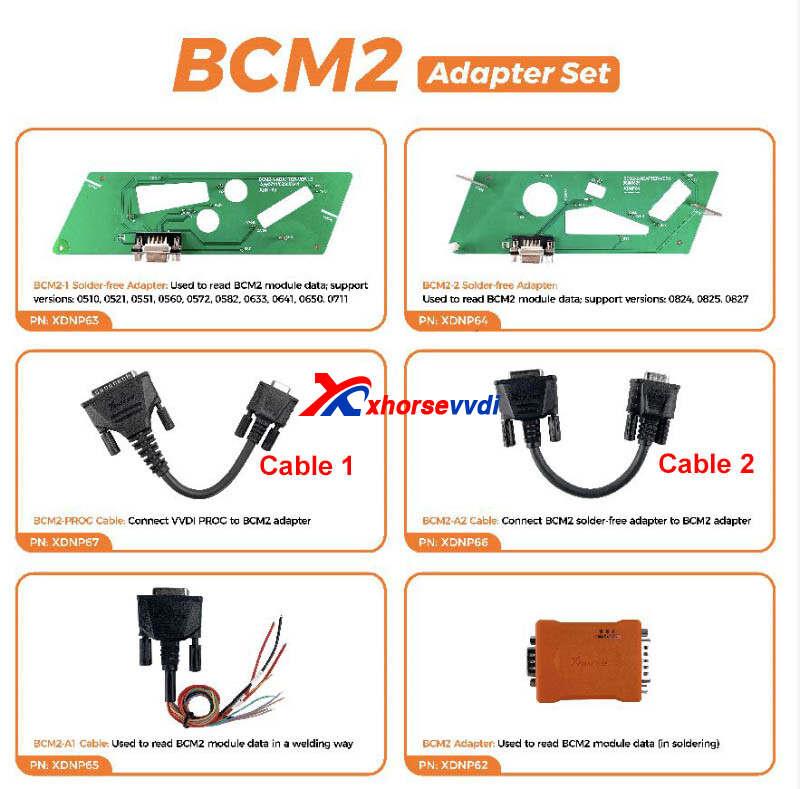
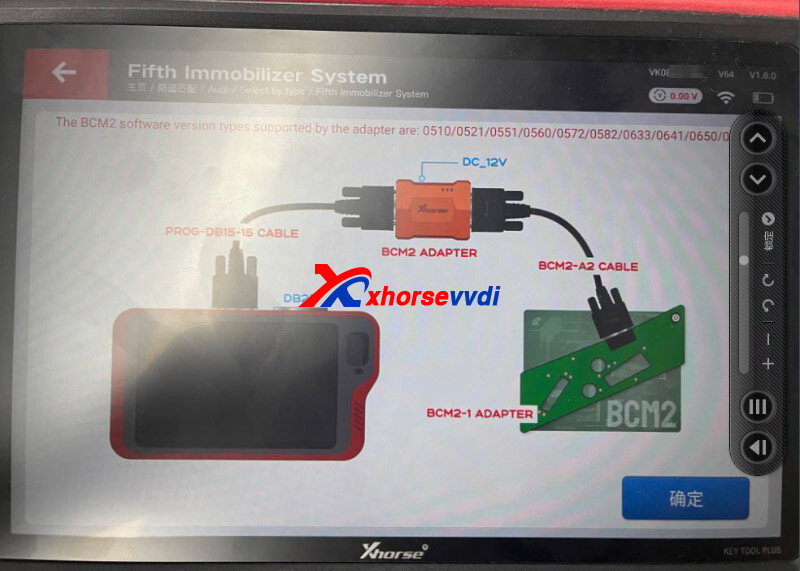
VVDI Audi Encrypted BCM2 Adapter is designed for reading encrypted Audi BCM2 module without soldering. BCM2 adapter Package has several cables for Key Tool Plus/VVDI PROG that could easily confuse users (esp. Key Tool Plus).
So, here are some tips on connecting VVDI BCM Adapter:
Notes:
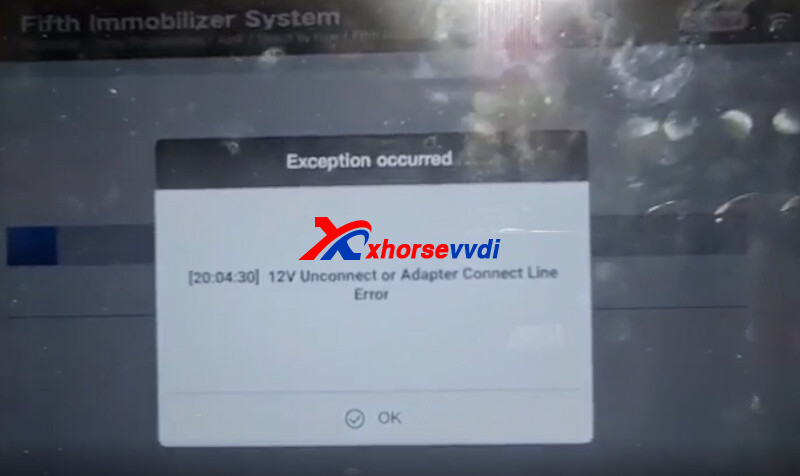
1.Plz read instructions and diagrams on Key Tool Plus/VVDI PROG carefully before operation
2.Device will prompt "12V Unconnect or Adapter Connect Line Error" if connection is incorrect
Power Supply
Operation needs 12V 3-5A power supply, which is not included in BCM adapter package.
Cables to VVDI PROG
Two cables about VVDI PROG come from BCM adapter package, USB cable is in VVDI PROG package.
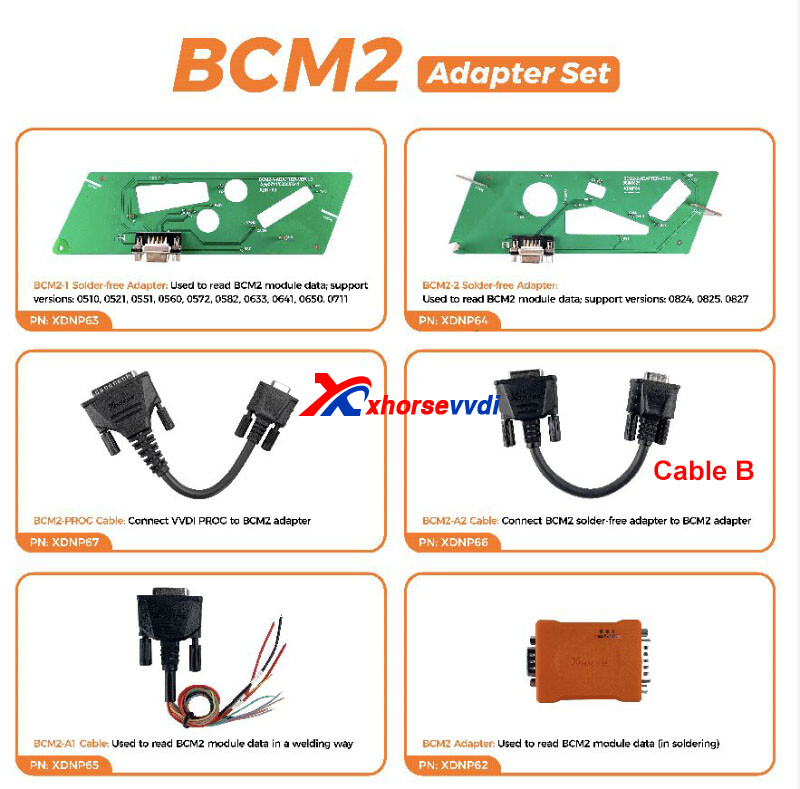
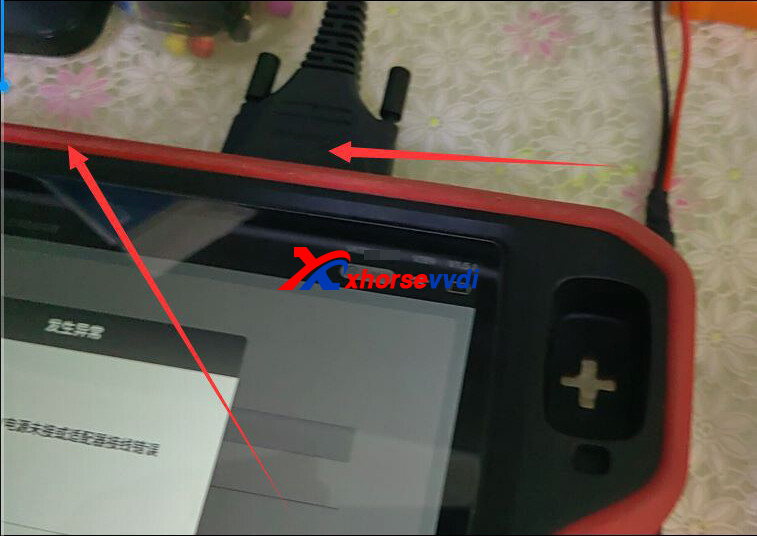
Cables to Key Tool Plus
The cable (B) connected to BCM2 adapter is in BCM adapter package, same cable as VVDI PROG (cable 2).
The cable connected to Key Tool Plus (cable A) is in Key Tool Plus package, Not the one in BCM adapter package as VVDI PROG.
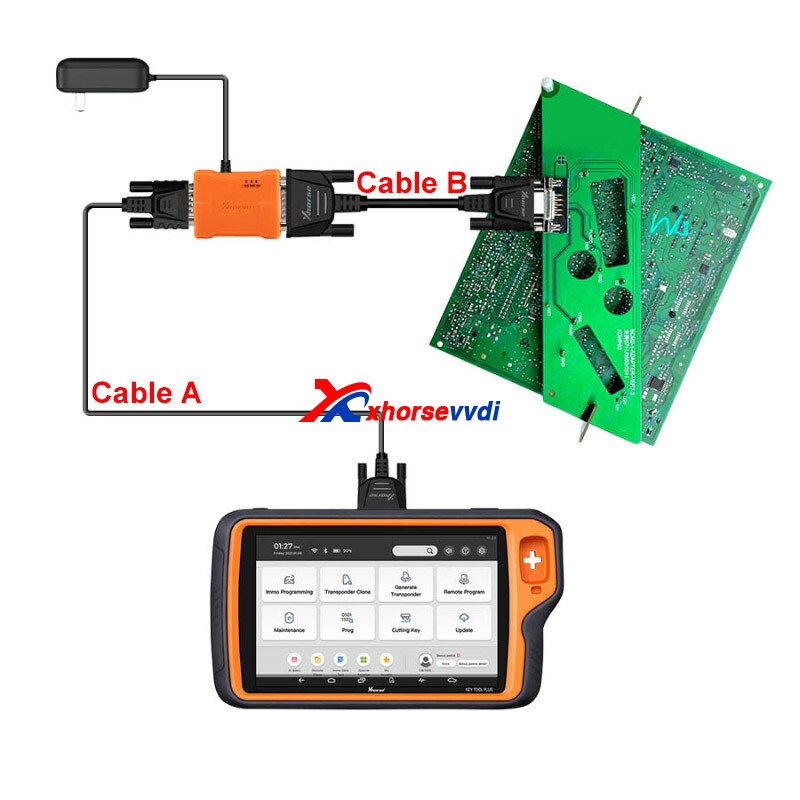
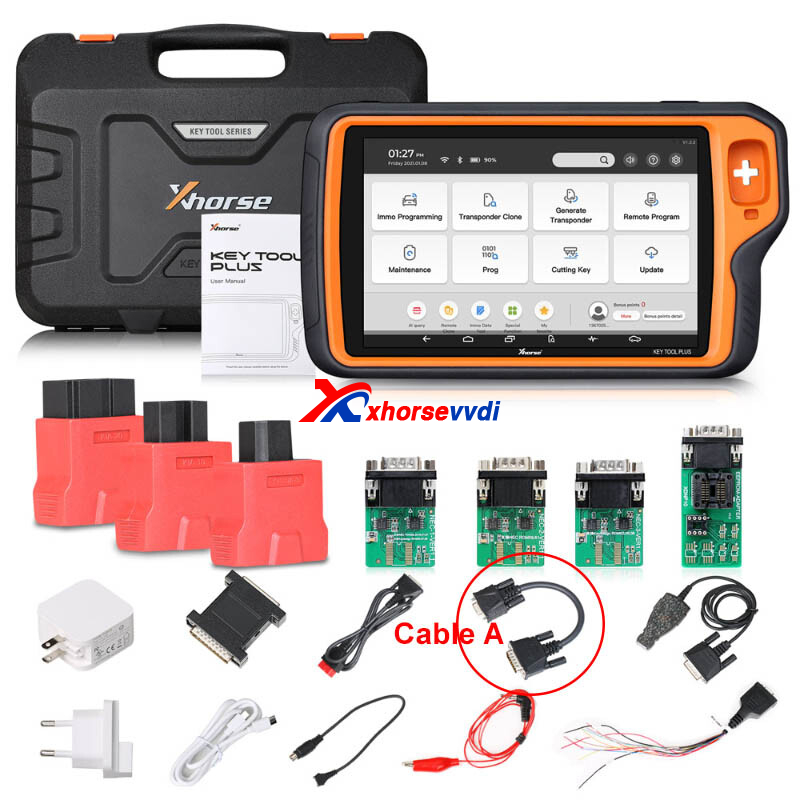
Besides,
Key Tool Plus Tablet is connected via left DB15 port not DB25 port
Alright, those are what we need to care about when using VVDI BCM Adapter.
Hope this could help!
https://www.xhorsevvdi.com/
Posted by: xhorsevvdi at
10:37 AM
| No Comments
| Add Comment
Post contains 203 words, total size 4 kb.
This is a review of New Xhorse Toyota 8A/4A Smart Key Adapter:
Toyota Land Cruiser 2019 All Key Lost with VVDI Key Tool Plus using XDBASK Adapter and XM38 Smart Remote.
Connection:
OBD Port>>OBD Cable>>Toyota 8A Adapter>>Key Tool Plus
Smart Box>>Toy-1 Cable/ Toy-2 Cable>>Toyota 8A Adapter
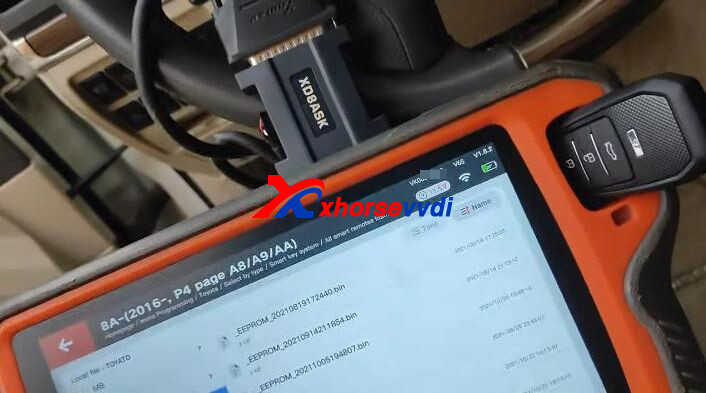

(Learn more: How to Connect XDBASK Adapter to Key Tool Plus)
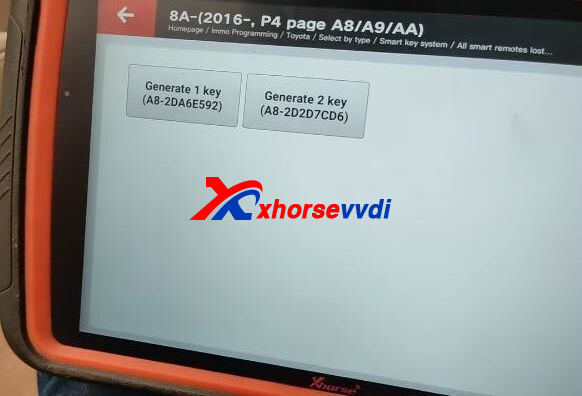
Path: Homepage>>Immo programming>>Toyota>>Select by type>>Smart key system>>All smart remotes lost>>8A-(2016-, P4 page A8/A9/AA)
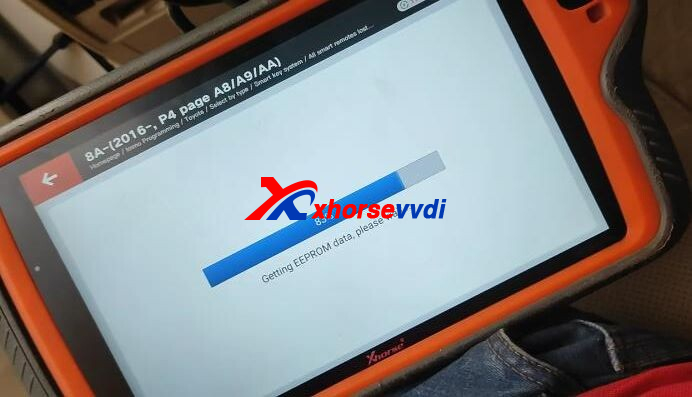
Then go to "Generate emergency key" or "Add smart key" to add key.
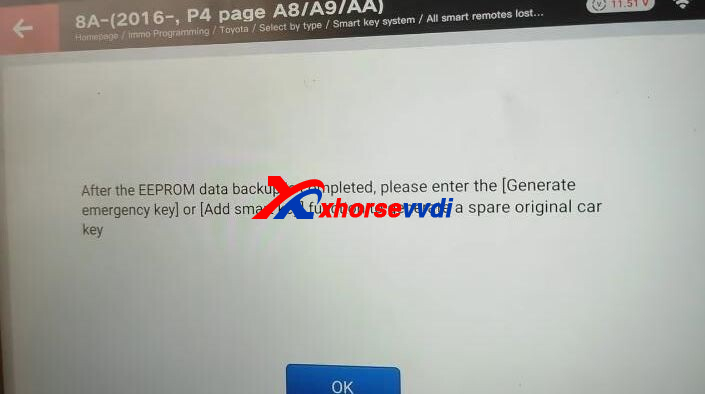
Click "Generate emergency key".
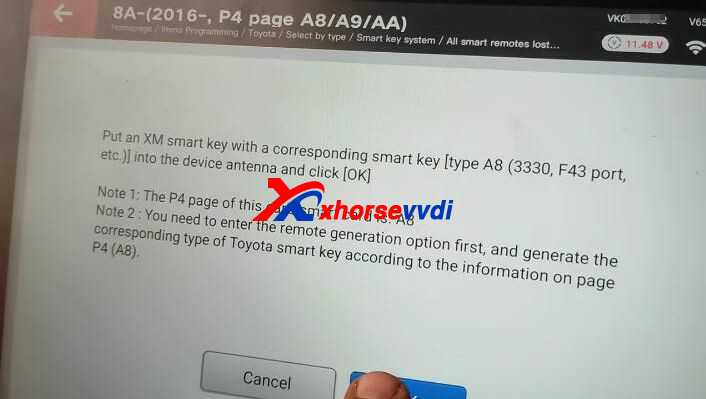
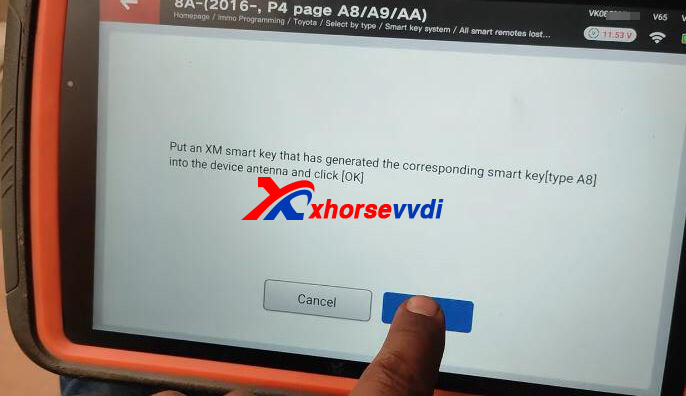
Put an XM38 Smart Key into key coil.
Notes:
1)P4 page of this car's smart card is A8
2)Need to generate remote first
Add 1 key, so select
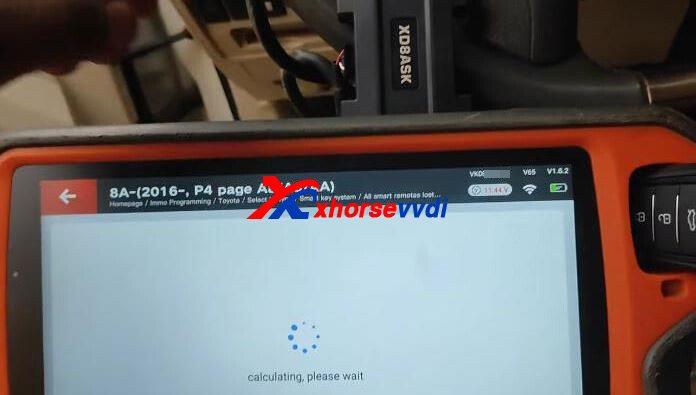
Generate 1 key (A8-2DA6E592)
Make XM38 Remote stay in.
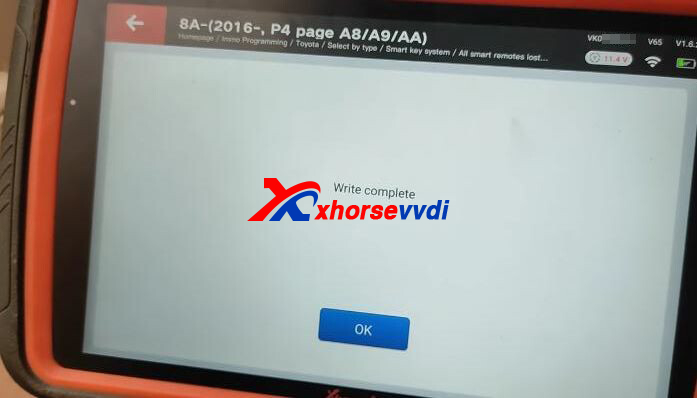
Complete.
http://blog.xhorsevvdi.com/key-tool-plus-with-xdbask-adapter-review-toyota-land-cruiser-2019-akl/
Posted by: xhorsevvdi at
10:37 AM
| No Comments
| Add Comment
Post contains 138 words, total size 4 kb.
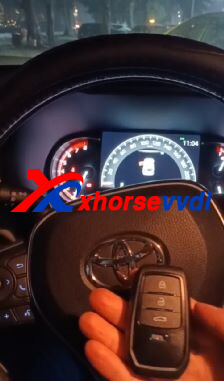
One customer gave feedback that his Key Tool Plus Tablet cannot communicate with a 2020 Toyota RAV4 using Xhorse Toyota 8A Smart Key Adapter.
Reason:
Through pictures of connection, he inserts cables into a module with pink case and only one plug, which is not smart box.
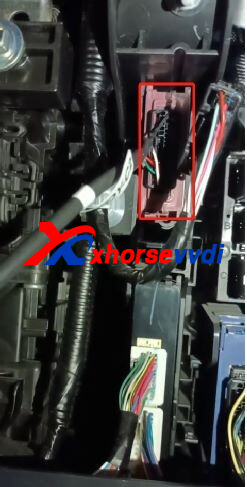
So, How to Locate Smart Box?
New Toyota smart box features:
1. A black case (some old types have a grey/ brown case)
2. Three plugs at least
3. Part number begins with "89990"
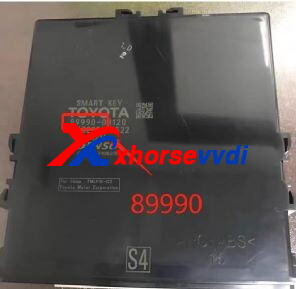

Then this customer locates right smart box and program keys successfully.
Summary
- Plugs on Xhorse XDBASK Adapter could be inserted into other modules
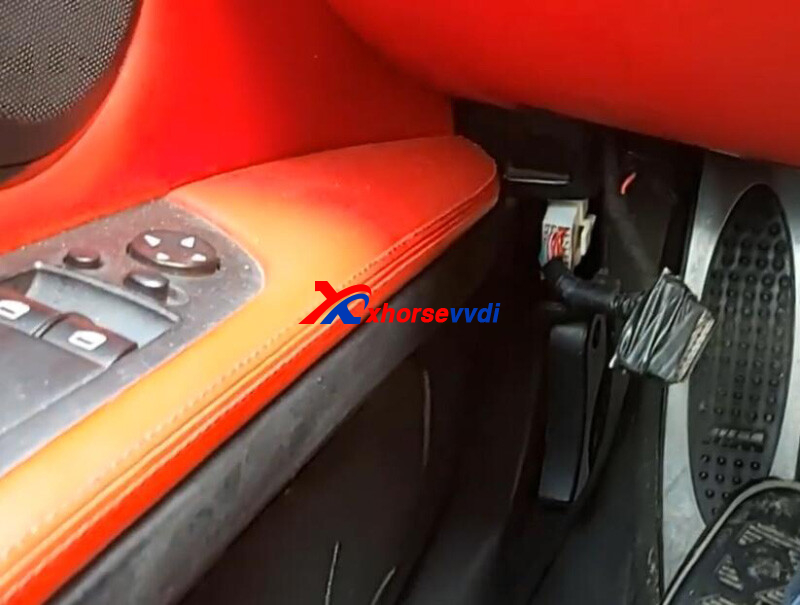
- Most smart boxes are behind glove box on passenger's side, some are under dashboard on driver's side
- Most smart boxes have black case, three plugs at least and part number beginning with "89990"
Hope this could help.
http://blog.xhorsevvdi.com/how-to-locate-toyota-smart-box-during-smart-key-akl-programming/
Posted by: xhorsevvdi at
10:36 AM
| No Comments
| Add Comment
Post contains 151 words, total size 3 kb.
Question:
What is the difference, aftermarket Fiat remote, Marelli and Delphi?
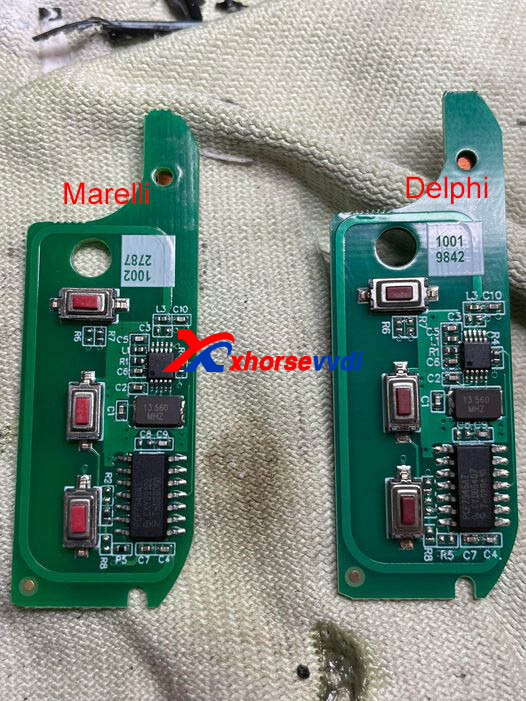
1.What is Marelli and Delphi
Both are Fiat BSI (Intelligent Service Box), but different brands/ models
2.How to know one is Marelli or Delphi?
Resistor allocations for buttons.
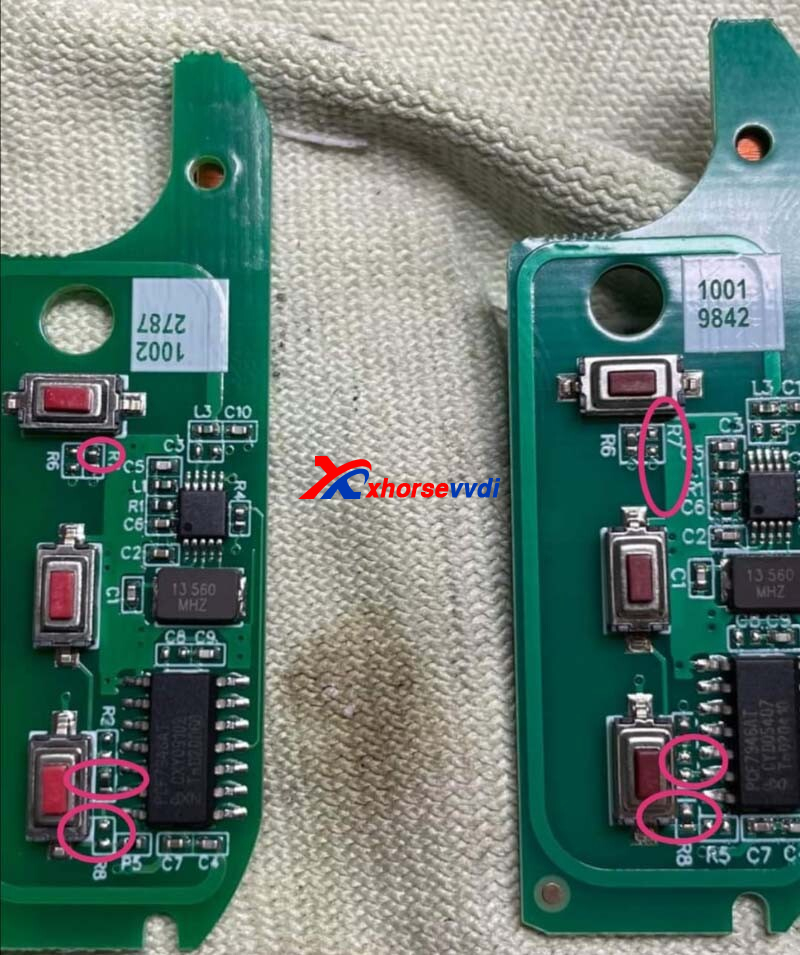
3.Can Marelli Convert to Delphi and back?
Yes but not 100%, they can convert to the other system manually.
ID: xxxxx2A,
1)Press these 2 buttons at the same time, don't release the buttons
2)Click this button 30 times, then release the 3 buttons at the same time
ID: xxxxx25,
1)Press these 2 buttons at the same time, don't release the buttons
2)Click this button 10 times, then release the 3 buttons at the same time
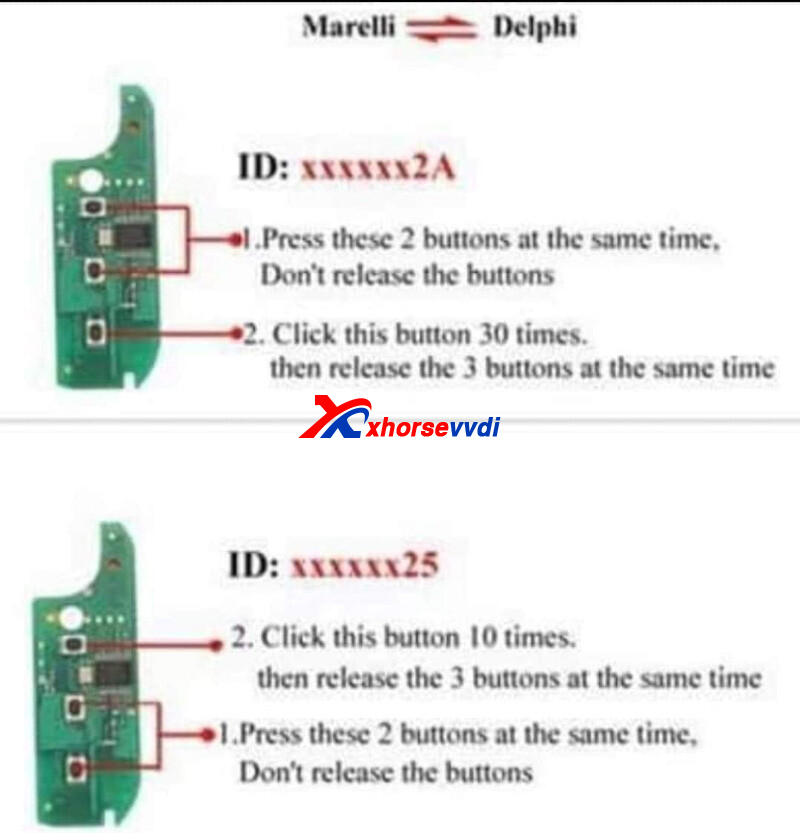
To Verify, check if key ID changes. (xxxx25 is Marelli, xxxx2Y is Delphi)
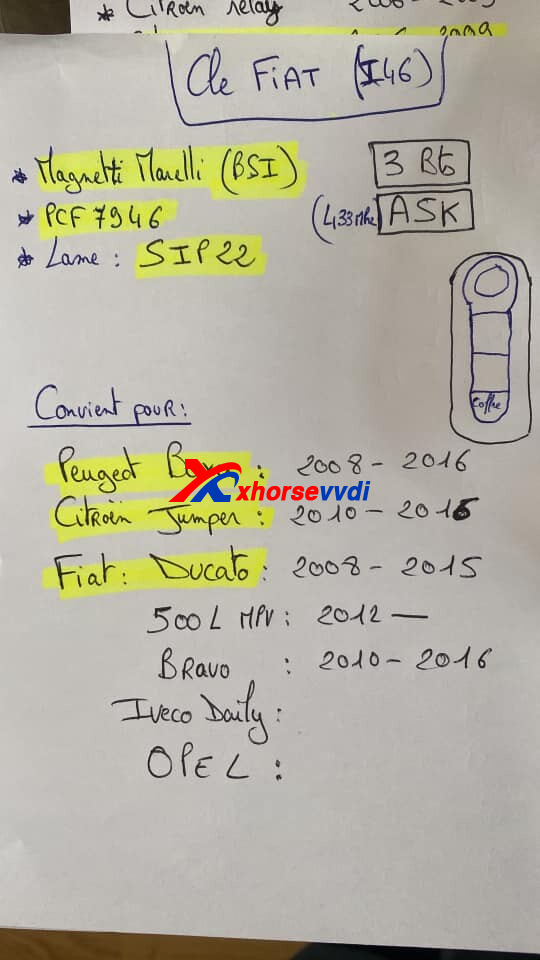
4.How to Generate Remote for Marelli and Delphi?
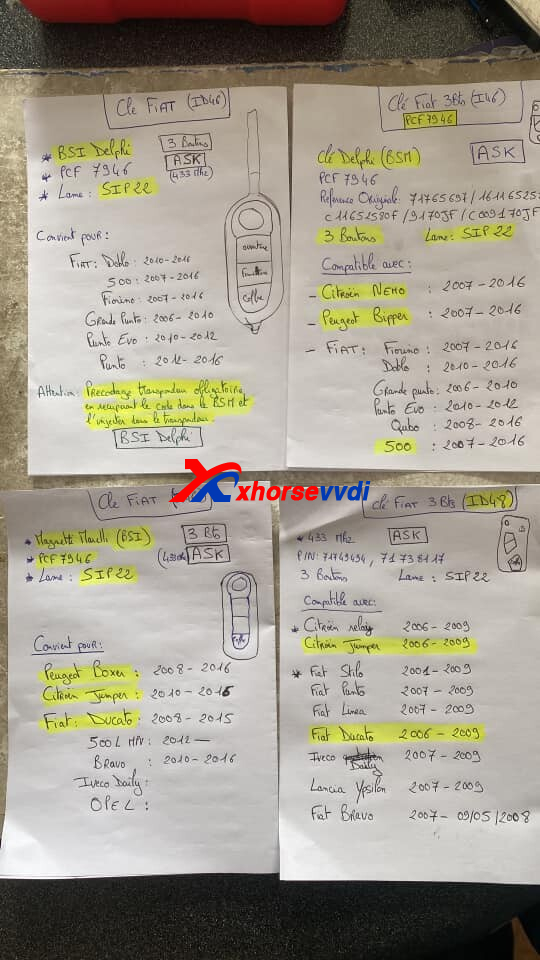
(pic via Mickey)

e.g. Ducato 2013 Marreli System
It is PCF7946, Marreli Magnetic System, 3 Buttons, SIP22 blade
Credits to Mickey, Woj, Ahmed, Antonello...
Hope this could help!
Key Programmers for Marelli and Delphi system of Fiat:
Posted by: xhorsevvdi at
10:35 AM
| No Comments
| Add Comment
Post contains 196 words, total size 3 kb.
This is an Xhorse VVDI2 with VVDI PROG review:
Program VW Polo 2009 all key lost successfully.
Procedure:
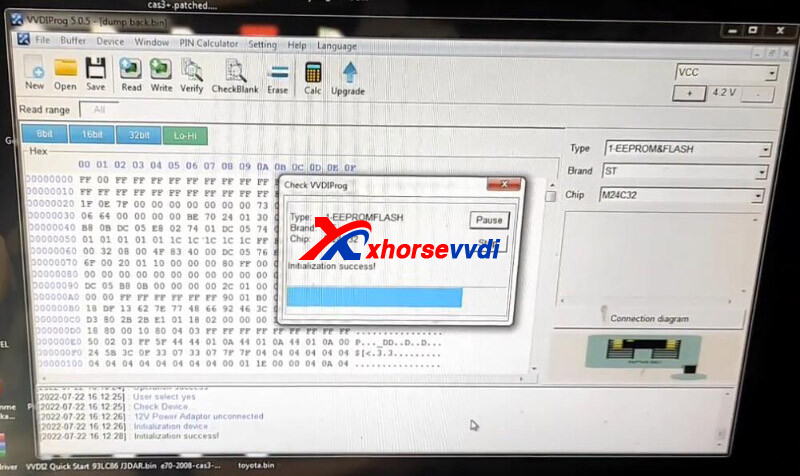
Step 1. Read Original Data
Connect VVDI PROG to VW cluster via clip adapter.
Select "1-EEPROM&FLASH" "ST" "M24C32".
Read and save original data.
Step 2. Enter Service Mode
Go to VVDI2 software, enter VW menu.
Select
Service Mode>>Prepare service 24C32 EEPROM
Load original data file.
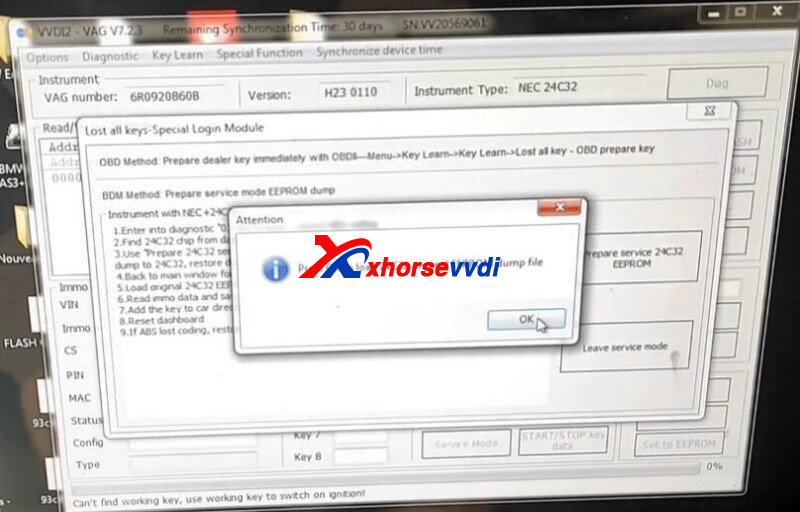
Save service mode file.
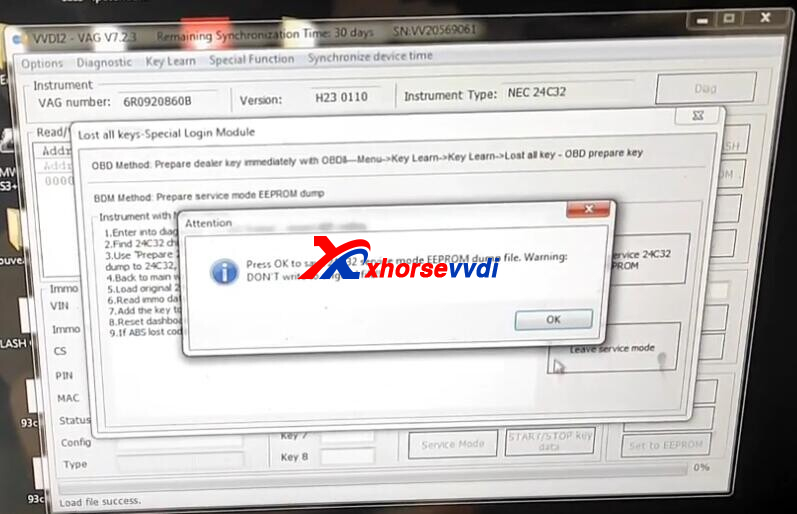
Turn to VVDI PROG software,
Load service mode file and write it into instrument.
Step 3. Add Key
Connect VVDI2 to instrument.
Click "Read EEPROM/FLASH".
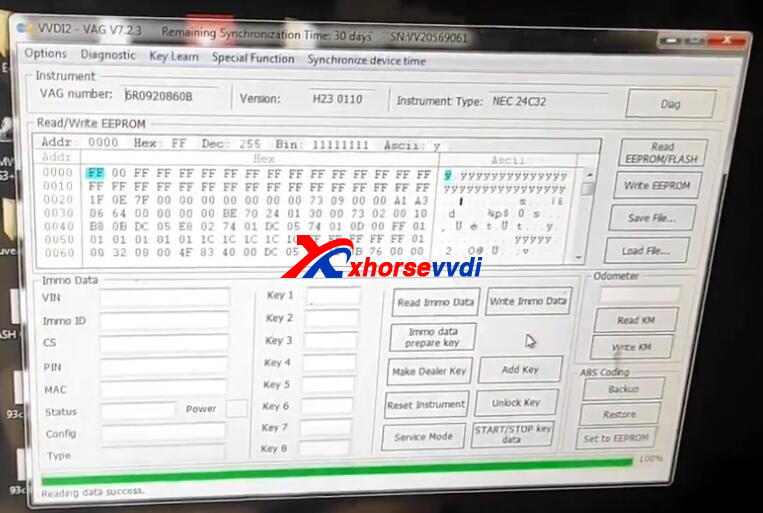
Save new EEPROM file.
Click "Read IMMO Data".
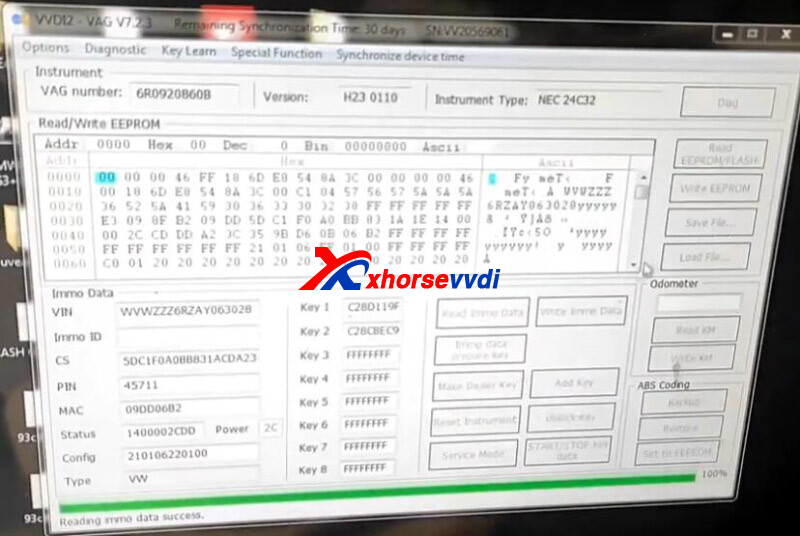
Save immo file.
Put a new key into VVDI2 coil.
Click "Make Dealer Key".
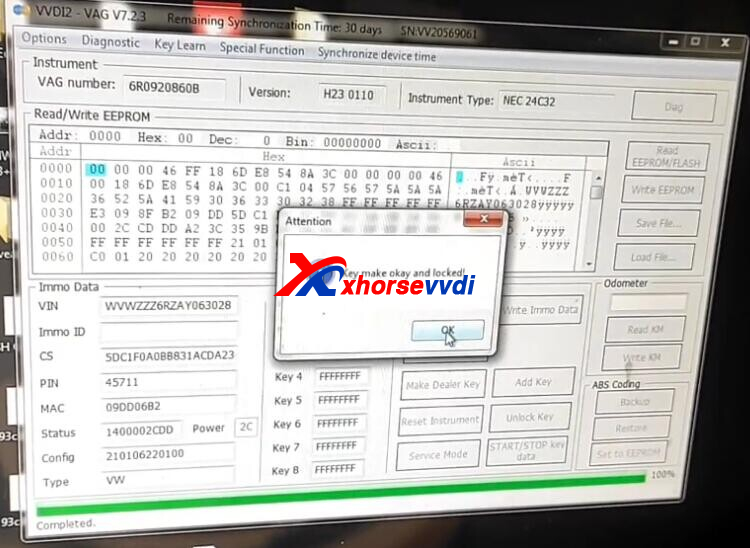
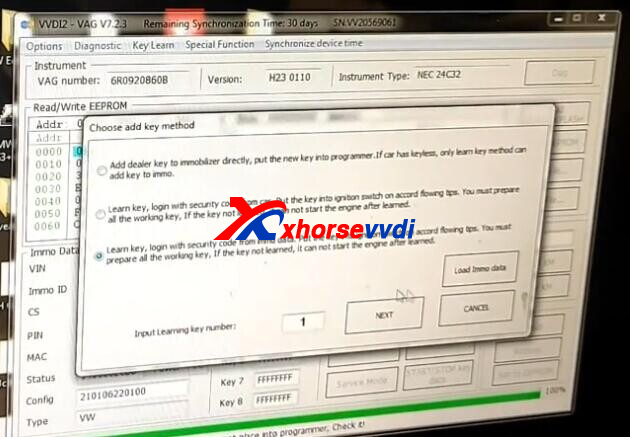
Then select
Add Key>>Learn key, login with security code from immo data
Load immo data file.
Key learn complete.
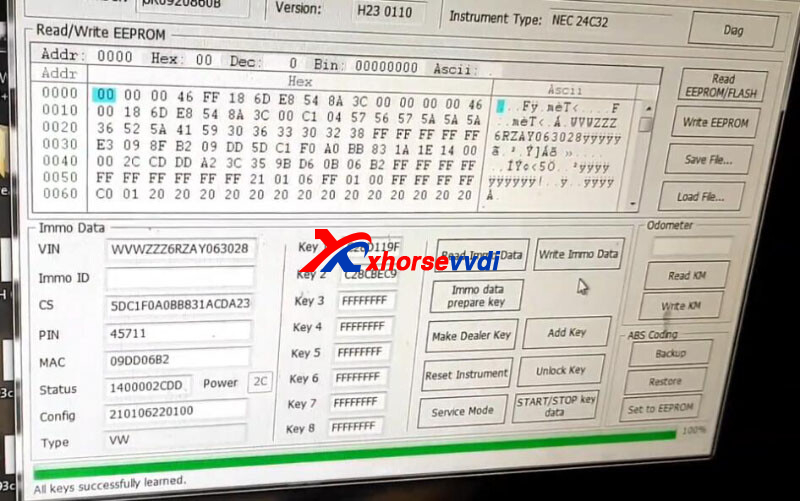
That's 2009 VW Polo AKL programming using VVDI2 + VVDI PROG.
http://blog.xhorsevvdi.com/how-to-program-vw-polo-2009-akl-by-vvdi2-vvdi-prog/
Posted by: xhorsevvdi at
10:35 AM
| No Comments
| Add Comment
Post contains 156 words, total size 4 kb.
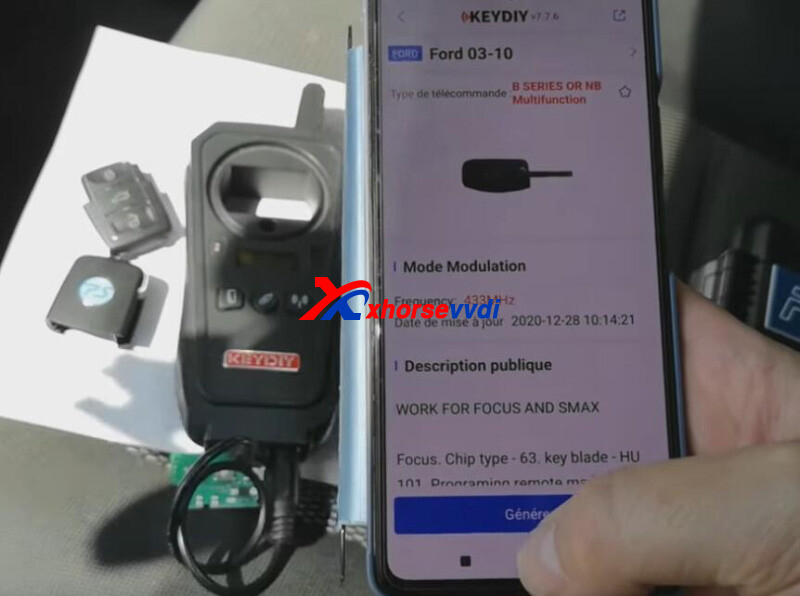
Here we will show you how to add a key for Ford C Max 2009 using VVDI Super Chip and KD-X2.
Simple Guide:
Generate Remote>>Add Remote Manually>>Clone Transponder
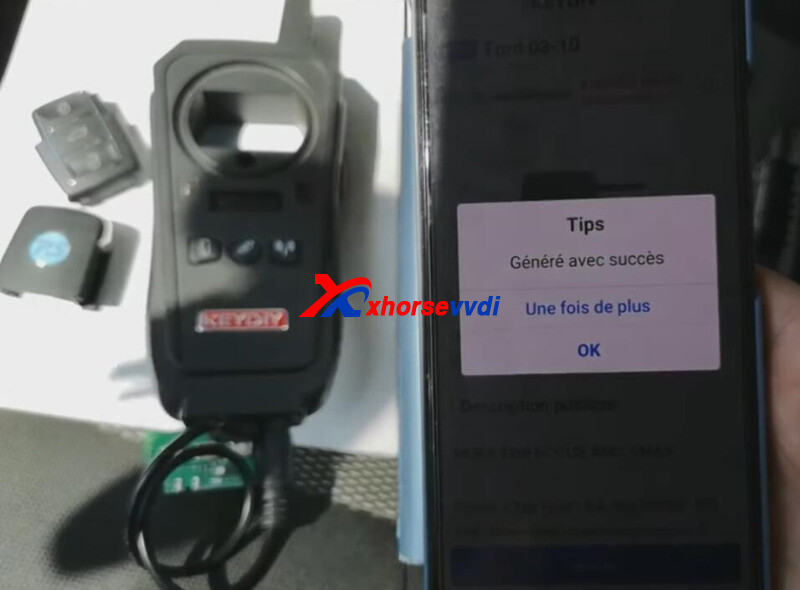
Step 1. Generate Remote
On KD-X2, go to
Generate Remote>>Ford>>C Max>>Ford 03-10 433MHz
Success.
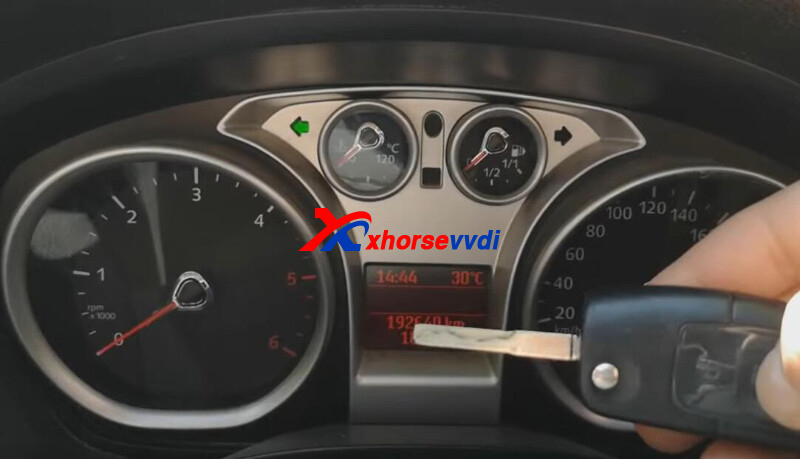
Step 2. Manually Add Remote
Turn on& off the ignition four times quickly using original key until it makes a loud noise
Press buttons on original key, then press buttons on new key, now car should react to remote control of new key.
Turn on& off the ignition once by original key to exit remote programming.
Step 3. Clone Transponder
On Key Tool Max, go to
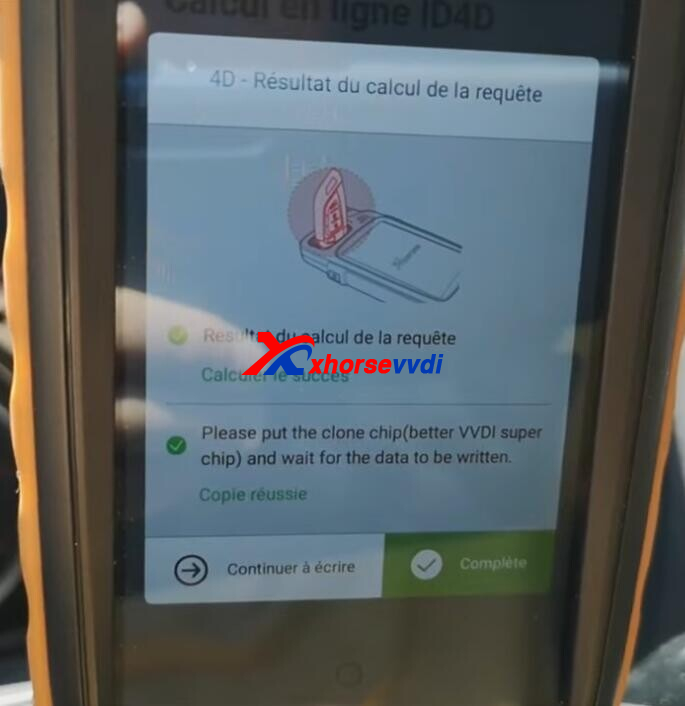
Transponder Clone>>Read Transponder
Clonable, 4D 63 chip.
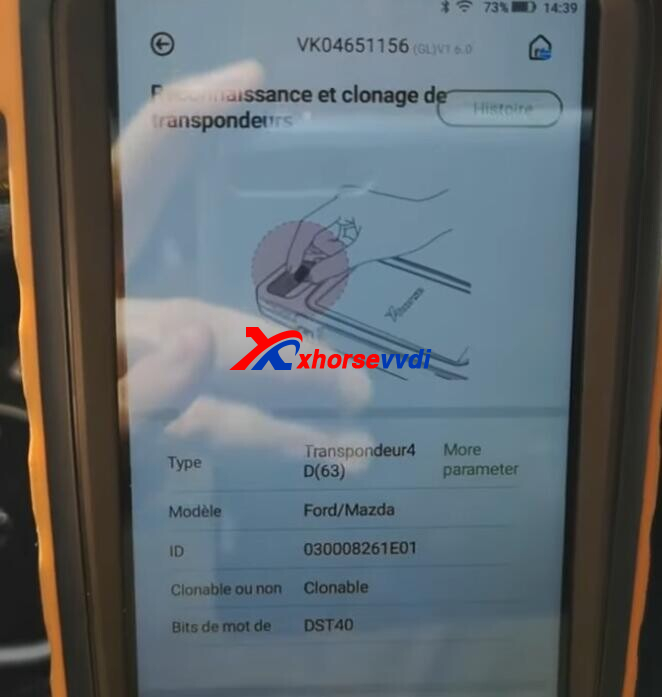
Then click "Clone".
When it asks for a Super Chip, put new key with Super Chip inside into the coil
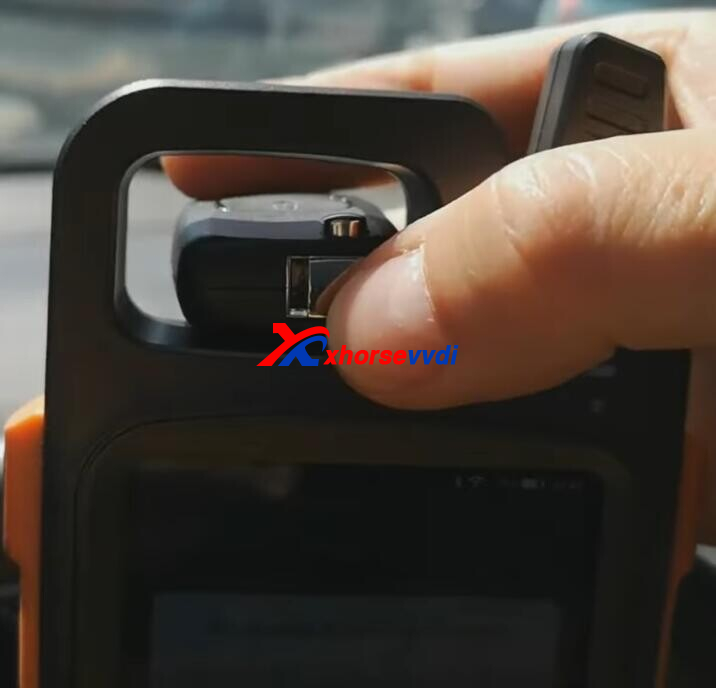
Complete.
Start the car. Once it starts, even the chip is not requested, only blade into ignition.
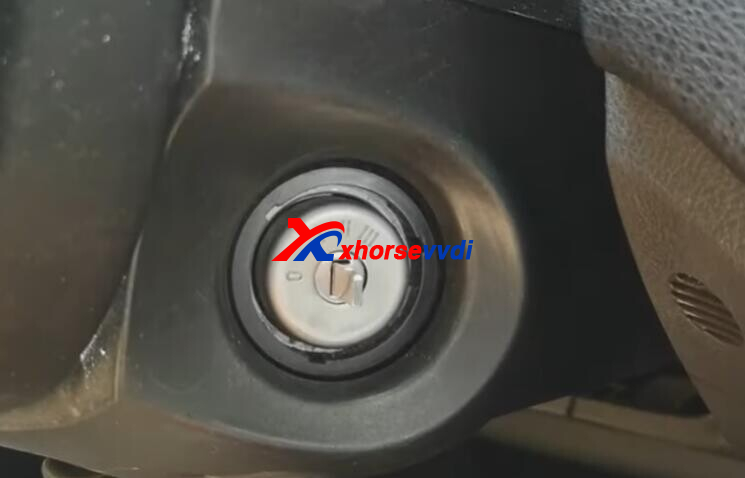

Done!
That's how we add a spare key for Ford C Max 2009 via remote generation and chip clone.
More functions to be explored!
Skype: xhorsevvdi.com
Whatsapp:+86-13983756354http://blog.xhorsevvdi.com/how-to-add-key-for-ford-c-max-2009-by-vvdi-super-chip-and-kd-x2/
Posted by: xhorsevvdi at
10:34 AM
| No Comments
| Add Comment
Post contains 193 words, total size 4 kb.
Xhorse Universal Smart Remote support re-generation. What to do if re-generation fails, here we will show you.
Xhorse Smart Remote has 2 types: XM38 Smart Remote and NXP Smart Remote.
Part 1. XM38 Remote

1.Remove battery
2.Press and hold Lock button, then install battery
3.Light on PCB keeps on
4.Go ahead and burn remote controls
Part 2. NXP Smart Remote
1.Check battery capacity
2.Switch battery
3.If the problem remains, send back to factory
Hope this could help.
http://blog.xhorsevvdi.com/how-to-reset-xhorse-smart-remote-if-re-generation-fail/
Posted by: xhorsevvdi at
10:34 AM
| No Comments
| Add Comment
Post contains 84 words, total size 2 kb.
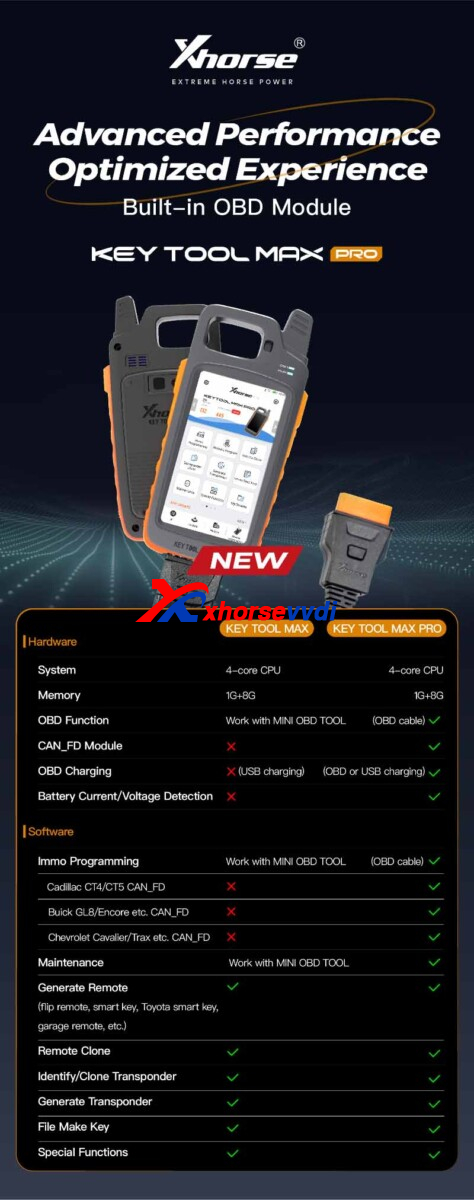
VVDI Key Tool Max Pro is the updated version of VVDI Key Tool Max. Here we will show you more details about this key programmer.
Part 1. What are New Features, compared to Key Tool Max?
1.New built-in modules
Built-in OBD Module
Before, Key Tool Max is a wireless key tool. To program keys, it must work with other programmers like MINI OBD.
Now, Key Tool Max Pro is a standalone key programmer. Of course, it could work as before to, like, generate remote or write via dump wirelessly; moreover, it could program keys via OBD on its own.
Built-in CANFD Module
This helps to program new GM vehicles with CANFD protocols, directly connected via OBD, No Adapter or Password required. (even VVDI Key Tool Plus do not support CANFD)


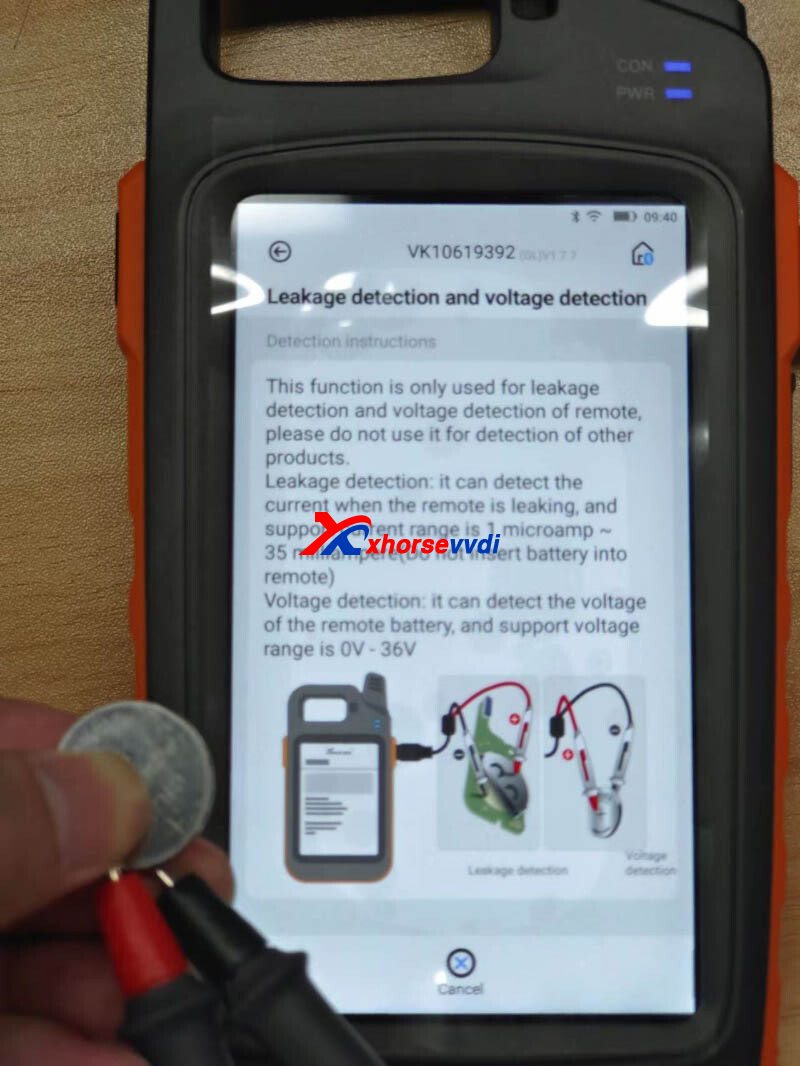
Battery Test Module
This functions is designed for leakage and voltage detection.
Remote Current (1μA~35μA)
Battery Voltage (0V~36V)
BMW CAS3/ TOYOTA Programming
New Feature, BMW CAS3 and Toyota Key Programming via OBD, is coming soon.

2.Comparison Chart:
Part 2. What models it supports?
Just a quick look at GMC, Toyota, Honda, and Nissan menu.
For more models, questions are welcome.
Part 3. FAQ
Q1. What languages does it have?
A1. Same as VVDI Max (English, German, Spanish, Persian, French, Hebrew, Hindi, Indonesian, Italian, Korean, Polish, Portuguese, Russian, Thai, Turkish, Ukrainian, Vietnamese).
Q2. Max Pro can work with Toyota 8A Non-Smart Key All Keys Lost Adapter? Also the new Toyota 8A Smart Key Adapter?
A2. Compatible with non-smart key adapter, new Toyota adapter can only link to Key Tool Plus
Q3. Can-Fd works without password on the new GM's?
A3. Yes, no password is needed.
More Functions to be explored!
http://blog.xhorsevvdi.com/vvdi-key-tool-max-pro-full-details/
Posted by: xhorsevvdi at
10:33 AM
| No Comments
| Add Comment
Post contains 290 words, total size 4 kb.
Question:
VVDI MB, use it for 2008 Mercedes CLS 63 AMG Keyless Go W219. I searched and found W219 is the same as W211 W209, but the software gives "ERROR: 3" prompts.
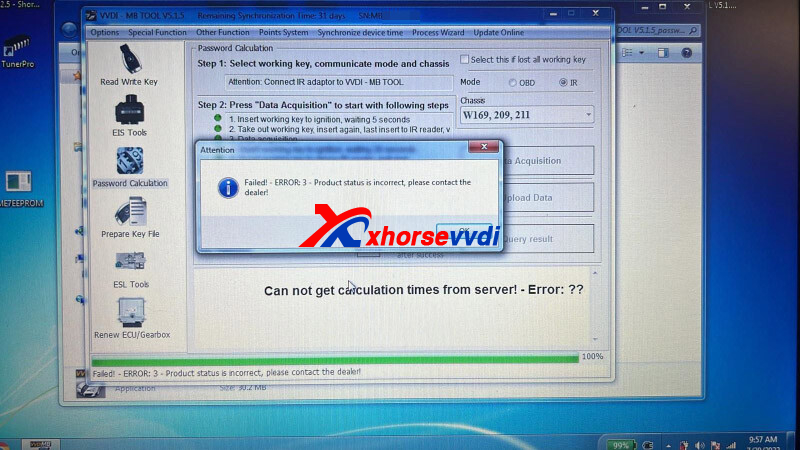
Here Xhorsevvdi gives the
Solution:
1.Link VVDI MB Tool via Xhorse Upgrade Kit
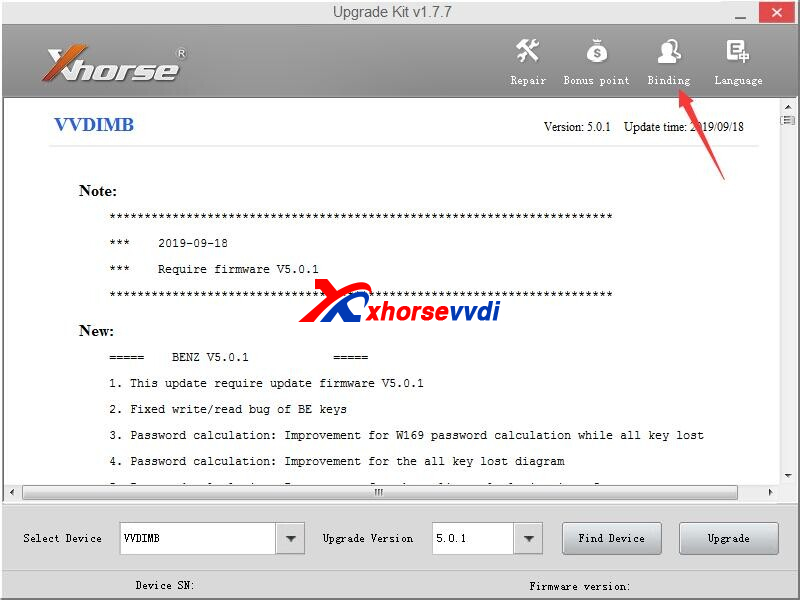
2.Synchronize device time on VVDI MB V5.1.5
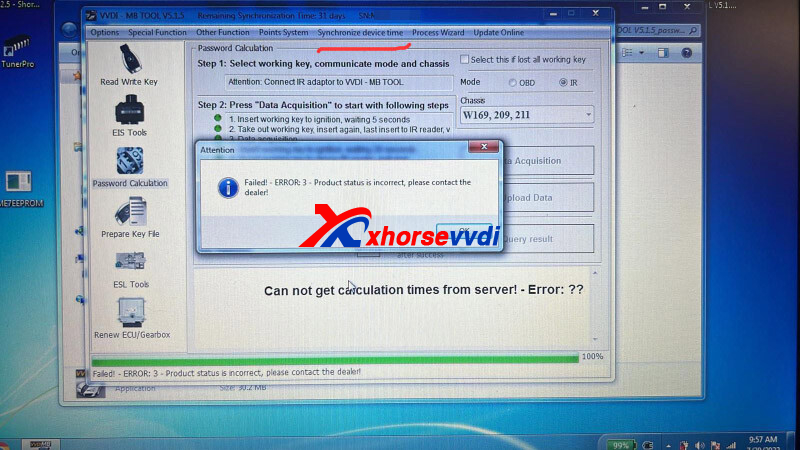
Then key pass calculation should work well.
Posted by: xhorsevvdi at
10:32 AM
| No Comments
| Add Comment
Post contains 71 words, total size 2 kb.
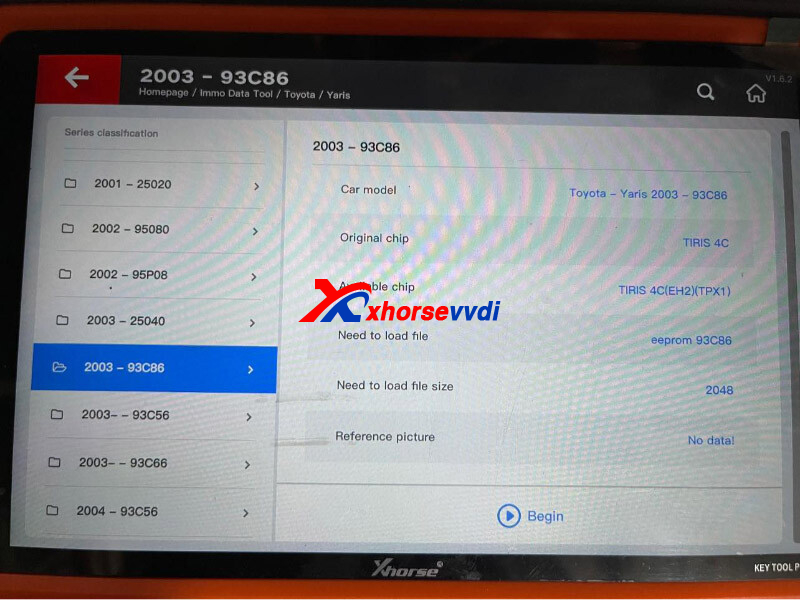
Question:
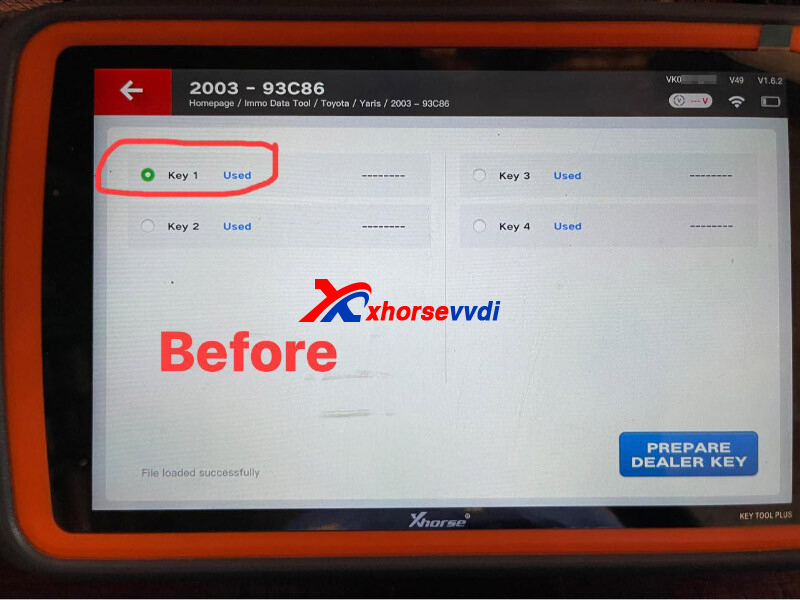
Vehicle Info - 2004 Toyota Alphard ID4C all keys lost, writing key via IC dump 93C86.
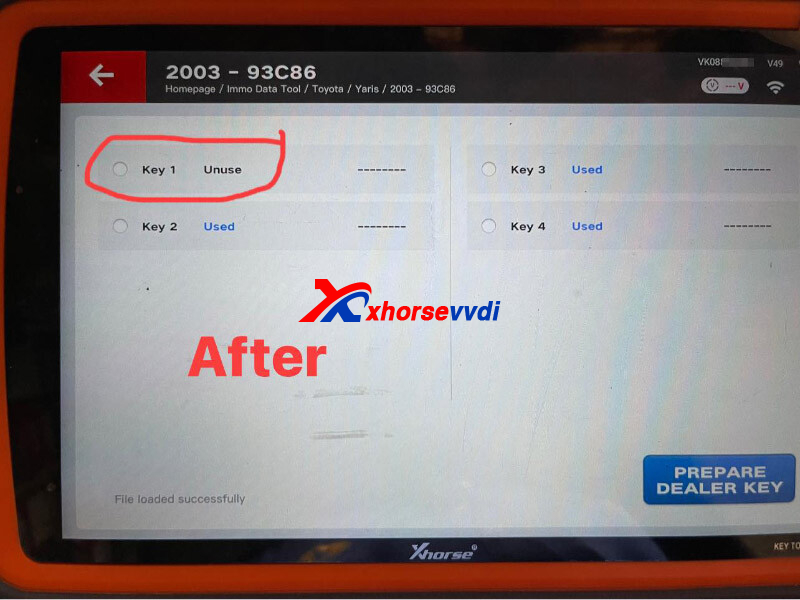
Process - IC reads fine, go to IMMO DATA TOOL on VVDI Key Tool Plus, 4 keys registered, select position 1 to write in, then write file back to IC.
Result - Immo light on, no start, on key file position 1 is unused, also try position 2-4, all deleted instead of adding them.
Solution:
Method 1. Use VVDI XT27 Super Chip
Method 2. Manually edit generic 4C chip
More details:
Write dump data into XT27 on Key Tool Plus without dump file changed.
Relevant Reviews:
1)I use vvdi key tool works without issue. I had similar issues with a LS400.
2)Worked on same ecu with VVDI2 car started without any problem just use super chip and just emulate any used key position
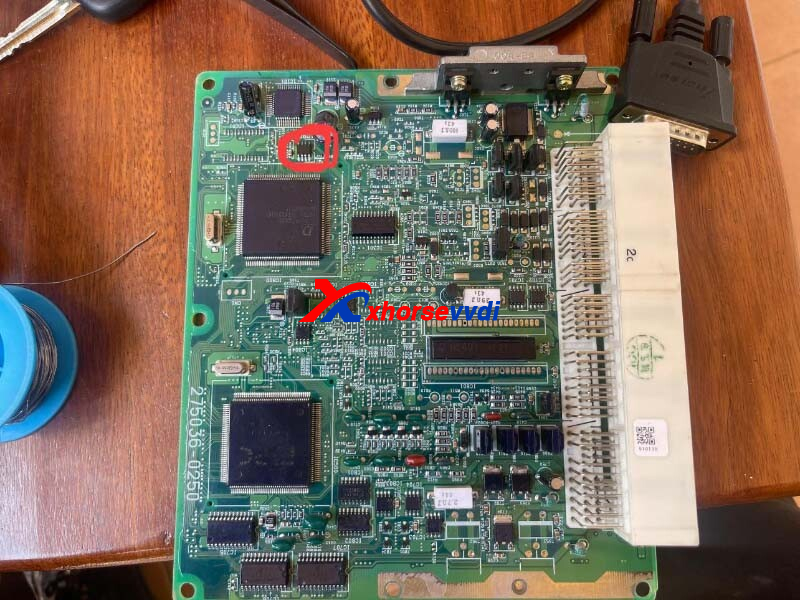
2.Manually edit data
On 4C transponder, we don't even need a programmer like Tango.
1)Read 93C86 EEPROM data, then we will see top 4 lines of bin file where the key data is located
2)Find the first 8 digits on line 1 which will repeat on line 2 (on 16bit format the data string will be in reverse order)
3)Read 4C chip data, type the data on step 2, and write back to Eeprom
http://blog.xhorsevvdi.com/fixed-key-tool-plus-program-toyota-id4c-akl-write-via-dump-fail/
Posted by: xhorsevvdi at
10:32 AM
| No Comments
| Add Comment
Post contains 229 words, total size 3 kb.
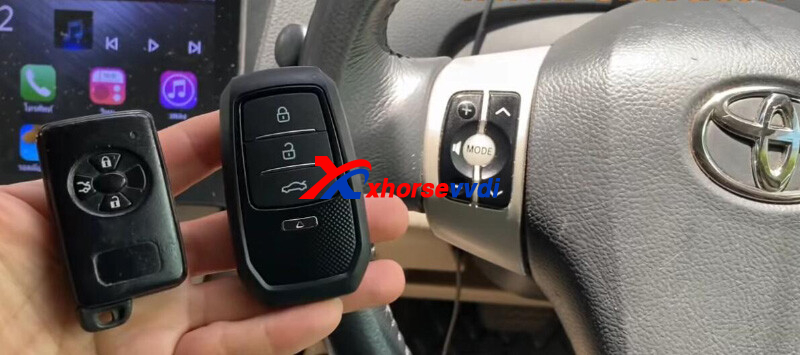
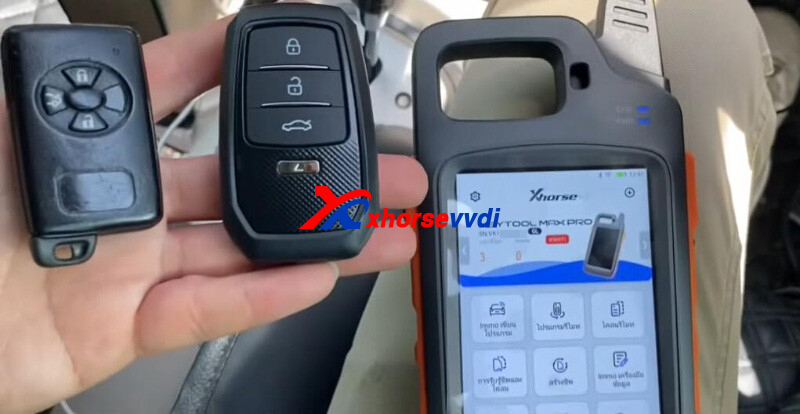
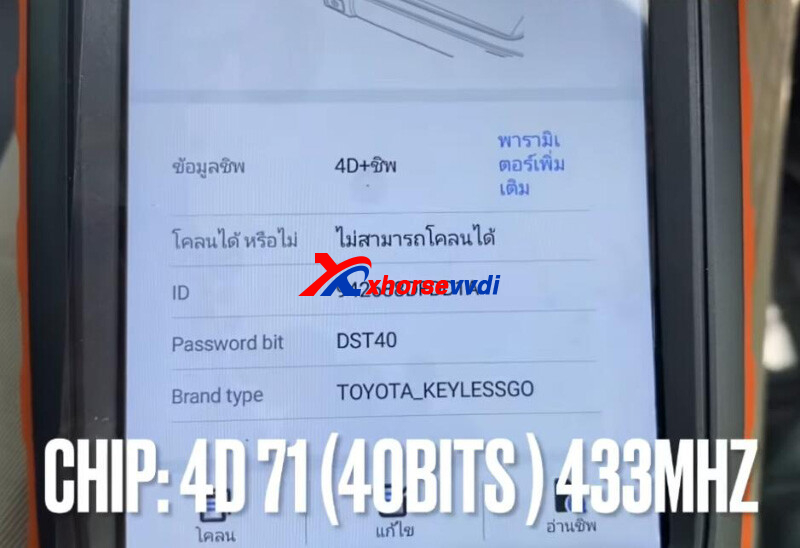
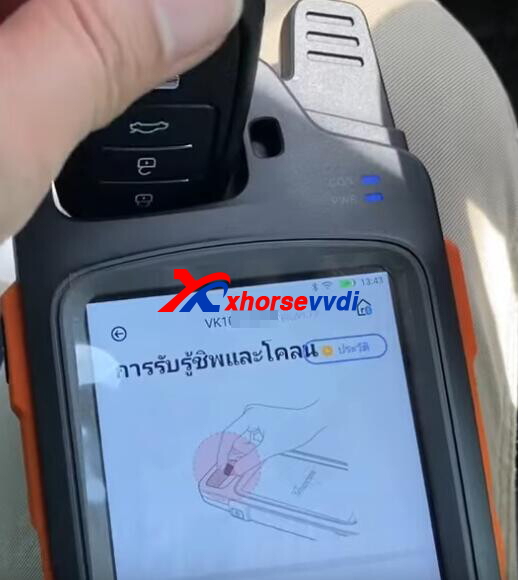
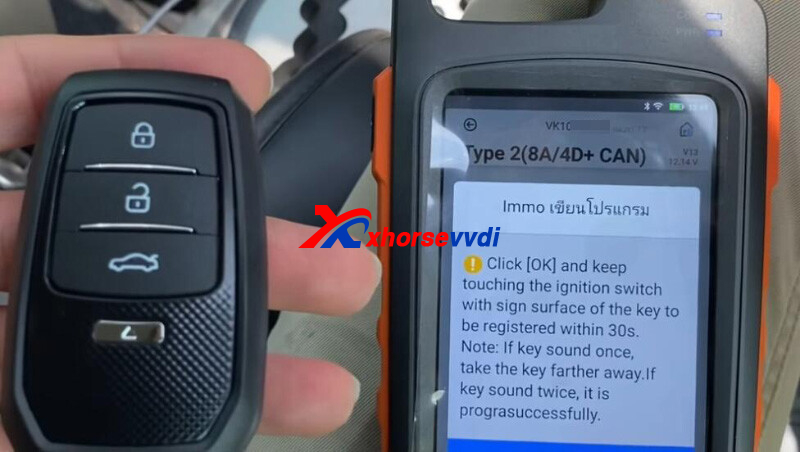
This is the first review of VVDI Key Tool Max Pro:
2012 Toyota VIOS G-system add new smart remote no problem using VVDI XM38 Remote.
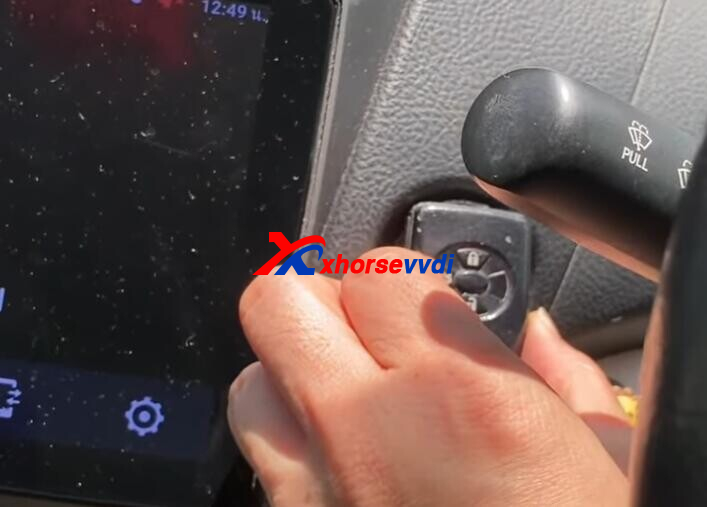
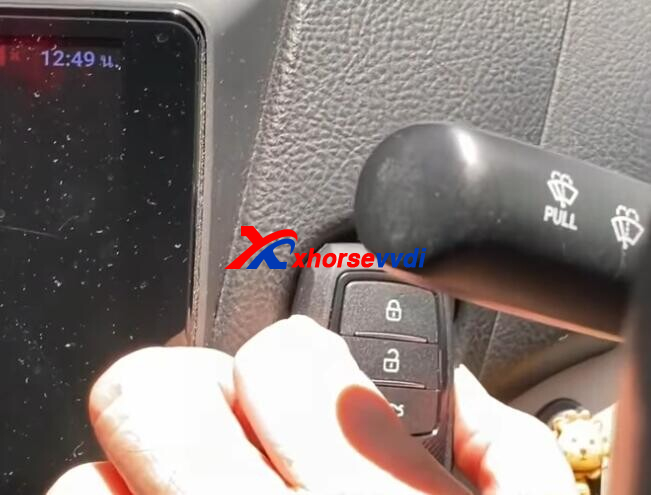
Step 1. Generate Remote
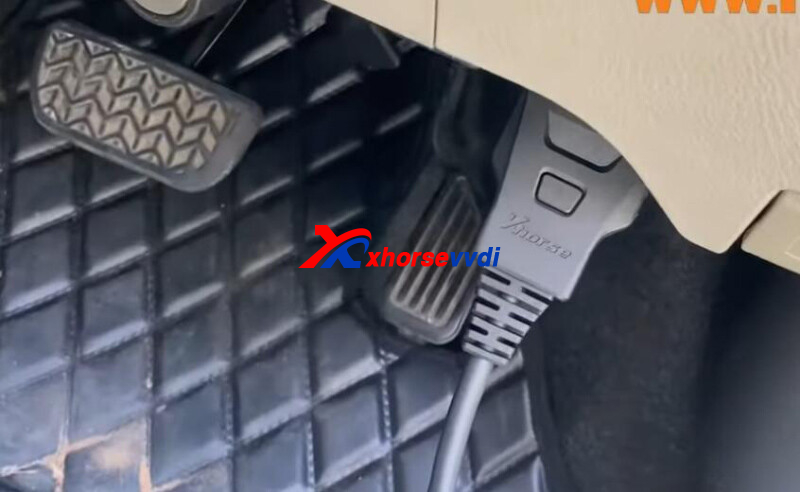
Connect Max Pro to vehicle by new OBD cable.
Read original remote.
Install cr2032 battery into new remote, and put XM38 Remote into key coil.
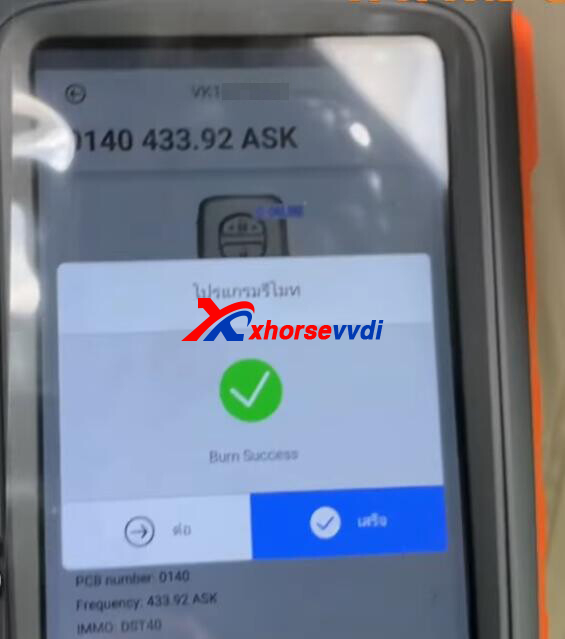
Go to "0140 433.92 ASK".
PCB number 0140, frequency 433, network required.
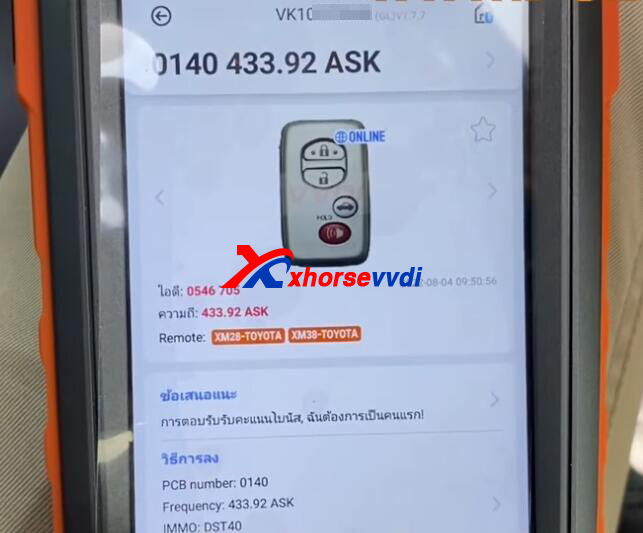
Generate Remote.
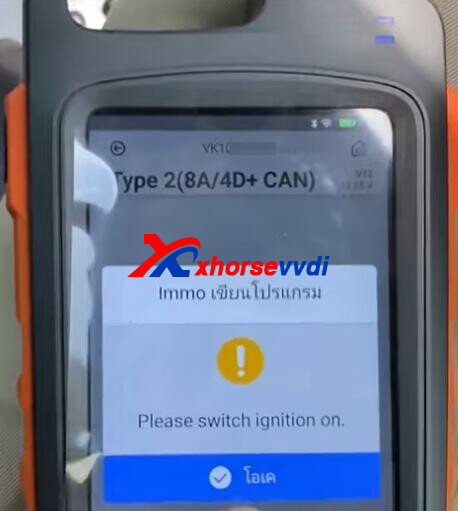
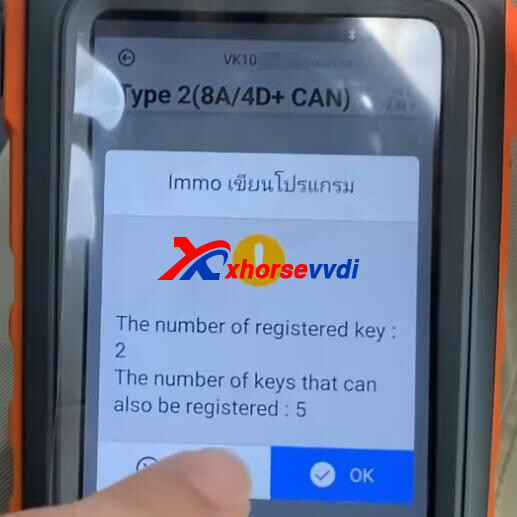
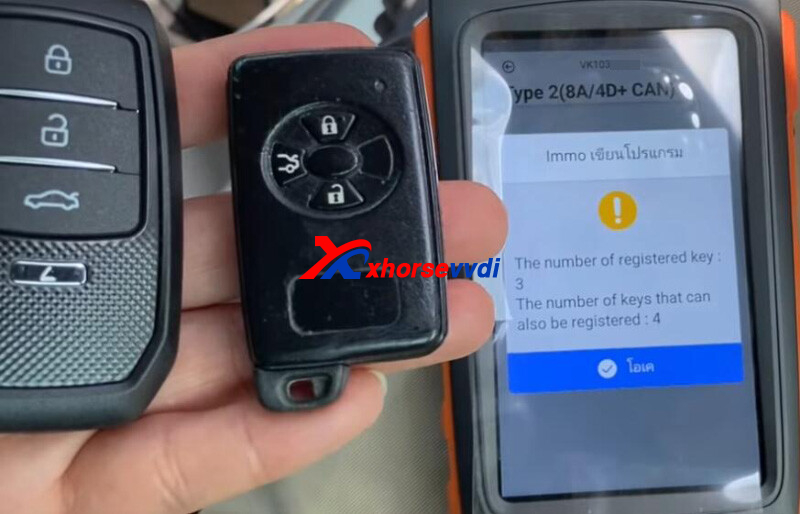
Step 2. Key Programming
Go to
IMMO Programming>>Toyota>>Select by Type>>Smart Key System>>Type 2(8A/4D+ CAN)
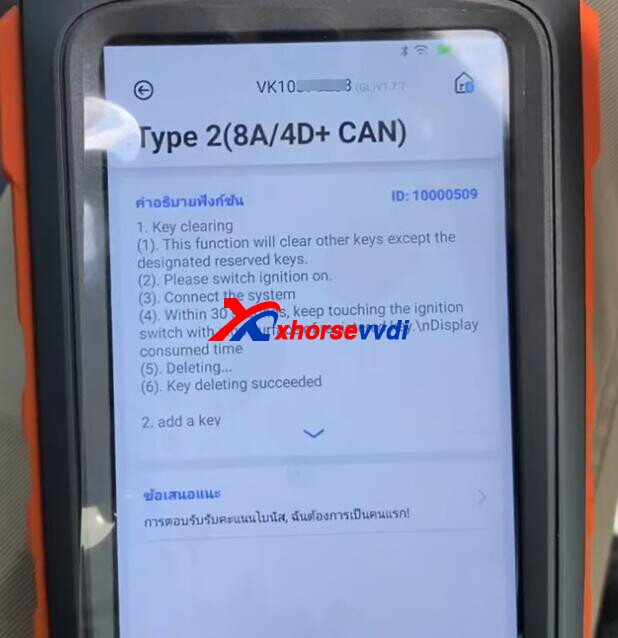
Add key.


http://blog.xhorsevvdi.com/vvdi-key-tool-max-pro-add-smart-key-for-2012-toyota-vios-g-chip/
Posted by: xhorsevvdi at
10:31 AM
| No Comments
| Add Comment
Post contains 98 words, total size 5 kb.
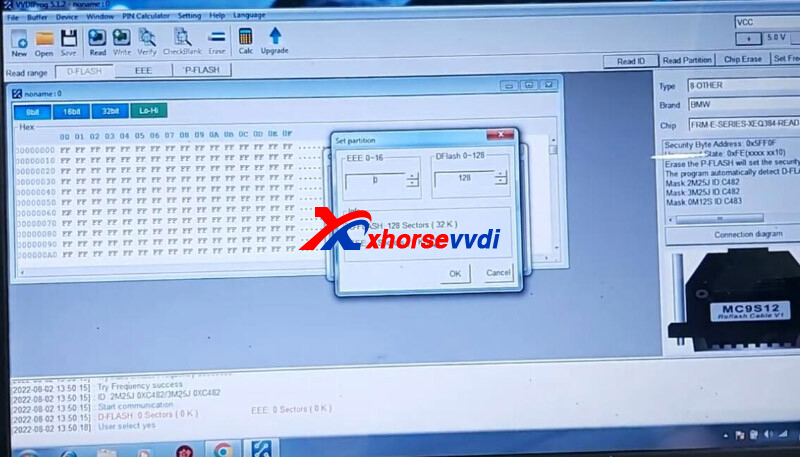
Purpose:
To repair a BMW F-series FRM XEQ384 using VVDI PROG.
Issue:
Windows no response.
Remove FRM to bench.
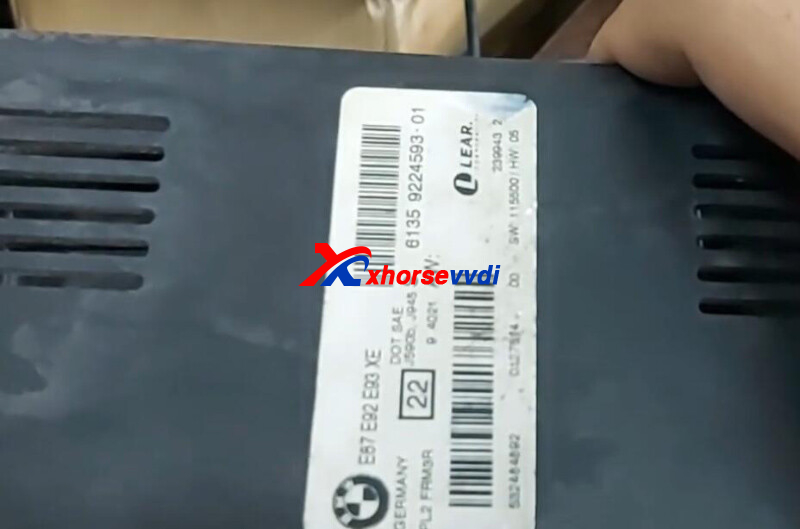
On PC, select
8-OTHER, BMW, FRM-E-SERIRES-XEQ384-READ
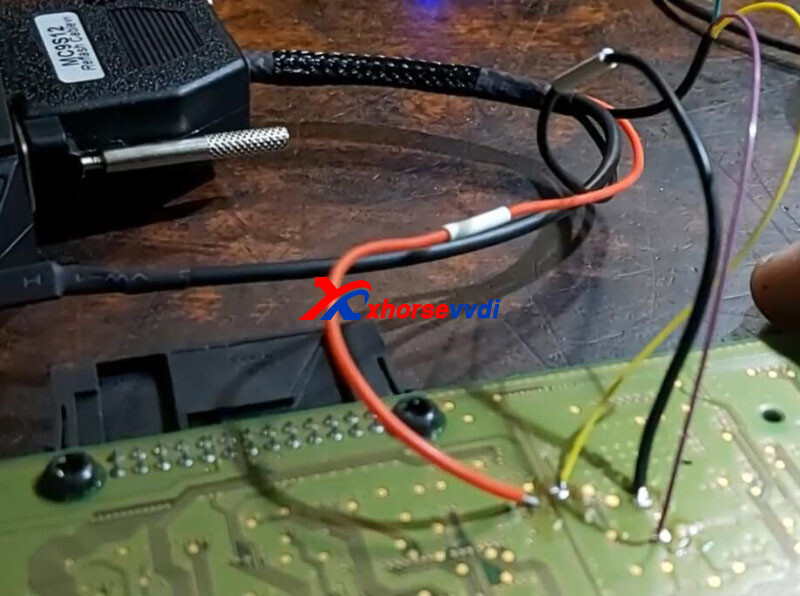
Diagram.
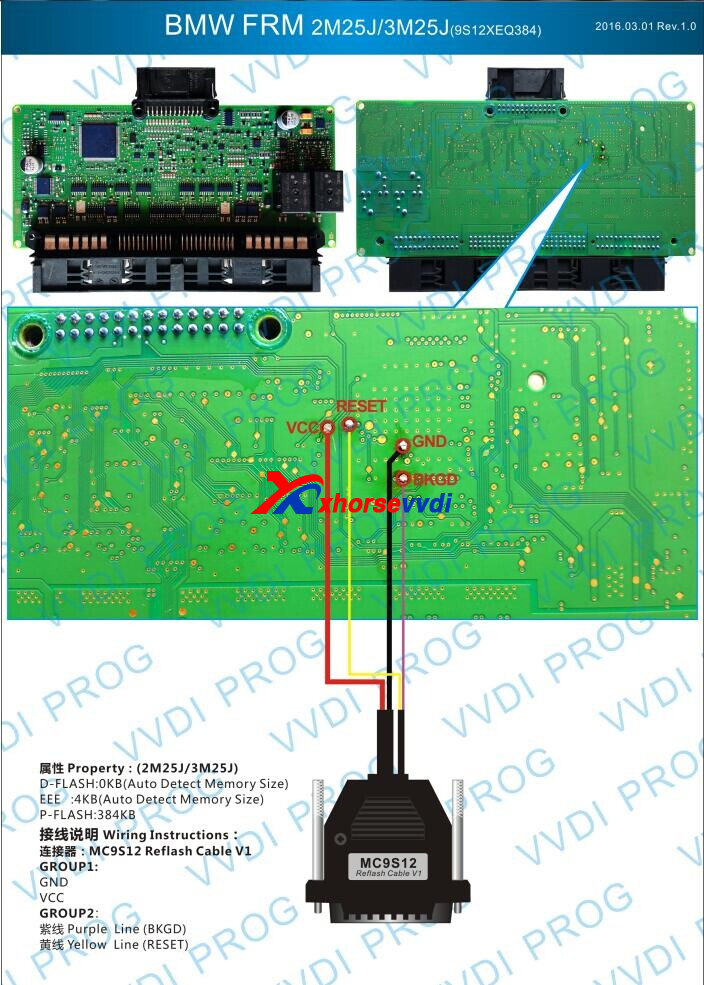
Connect VVDI PROG Programmer to FRM pcb as prompt.
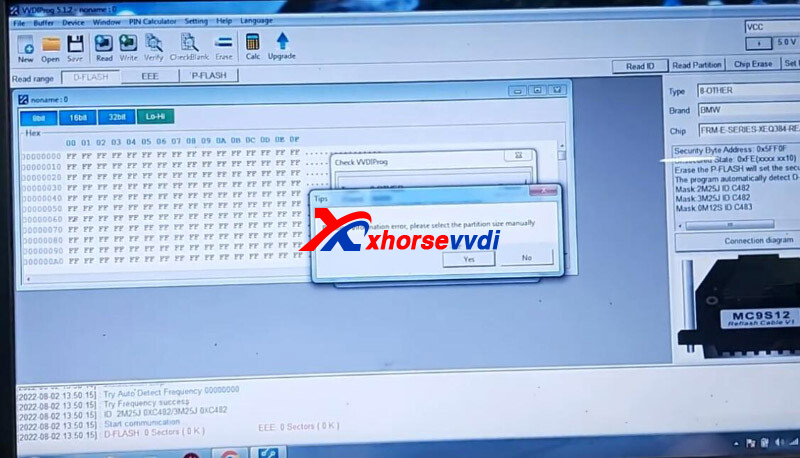
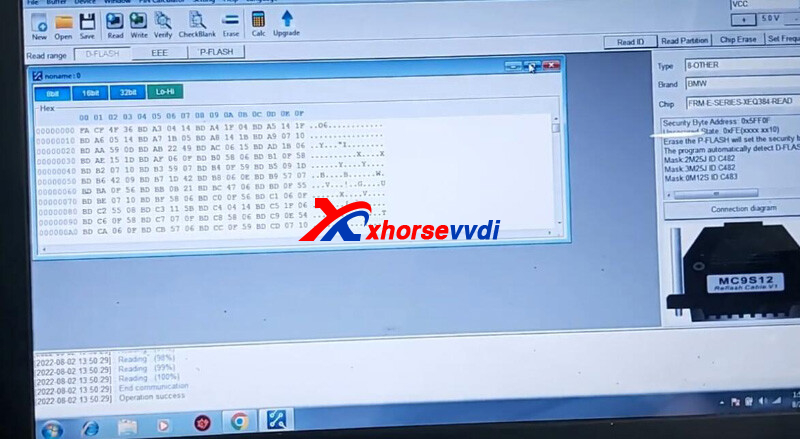
Read D-FLASH.
Partition information error, manually select size.
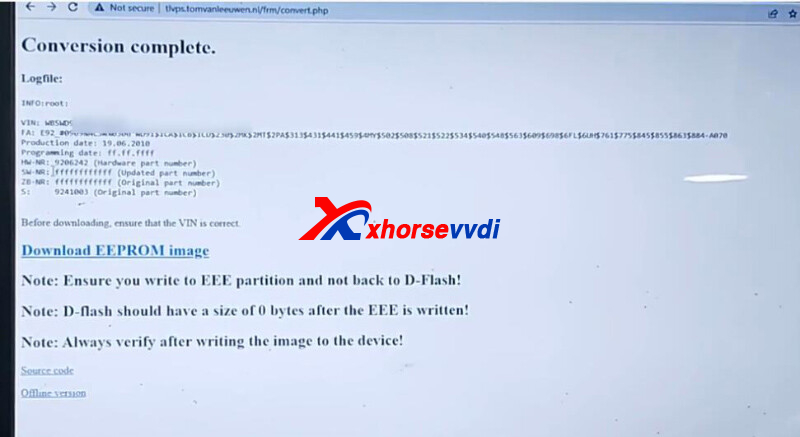
Go to tlvps.tomvanleeuwen.nl/frm/.
Load D-FLASH.

Download EEPROM.
On VVDI PROG software, switch to FRM-E-SERIRES-XEQ384-WRITE.
Load EEPROM file and write it in.
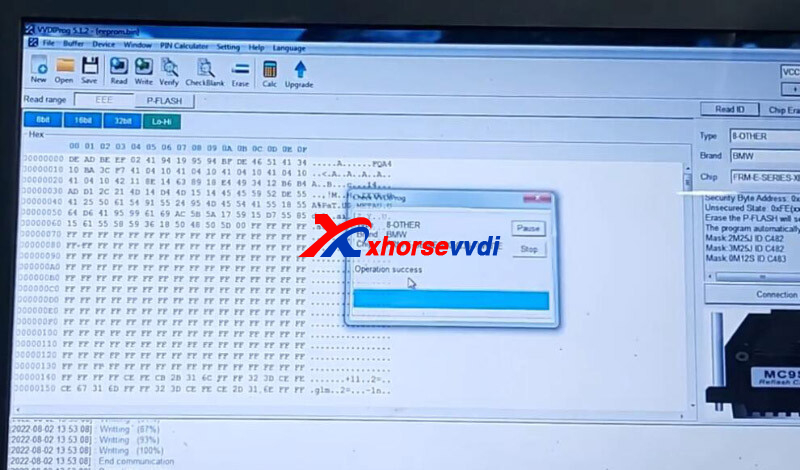
Install FRM back.
Headlamp and windows work okay.
Posted by: xhorsevvdi at
10:30 AM
| No Comments
| Add Comment
Post contains 81 words, total size 3 kb.
New Xhorse Dolphin XP-008 Manual Key Cutting Machine is designed for special keys including bit, double-bit keys, etc.
How to Install and Calibrate Dolphin XP-008?
Step 1. Install Calibration Plate
*First, make sure machine's power is off.
Hold calibration rod and loosen the clamp, then take out calibration rod.
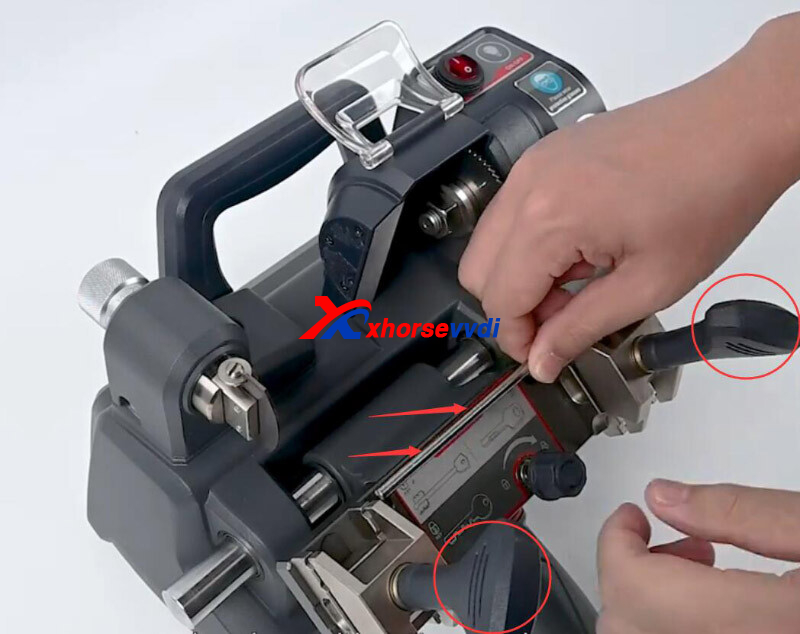
Stick it into spindle pinhole

Loosen lock screw using a wrench.

Remove the cutter (cutting plate).
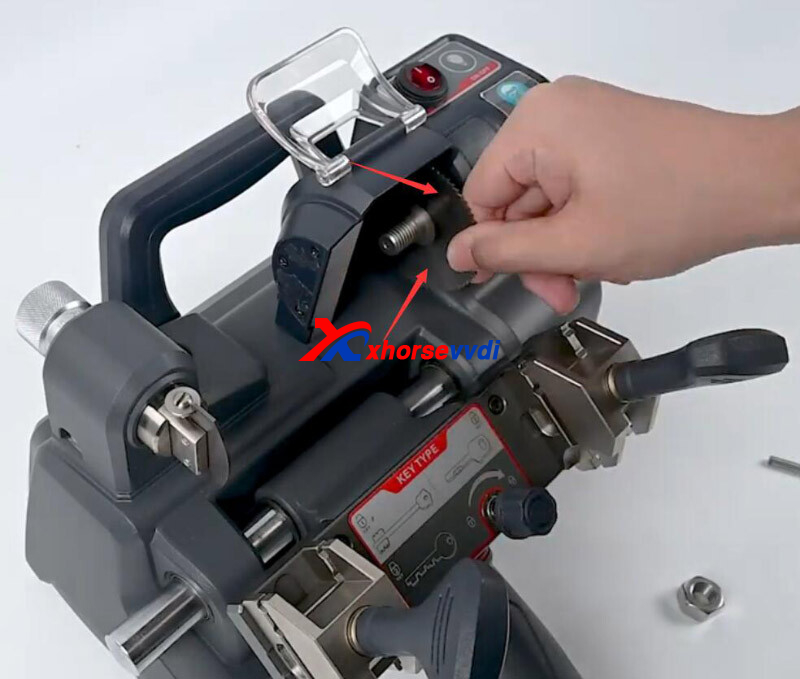
Install calibration plate, same as before.

Step 2. Lateral Adjustment of Micro-adjust Base
*First, make sure the main and the auxiliary clamps stay Side A.
Rotate handle until calibration plate touches right part of auxiliary clamp.
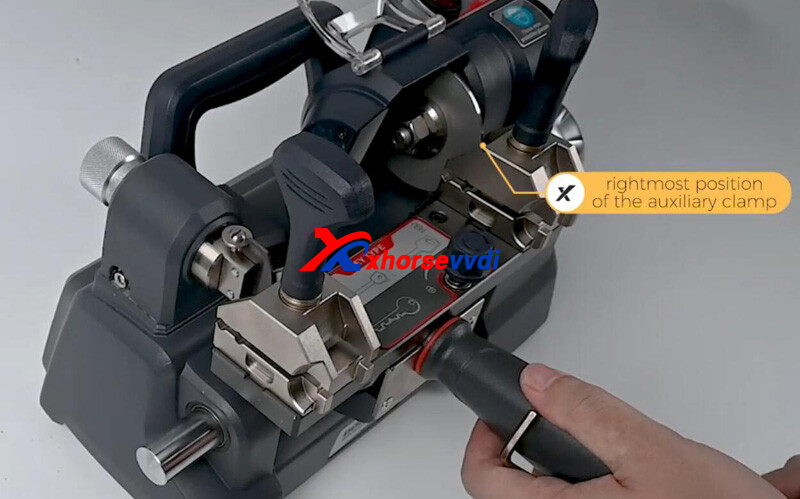
Slightly loosen fixing screw of sliding base.

Adjust left adjusting screw using an Allen wrench until cutting guide touches right part of main clamp.
Tighten fixing screw of sliding base.
Step 3. Vertical Adjustment of Micro-adjust Base
Stick calibration rod into clamps and tighten it.

Adjust knob of micro-adjust base so that calibration rod can touch left cutting guide and right calibration plate in the meantime.
Step 4. Height Adjustment of Micro-adjust Base
*Generally, the procedure is already complete by factory.
Rotate handle, and make sure calibration rod keeps touching left cutting guide and right calibration plate in the meantime.
Done!
http://blog.xhorsevvdi.com/dolphin-xp-008-installation-and-calibration-step-by-step-guide/
Posted by: xhorsevvdi at
10:30 AM
| No Comments
| Add Comment
Post contains 209 words, total size 5 kb.
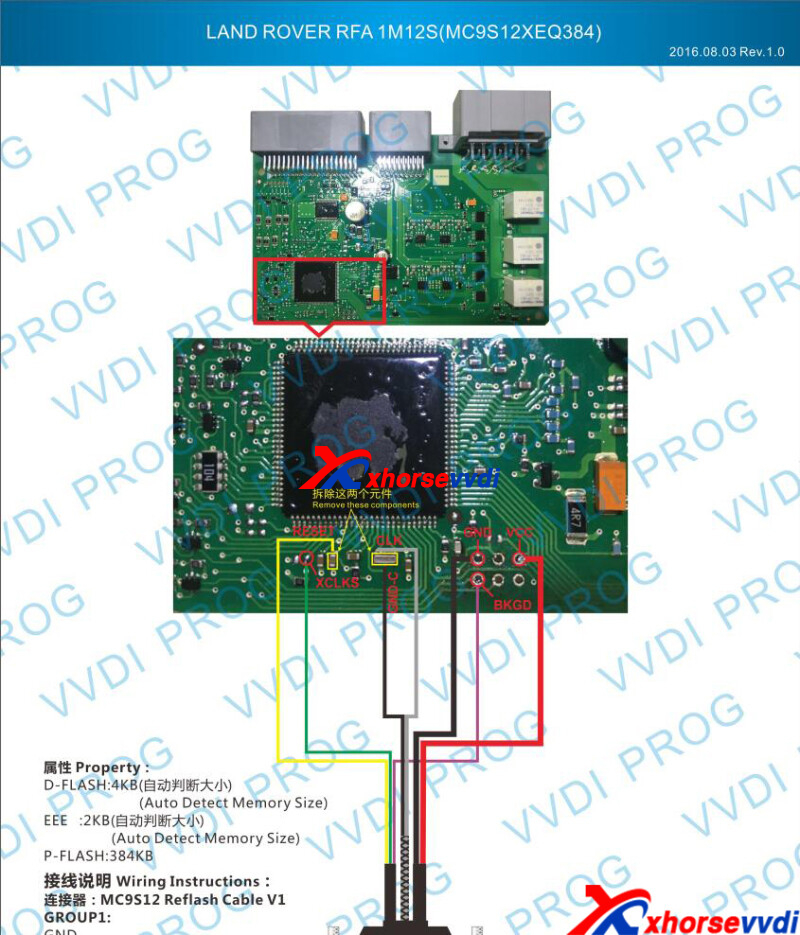
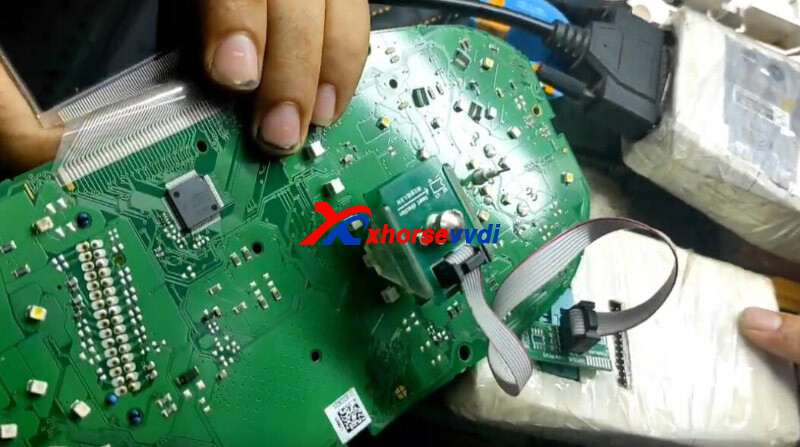
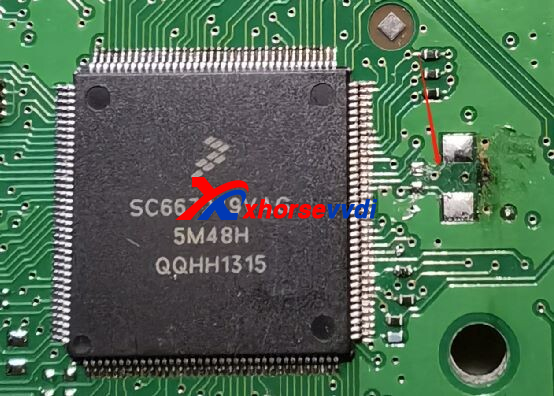
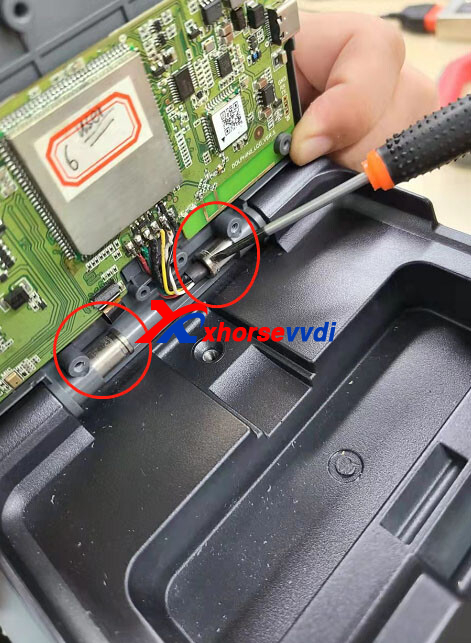
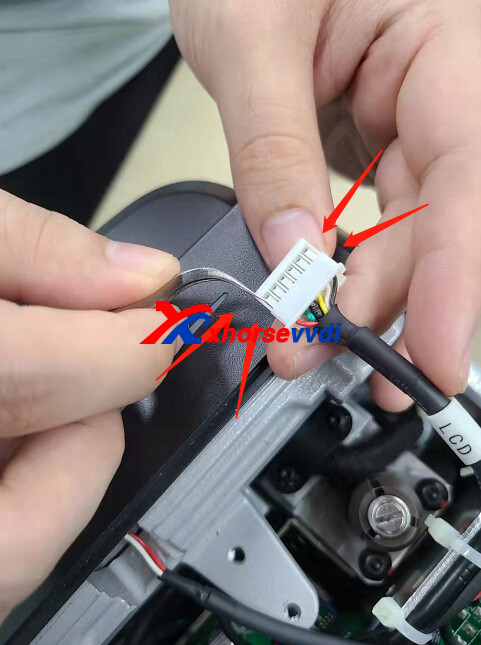
To program new Porsche BCM, we need to read BCM D-FLASH data. After installing all back to vehicle, some relays may sound abnormally, so here we will explain why at the point of soldering instead of data loss.
To read BCM using VVDI PROG, we have to cut off some wires.
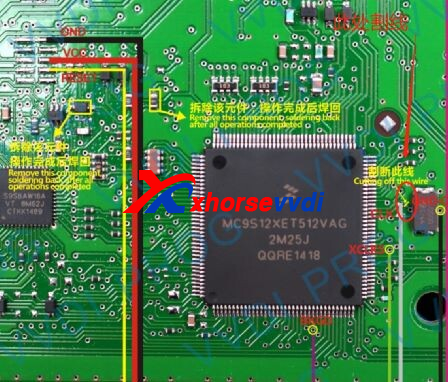
Generally, cutting won't cause issues unless we damage to under lower layers, but recovering wires is more likely to cause relay issues.
Some cut wires via:
Soldering tin wires to two points, and make sure wires on both sides are connected using multimeter.
When they recover wires, it is possible to connect these wires to GND.
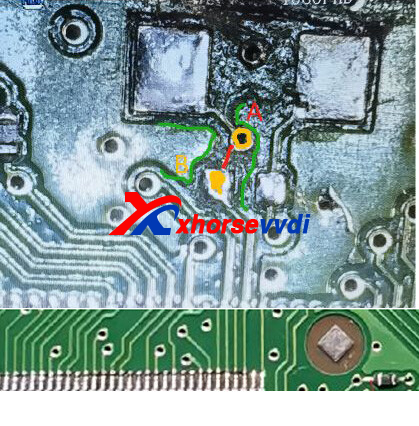
(The red wire is the position to cut, tin on yellow points could connect to A/B easily)
In this case, the crystal and module won't work, after which BCM relay sounds.
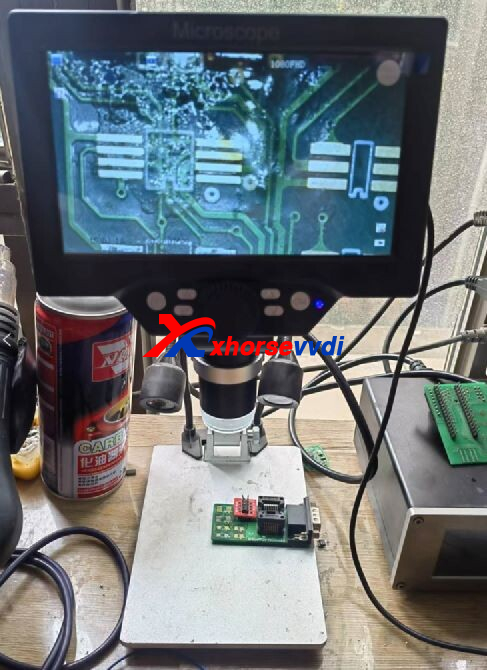
So, we recommend an digital magnifier to help check wires.
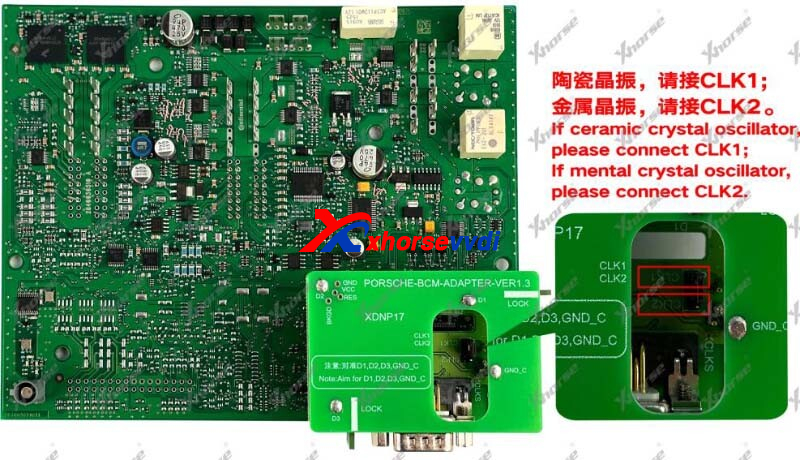
Or a BCM Solder-free Adapter to avoid cutting wires.
Read Also:
http://blog.xhorsevvdi.com/xhorse-vvdi-progvvdi2-new-porsche-programming-guide/
Posted by: xhorsevvdi at
10:29 AM
| No Comments
| Add Comment
Post contains 169 words, total size 2 kb.
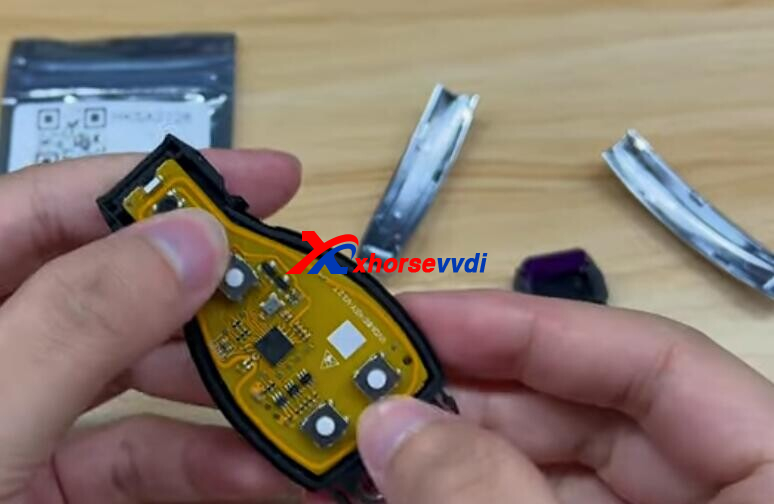
This is a VVDI BE Key Yellow PCB Review:
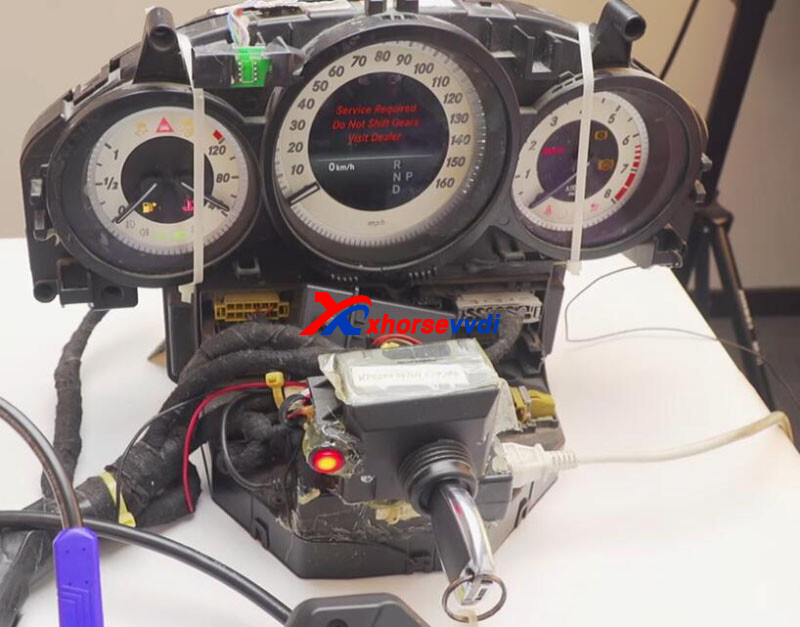
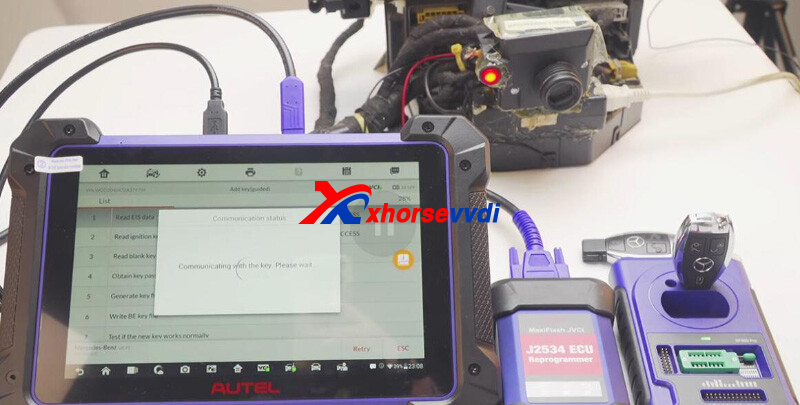
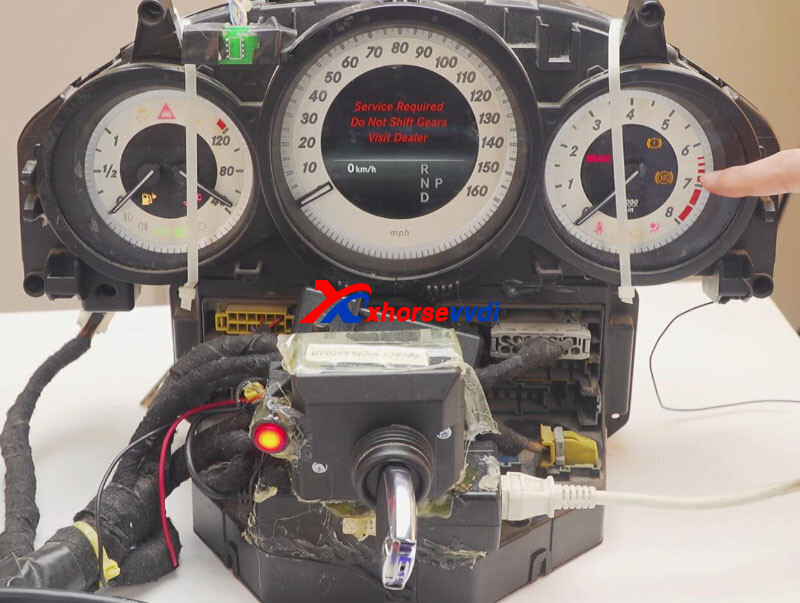
Benz W207 Add Key OK using new VVDI BE Key Yellow and Autel IM608
VVDI BE Key Yellow PCB is designed for locksmiths who don't have an Xhorse Key Programmer. This key doesn't have 200 points for MB online calculation, so it has a better price.
Procedure:
Assemble Yellow VVDI BE Key with Key Case.
New key into ignition, no response from dash.
Connect Autel IM608 to JVCI and XP400PRO Programmer.
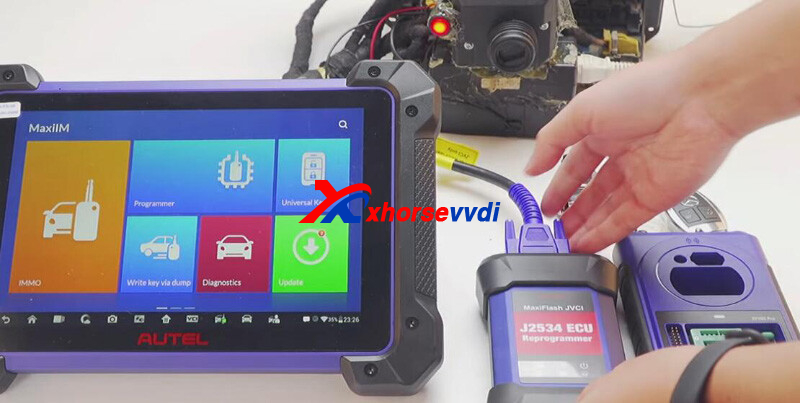
On tablet, select
IMMO>>Меrcedes-Benz>>Automatic selection>>2008-2014>>Hot function>>Add key (guided)>>On bench>>Auto scan
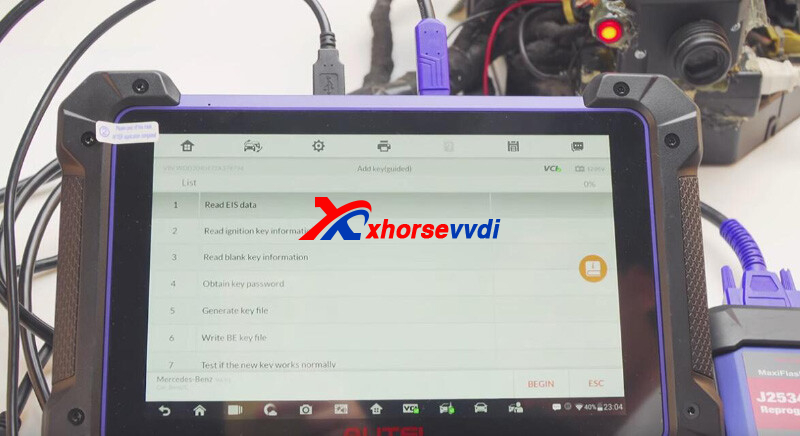
Read EIS data.
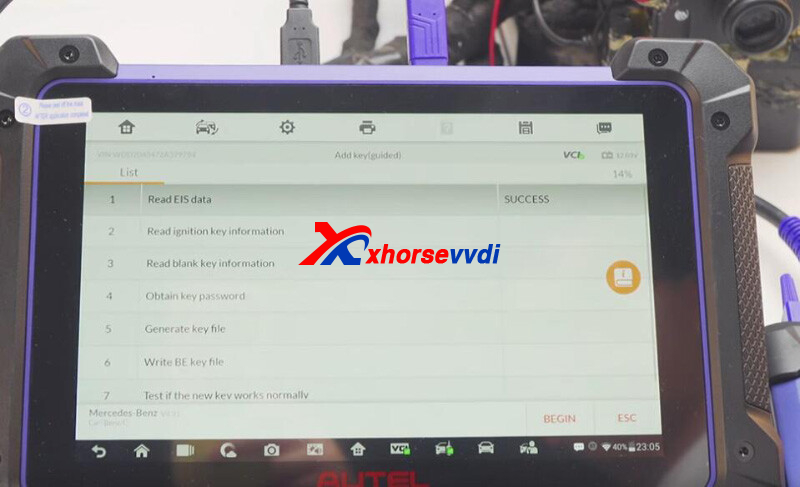
Read ignition key info.

Read blank key info.
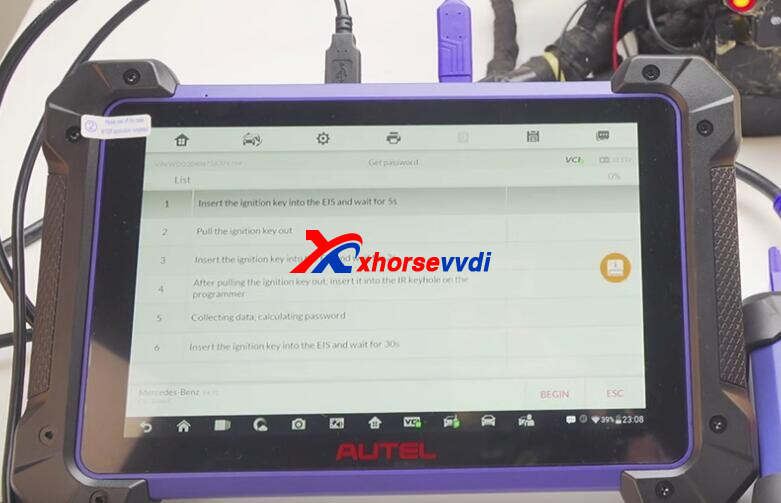
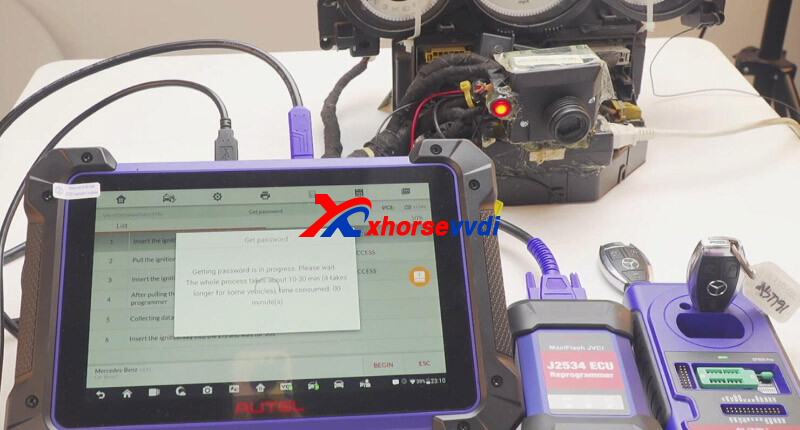
Read password.
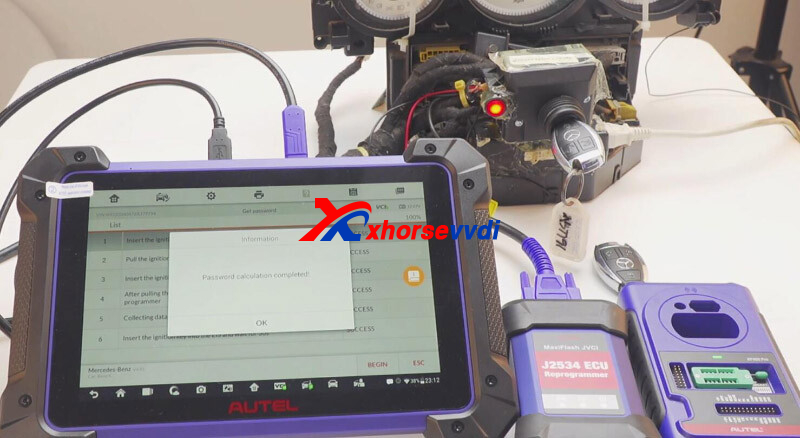
Generate and write key file.

Key Add complete.
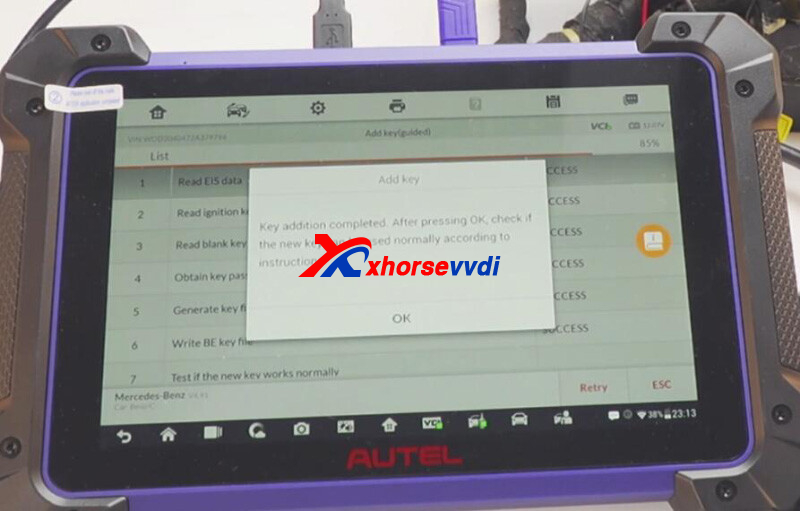
Done!
Posted by: xhorsevvdi at
10:28 AM
| No Comments
| Add Comment
Post contains 126 words, total size 4 kb.
Here we have collected some errors of Dolphin XP005L, also will we show you how to fix them. We will cover:
Part 1. Error Code/ Prompt
1.1 ERROR CODE: 5
1.2 ERROR CODE: 6
1.3 ERROR CODE: 33
1.4 ERROR CODE: 2
1.5 Not support current data
Part 2. Problem
2.1 Key gets stuck in M5 clamp
2.2 Cant connect to phone hotspot
2.3 Cant cut unfinished key
2.4 Cutter cut clamp
Part 3. Maintenance
3.1 Change Screen
Part 1. Error Code/ Prompt
1.1 ERROR CODE: 5 Detected probe
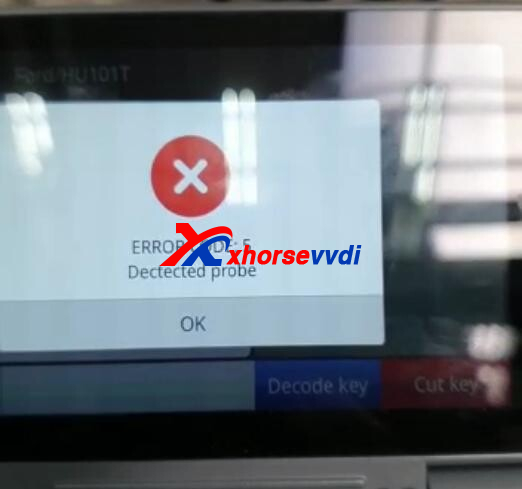
Step 1
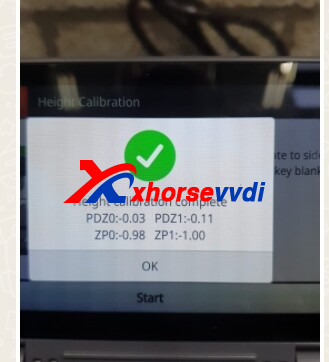
Update firmware to the latest version and do Height calibration and Clamp calibration
Step 2
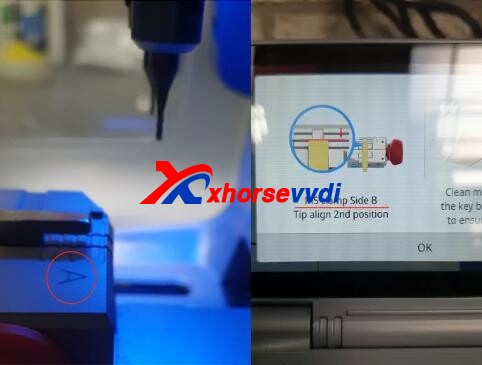
Check blade position.
e.g. Aligned with the 2nd line on the right side of required clamp

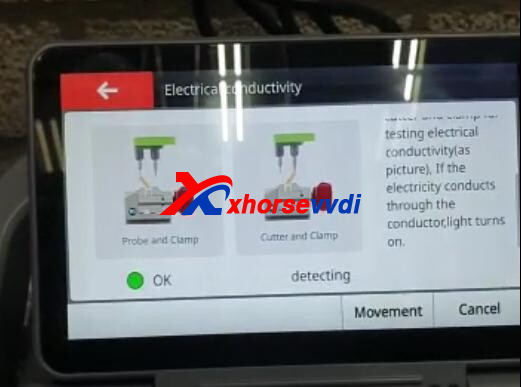
Step 3
If error still remains, do Electrical Conductivity Test, take a video, and send it to us.
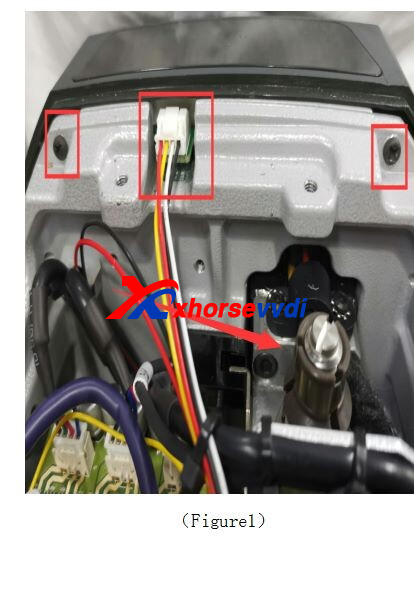
1.2 ERROR CODE: 6 Detected cutter

Solution:
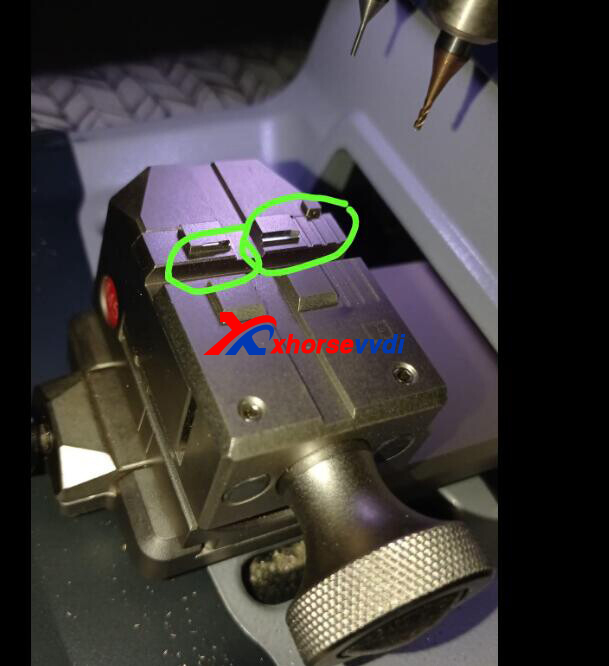
Step 1
Change clamp setting
Path: System>>Machine Parameter>>Cutting setting>>Clamp setting>>M5
After clamp setting changed, here will show "M5" instead of "M1".
Step 2
If clamp still can't move, do X-axis motor test to see if it could return to the left.
If not, remove back cover, check if X-axis cable gets loose.
1.3 ERROR CODE: 33 cutter diameter too large
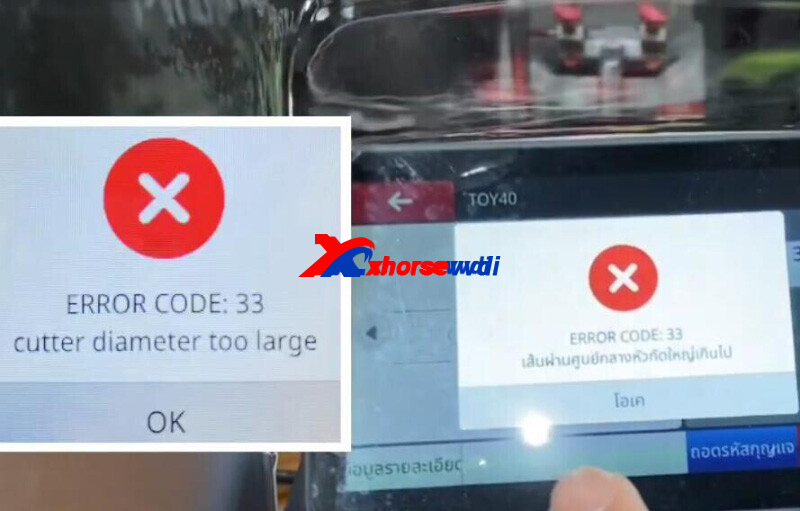
Switch to a cutter with small diameter.
Path: System>>machine parameter>>cutting setting>>cutter diameter 1.5mm
1.4 ERROR CODE: 2 Not detected probe
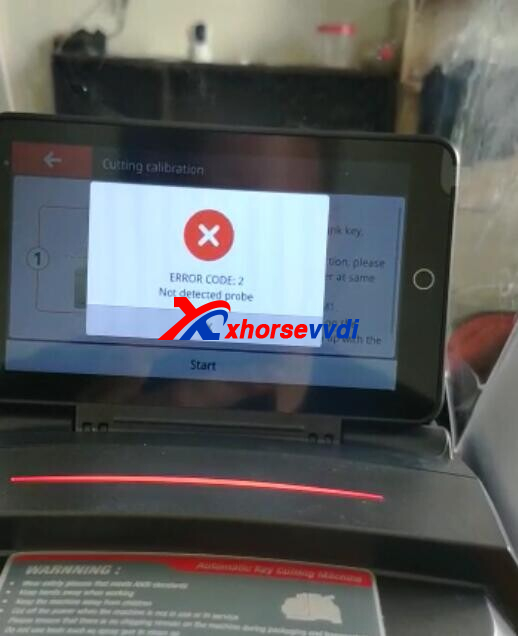
Solution:
Remove back cover of machine, check sensor of Z-axis is broken.
1.5 Not support current data

Update database to the latest version. (if it is the latest version, update again)
If error still remains, machine doesn't support this blade type yet.
e.g. XP005L supports HU49 6/ 7-cut key while doesn’t support HU49 9-cut keys
Part 2. Problem
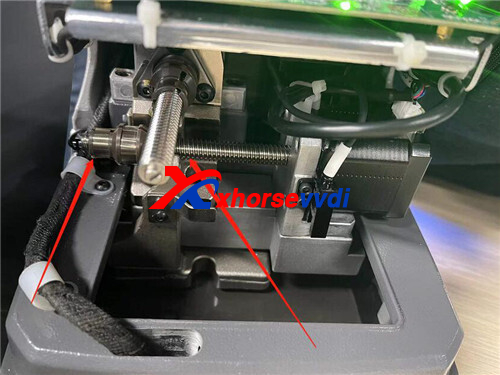
2.1 Key gets stuck in M5 clamp
Reason:
Part of the springs inside the M5 clamp stuck.
Solution:
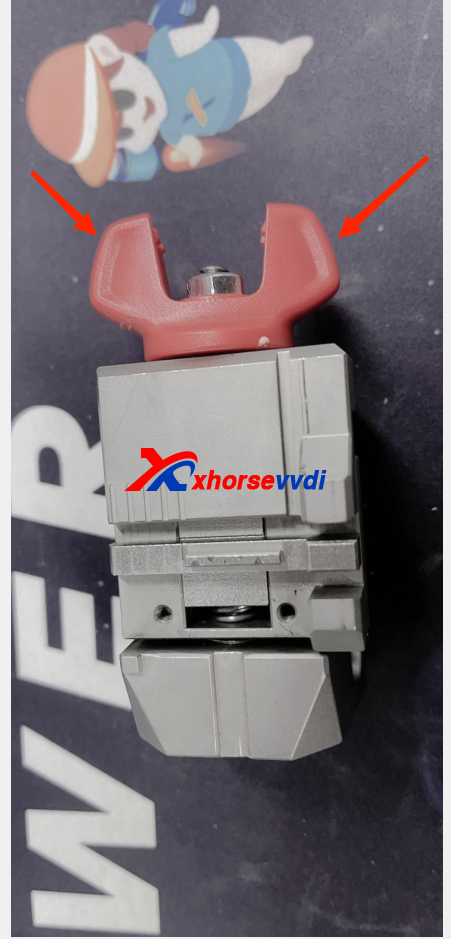
Step 1
Remove the red rubble shell.
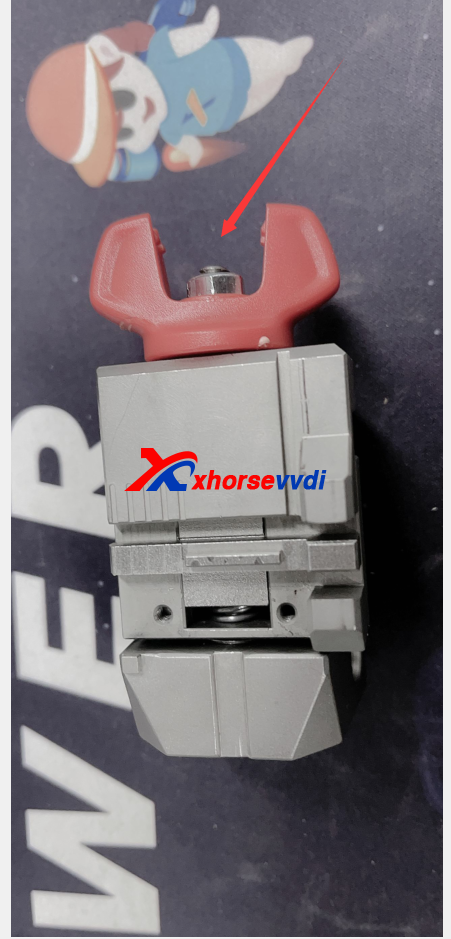
Step 2
Unscrew the middle screw.
Step 3
Unscrew the 4 screws around.
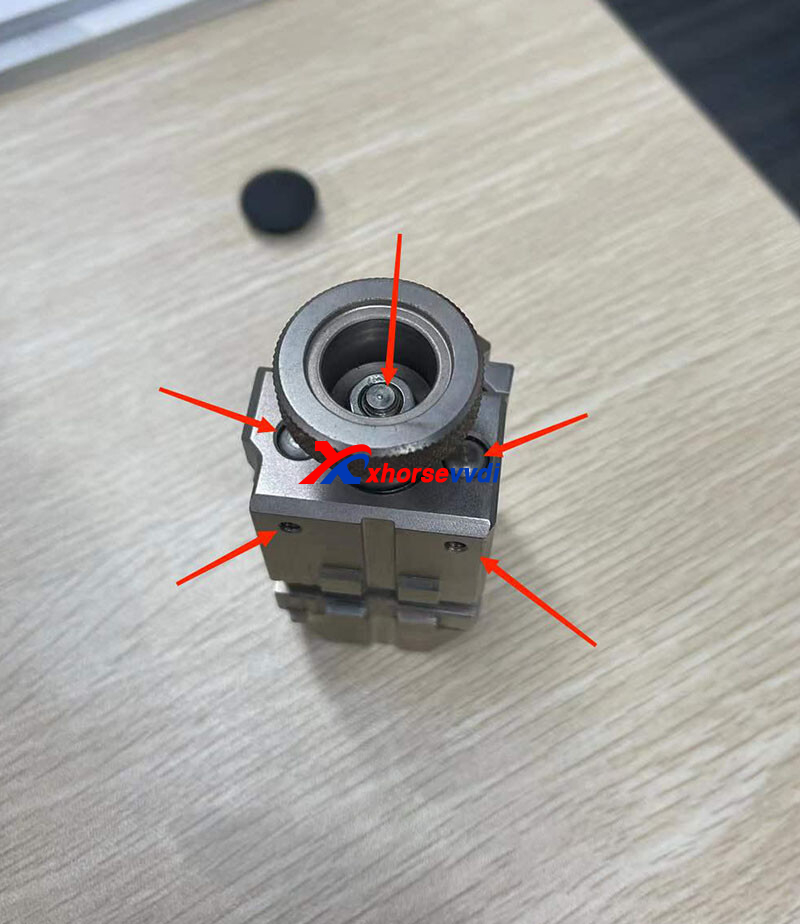
Step 4
Restore the stuck part of the inside spring.
2.2 Cant connect to phone hotspot
Solution: try 2.4GHZ phone hotspot
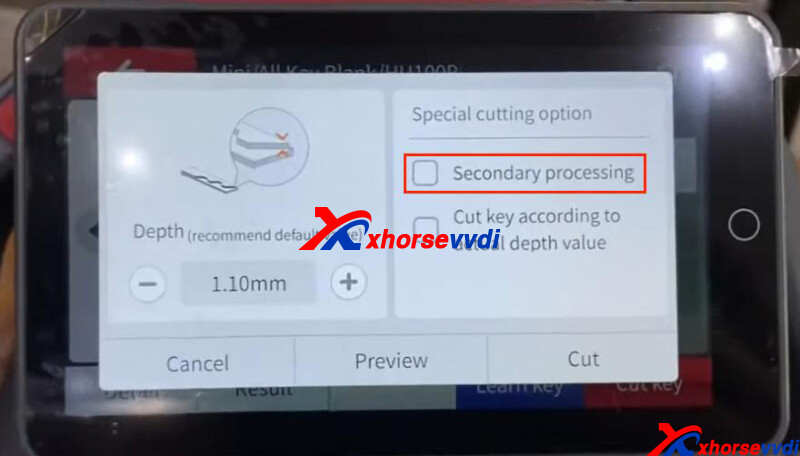
2.3 Cant cut unfinished key
Solution: tick "Secondary processing" before Cut.
2.4 Cutter cut clamp
Reasons:
1.Cutter isn't tightened well and drops during cutting
2.Diameter of installed cutter is different from that on machine setting (Path: System>>Machine Parameter>>Cutting Setting)
Part 3. Maintenance
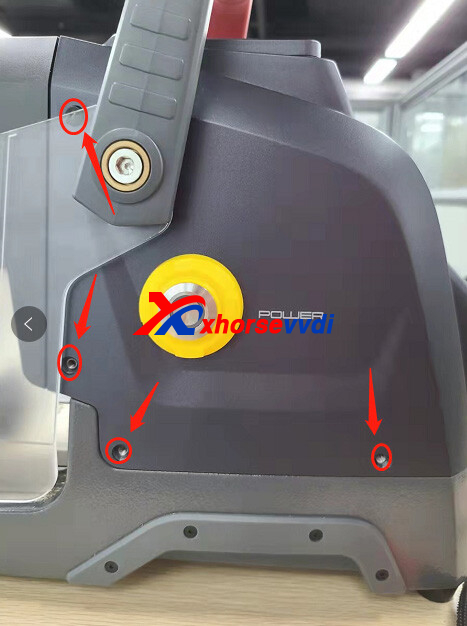
3.1 Change Screen
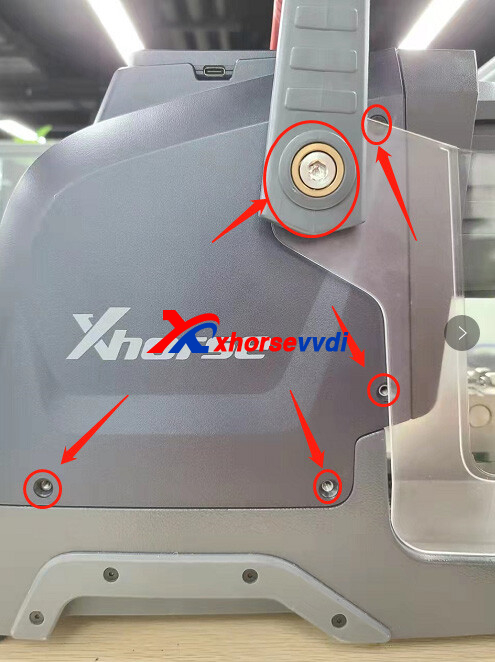
Step 1. Remove back case and handle
Remove all screws marked to take out back case and handle of XP005L.

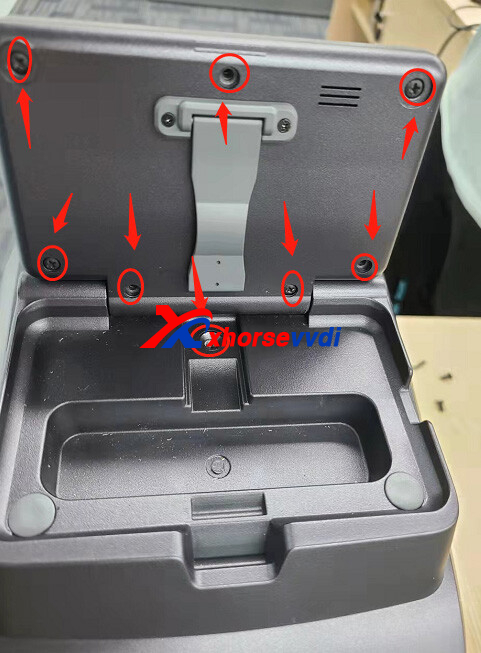
Step 2. Remove back case of screen
Remove all screws marked and unplug 2 cables to take out back case of screen.
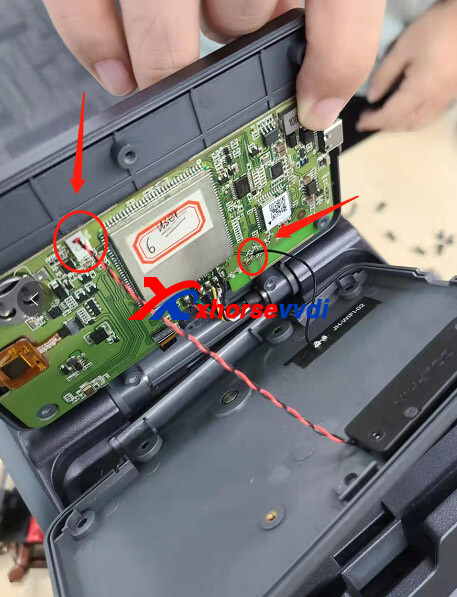
Step 3. Remove screen
1)Push out mount for fixing screen using a flat head screwdriver to remove screen off back case.
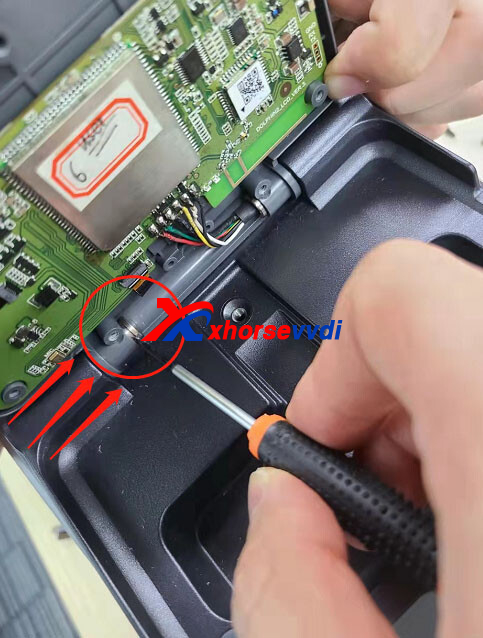
2)Remove plastic pin socket off screen cable using a sharp tweezer to completely remove old screen
Notice: please take a photo of pin socket before removing it, because all pin should be in the exactly same position as before.
Done!
https://www.xhorsevvdi.com/
Posted by: xhorsevvdi at
10:28 AM
| No Comments
| Add Comment
Post contains 499 words, total size 9 kb.
32 queries taking 0.0404 seconds, 131 records returned.
Powered by Minx 1.1.6c-pink.

