


March 30, 2022
When use vvdi key tool plus auto diagnose BMW FEM/BDC car, it shows the result that system status "preprocess", what is the meaning? What are the steps?
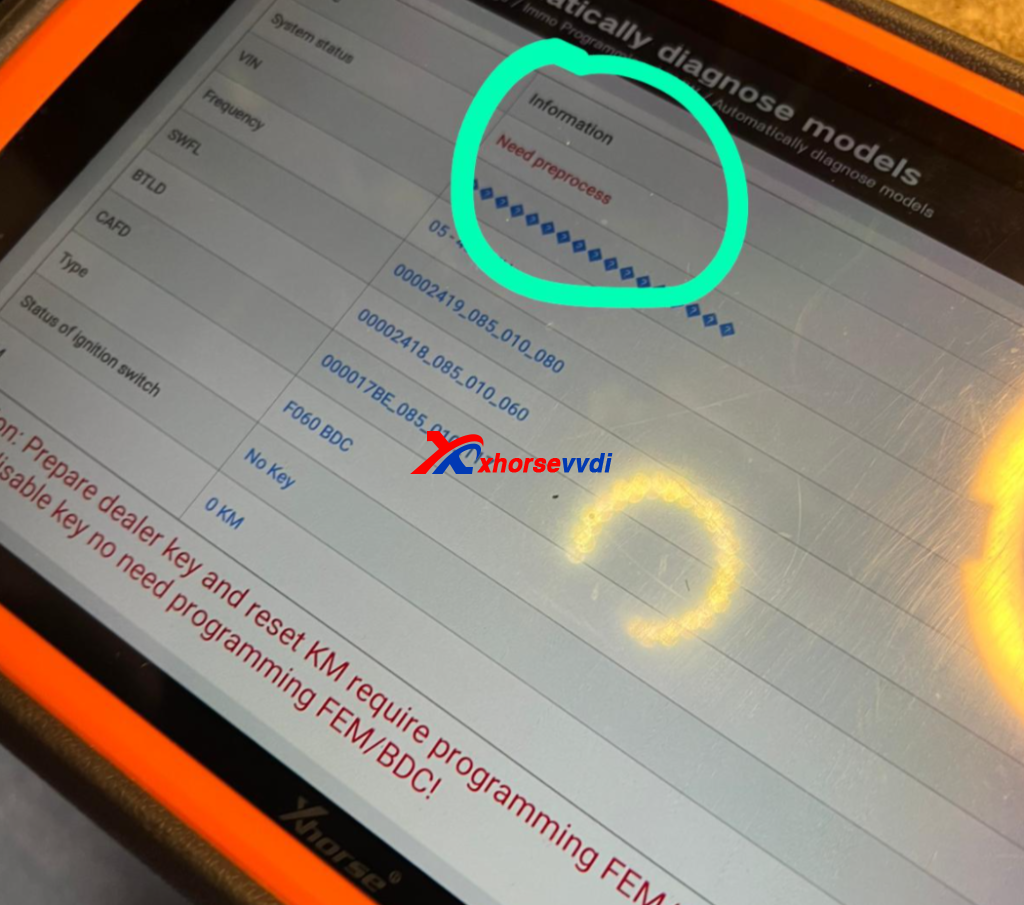
Usually when you do key programming, vvdi key tool plus will display the steps, just operate like the key tool plus display is OK.
1. Read key information
Get all the key ID and status (whether to enable) in the car immo system.
Read the car immo system status, version number and key ID and key status, etc.
If there is an abnormal situation for the vehicle, please continue after correction.
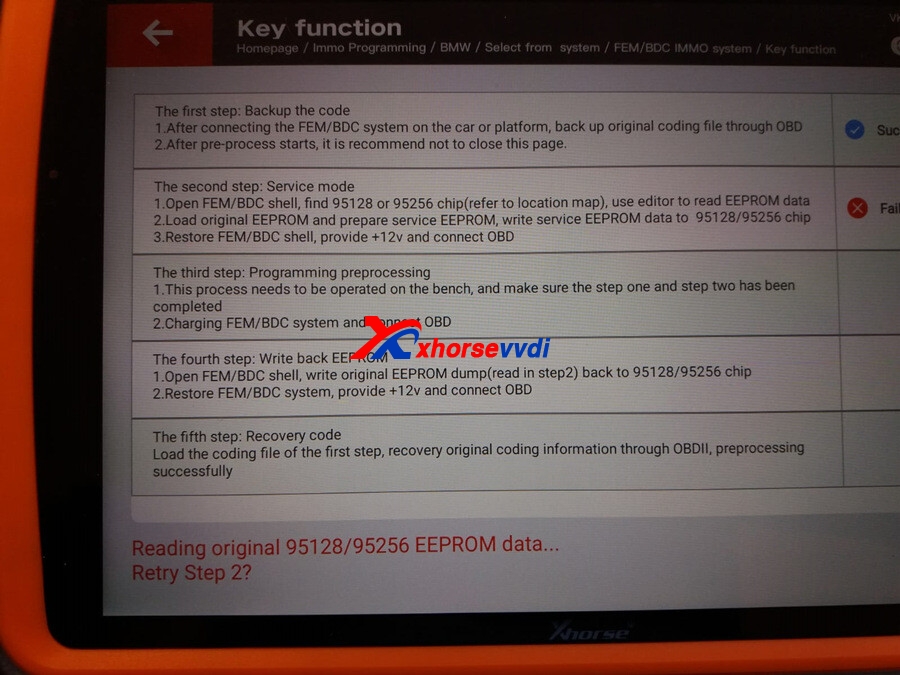
2. Programming FEM/BDC system
This function will automatically back up FEM/BDC system code, the backup code will fail during the preprocessing process, you need to back up manually (it is OK to back up successfully once during the entire vehicle operation process).
Please check if the original key is normal first after preprocess
In this step, it will do preprocessing.
3. Prepare dealer key with ignition switch
This function will use the car ignition switch to generate dealer key.
Ensure that the frequency is consistent before learning keys, if the learning always fails, replace other keys to try.
Source: http://blog.xhorsevvdi.com/what-is-the-preprocess-of-vvdi-key-tool-plus-bmw-fem/
Posted by: xhorsevvdi at
11:04 AM
| No Comments
| Add Comment
Post contains 208 words, total size 3 kb.
What’s the difference of Mercedes-Benz BGA/BE key between CGDI and VVDI? In this article we’ll show you.
CGDI BE/BGA Key vs VVDI BE/BGA Key:
| Key | MB FBS3 BGA KeylessGo Key 315MHZ | CG MB Be Key FBS3 315MHZ/433MHZ | VVDI MB FBS3 BGA KeylessGo Key 315MHZ/433MHZ | VVDI BE Key Pro For Benz XNBZ01EN Remote |
| Image | 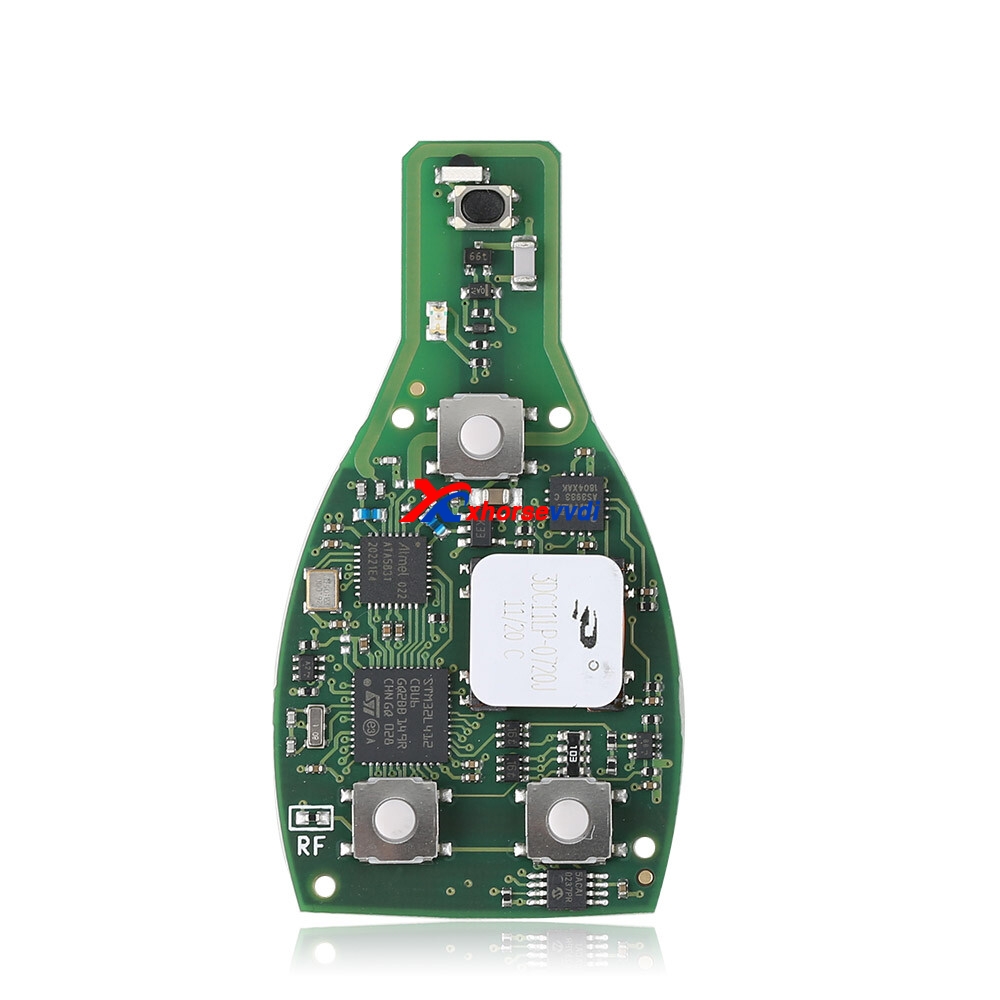 |
 |
 |
 |
| Brand | CGDI | CGDI | Xhorse | Xhorse |
| Smart Key | Support | Semi-smart | Support | Semi-smart |
| Frequency | 433Mhz/315Mhz | 433Mhz/315Mhz | 433Mhz/315Mhz | 433Mhz/315Mhz |
| Switch Frequency | Support(Default Frequency 315Mhz) How to Switch: 1.Manual Switch(remove the resistor) 2.IR Switch(CGDI MB Software) |
Support(Default Frequency 315Mhz) How to Switch: 1.Manual Switch(remove the resistor) 2.IR Switch(CGDI MB Software) |
Support How to Switch: 1.Manual Switch(remove the resistor) 2.IR Switch(VVDI MB Software) |
Support How to Switch: 1.Manual Switch(remove the resistor) 2.IR Switch(VVDI MB Software) |
| Times to Erase | ∞ | ∞ | ∞ | ∞ |
| How to Erase | 1.Manual Reset a. First press the Trunk button b. Then press the LOCK button until the key indicator keeps turning on c. Wait for 1 second, Press the UNLOCK button until the key indicator flashes twice. d. Key has been erased successfully 2.CG Smart Key, Reset via CGDI MB Software |
Support unlimited write&erase data via IR(CGDI MB) | Support unlimited write&erase data via IR(VVDI MB) | Support unlimited write&erase data via IR(VVDI MB) |
| Support Model | S-Class(W221) S-Class(W216) ML-Class(W164) R-Class(W251) ML-Class(W166) GL-Class(W164) (Generally FBS3 2008.12-) |
S-Class(W221) S Class(W216) ML-Class(W164) R-Class(W251) ML-Class(W166) GL-Class(W164) (Generally FBS3 2009-) |
C-Class(W204,W207) E-Class(W212) R-Class(W251) S-Class(W221,W216) CL-Class(W216) CLC-Class(W204) CLE-Class(W207) CLK-Class(W207) GL-Class(X164,X166) GLC-Class(X204) GLE-Class(W164,W166) GLK-Class(X204) ML-Class(W164,W166) (Generally FBS3 2010-) |
S-Class(W221) S Class(W216) ML-Class(W164) R-Class(W251) ML-Class(W166) GL-Class(W164) (Generally FBS3 2009-) |
| Support Device | Benz Key Programmers | Benz Key Programmers | VVDI MB/CGDI MB... | VVDI MB/CGDI MB... |
| Support Type | BGA -76/78 | BE | BGA -76/78 | BE |
| Update | Support | / | Support | / |
Source: http://blog.xhorsevvdi.com/mercedes-benz-bga-be-key-comparison-cgdi-vs-vvdi/
Posted by: xhorsevvdi at
11:02 AM
| No Comments
| Add Comment
Post contains 287 words, total size 6 kb.
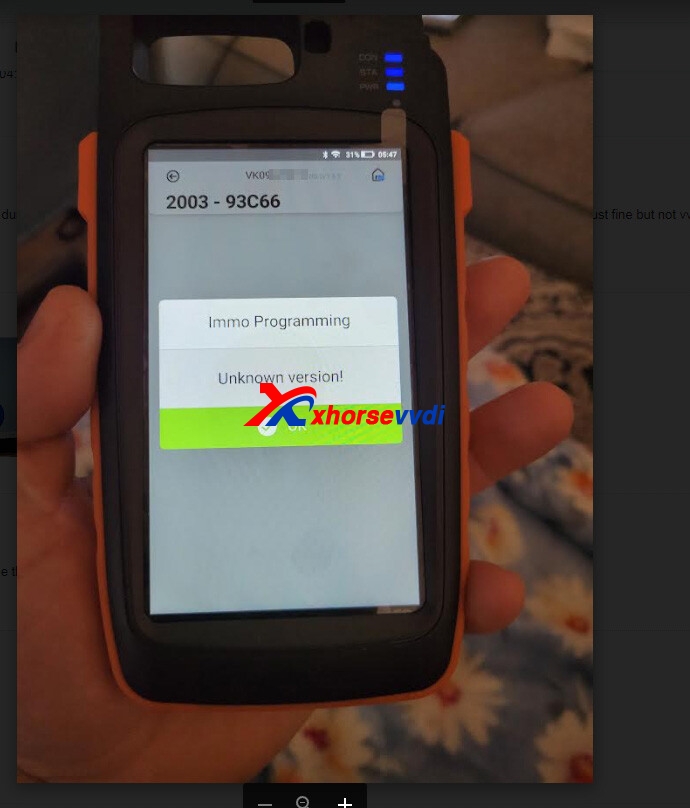
Question:
When I go to load dump file I saved from saab steering wheel lock chip on to vvdi2to make key it says file not supported. Same prompt on Key Tool Max.
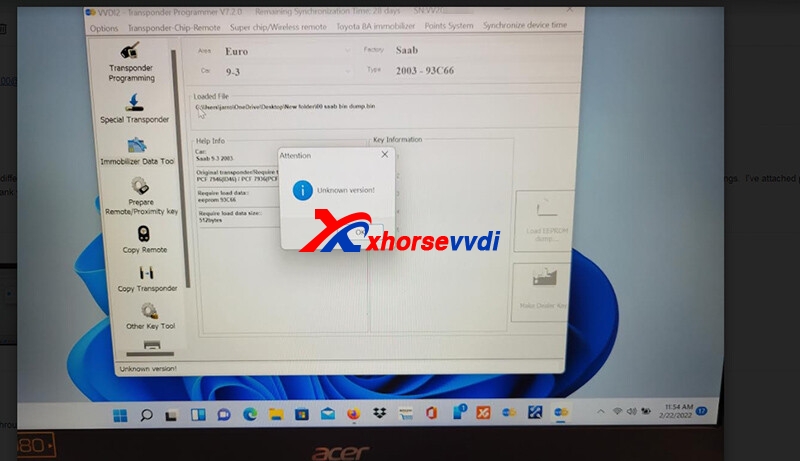
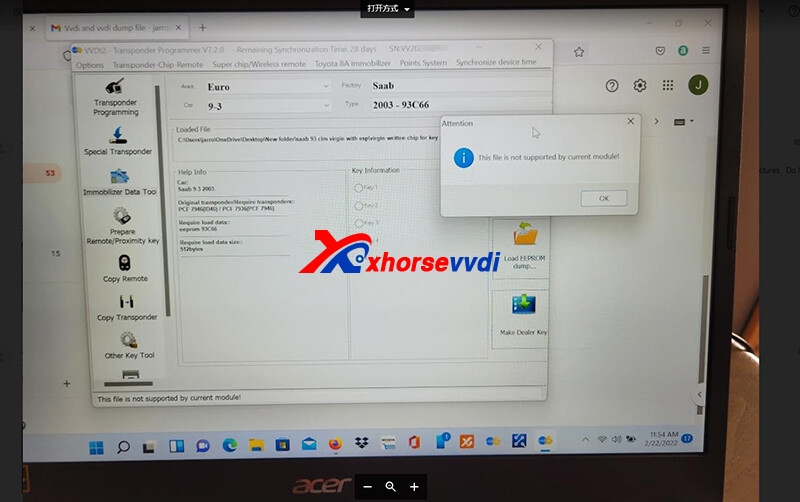
Then Xhorsevvdiengineer asks for the dump file to check.
And here is the
Reason:
The key info inside the data file is blank, and probably the file comes from a new immo box.
Tips about Write via Dump:
- Write via Dump requires the immo data from the car to be programmed, so the data could be written into the new key.
- Among Xhorse devices, VVDI Max, Key Tool Plus, and VVDI2 Programmer support Write via Dump.
Source: http://blog.xhorsevvdi.com/fixed-vvdi2-unknown-version-error-when-loading-dump-file/
Posted by: xhorsevvdi at
11:02 AM
| No Comments
| Add Comment
Post contains 118 words, total size 2 kb.
Here we share a successful case of 2012 Volkswagen Passat NEC Cluster Chip Addingby Xhorse VVDI2.
Connect NEC Cluster to VVDI2via OBD cable, and enter VW page.
Select
Key Learn>>4th Immobilizer system - VW/Skoda/Seat>>Instrument with NEC+ 24C64 (2013-)
Here VVDI2 will give us the steps and prompt the dashboard will be dark before "reset instrumentâ€.
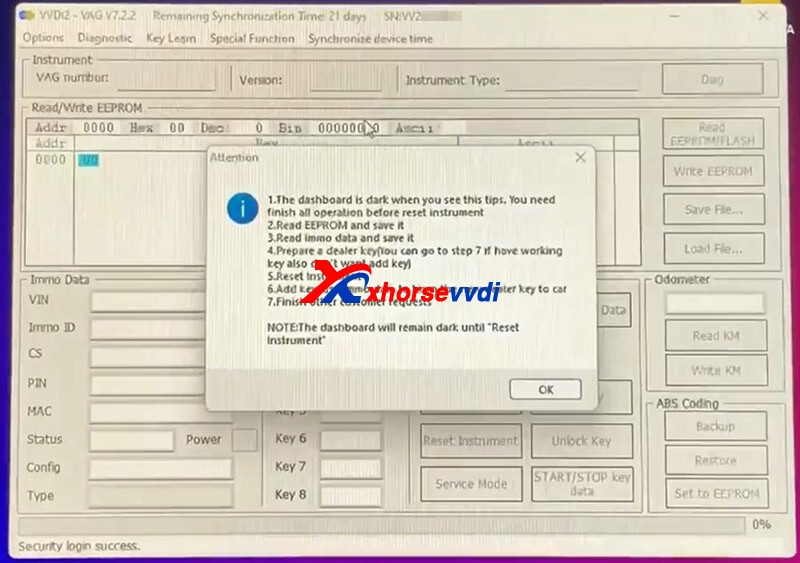

Click on "OKâ€, and then it will read EEPROM data automatically.
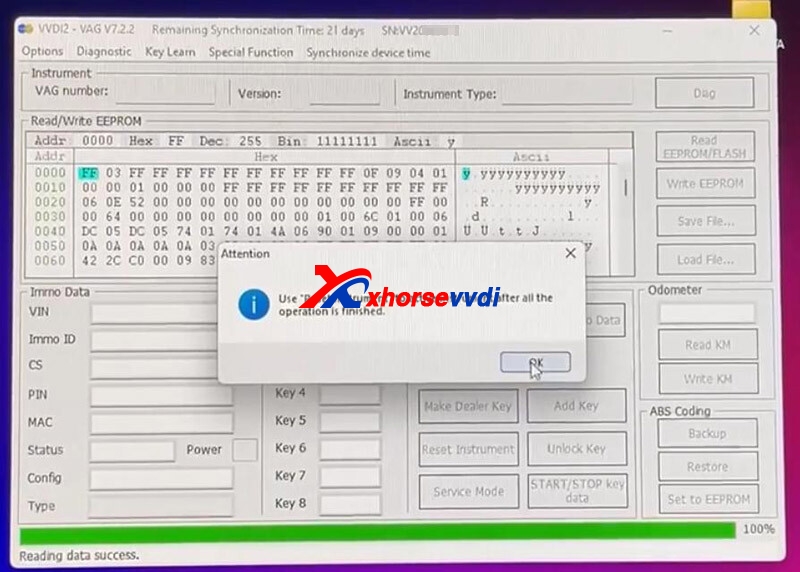
Click on "Save Fileâ€to save EEPROM data file.
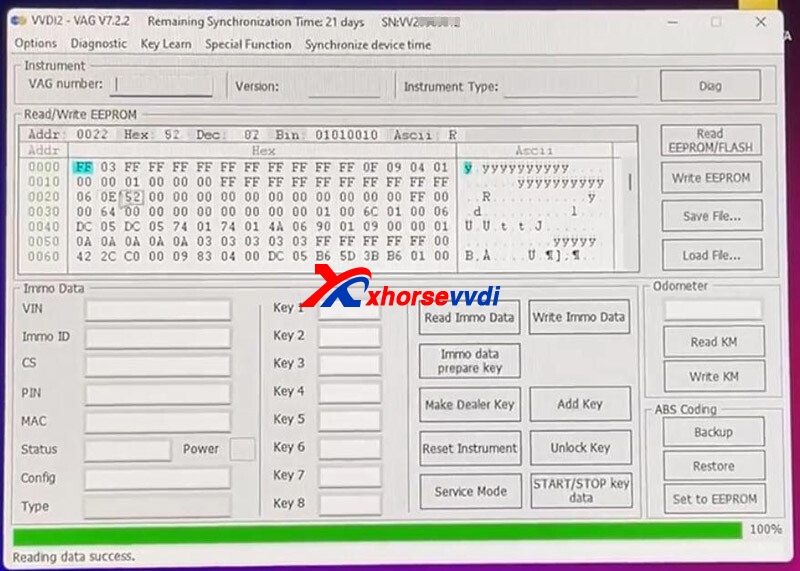
Then Read and Save Immo Data.
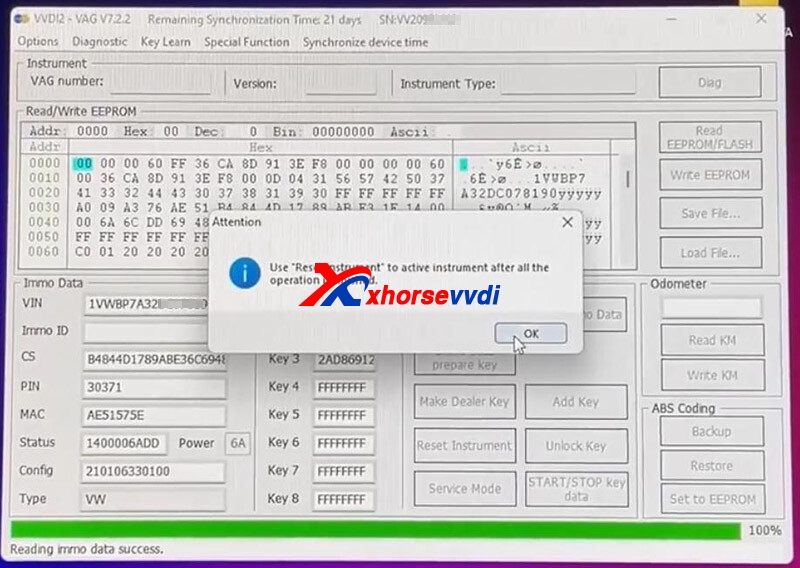
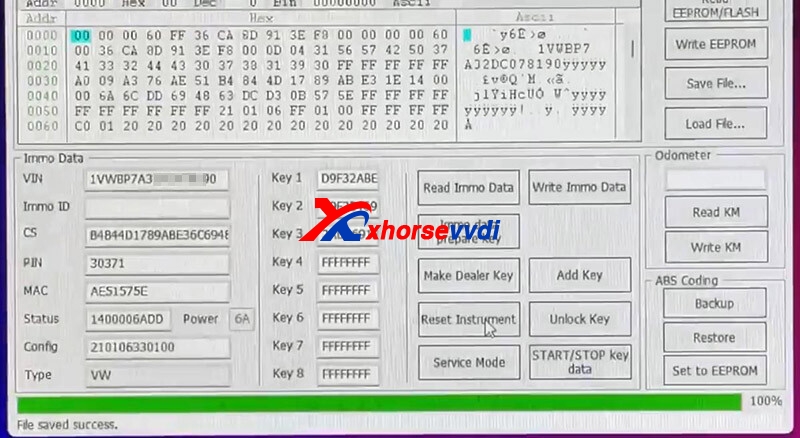
Since we just test it, don’t want to add a key, so we click on "Reset Instrumentâ€.
The cluster wakes up.
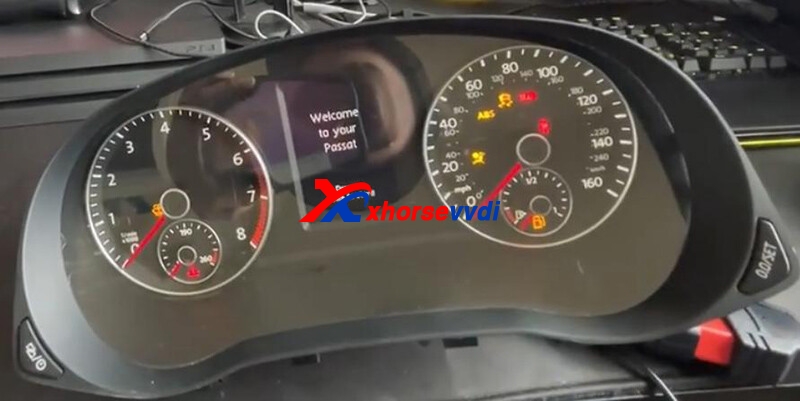
That;s how we add 2012 VW Passat NEC Cluster chip by VVDI2 Programmer.
Source: http://blog.xhorsevvdi.com/xhorse-vvdi2-add-vw-passat-2012-nec-cluster-chip-test-ok/
Posted by: xhorsevvdi at
11:01 AM
| No Comments
| Add Comment
Post contains 126 words, total size 3 kb.
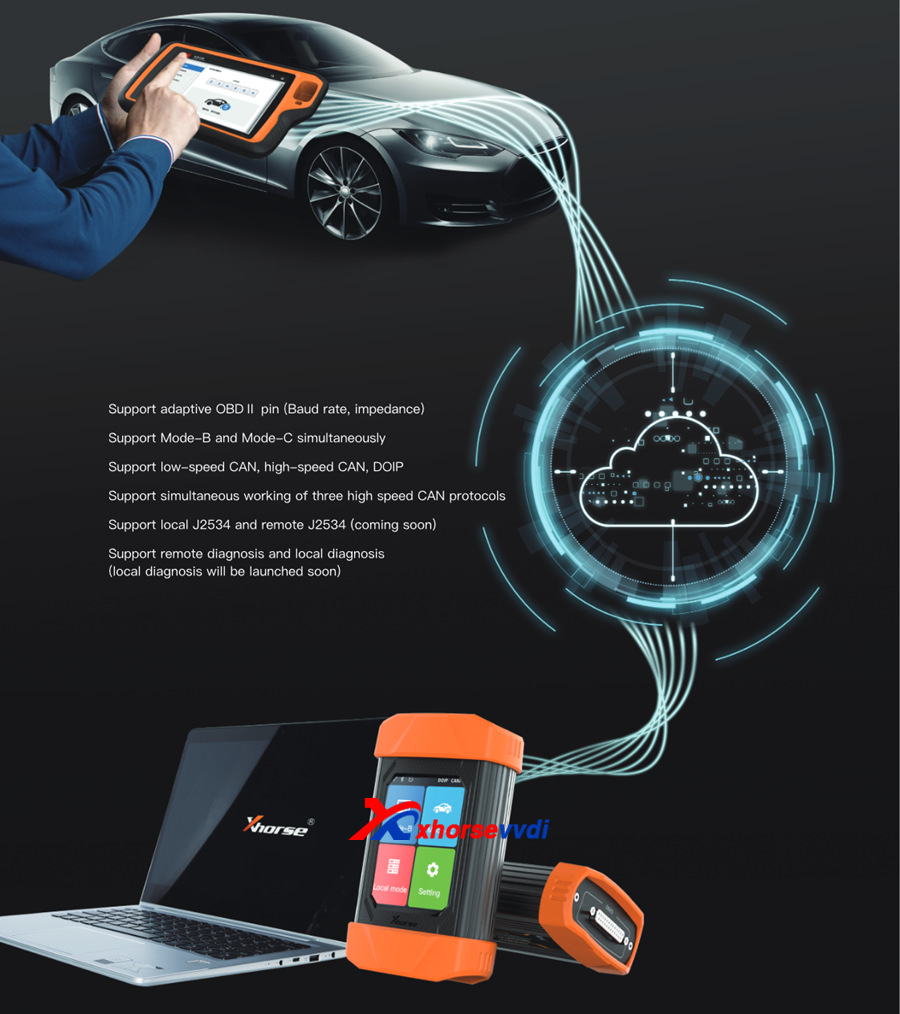
Xhorse Cloud Smart Mode B and Mode C 2 in 1. Support OBDI pin adaptive (baud rate, impedance), support B/C mode, support low-speed CAN, high-speed CAN, CANFD, DOIP.
Here is the Xhorse Cloud Smart Preview
Cloud Smart Key Features:
Support CAN2.0, J2534 DOIP. CANFD
Identify CAN2.0 type
Detect CAN2.0 Baud Rate
Support Mode-B and Mode-C Simultaneously
Car Voltage Replay(Mode-B)
Smart APP Control

Xhorse VVDI Cloud Smart Function:
Support adaptive OBD ll pin(Baud rate,impedance)
Support Mode-B and Mode-C simultaneously
Support low-speed CAN,high-speed CAN,DOIP
Support simultaneous working of three high speed CAN protocols
Support local J2534 and remote J2534(coming soon)
Support remote diagnosis and local diagnosis
(local diagnosis will be launched soon)
More info, we will keep updating:
https://www.xhorsevvdi.com/wholesale/xhorse-cloud-smart.html
Posted by: xhorsevvdi at
10:59 AM
| No Comments
| Add Comment
Post contains 127 words, total size 2 kb.
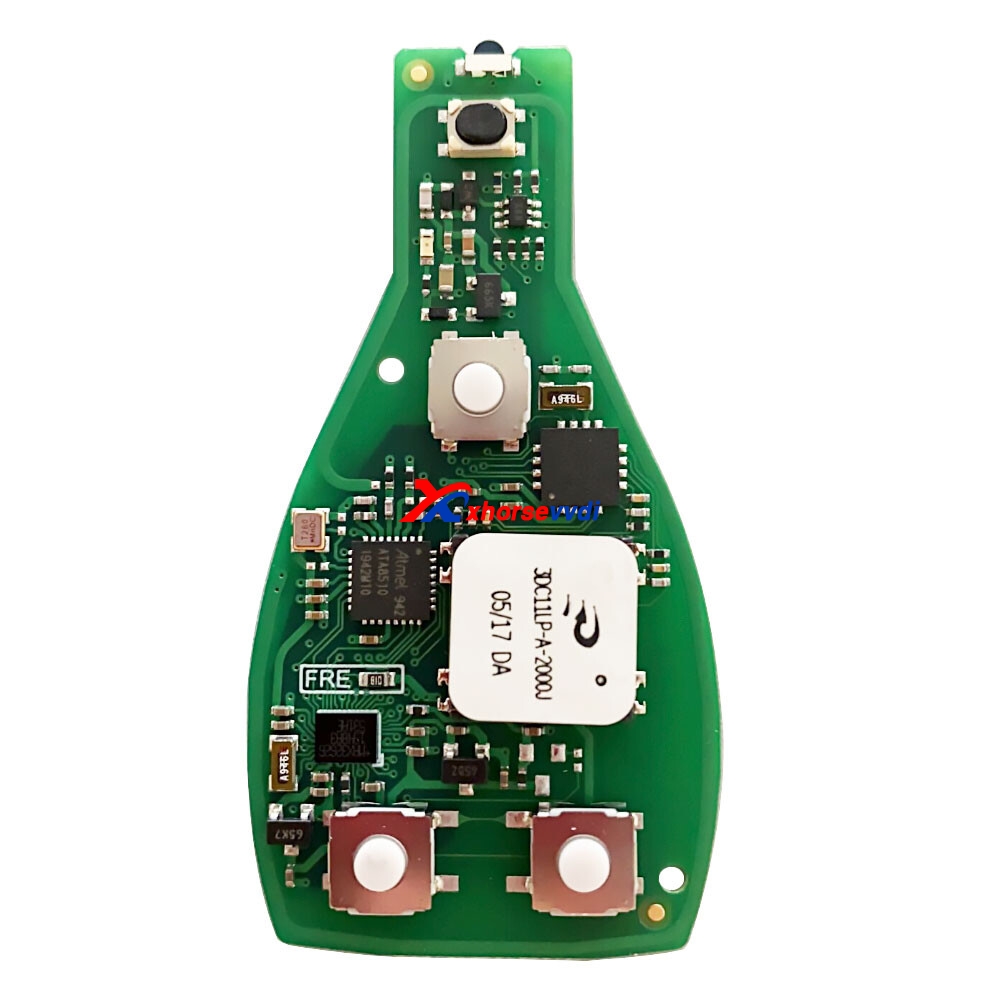
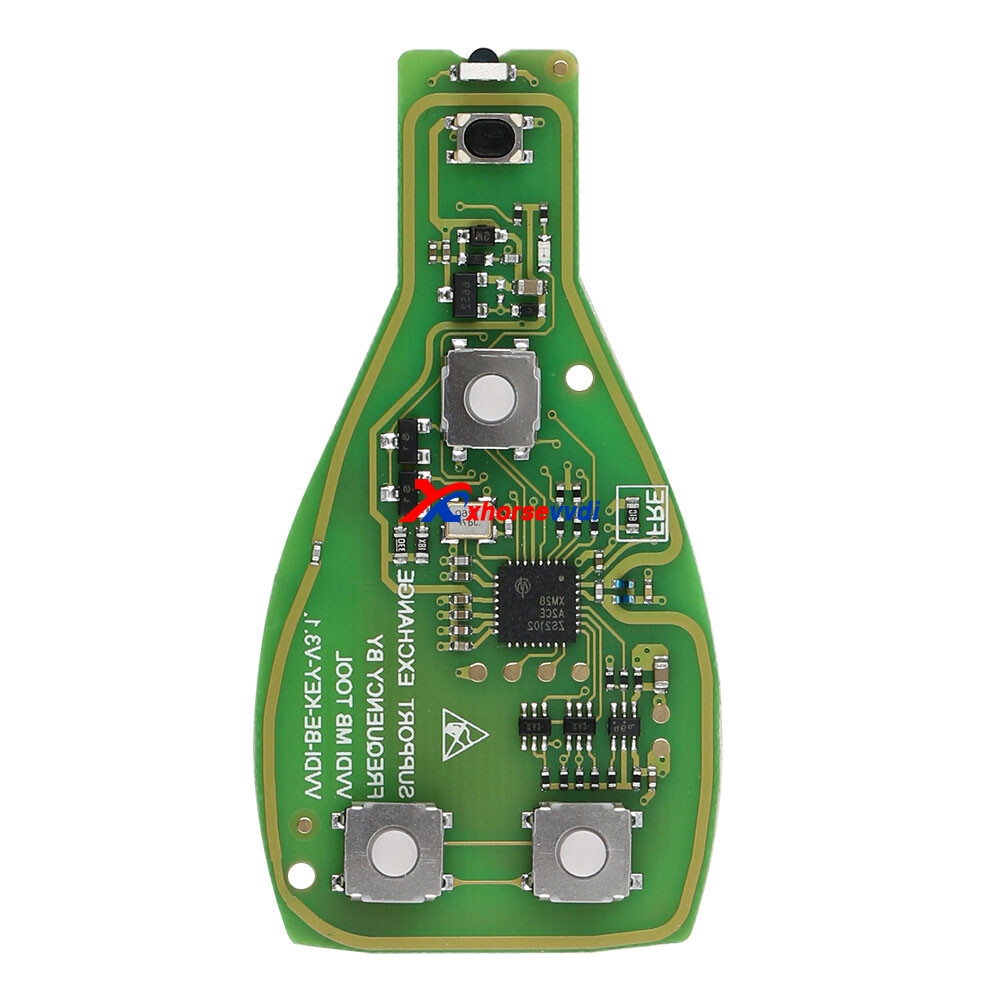
Xhorse VVDI smart remote keys are keeping updating and developing, recent time relese Xhorse XSKF30EN Smart Key Knife Style 4 Buttons. And in the process of updating, a little part of keys can be only generated via old types keys of smart keys.
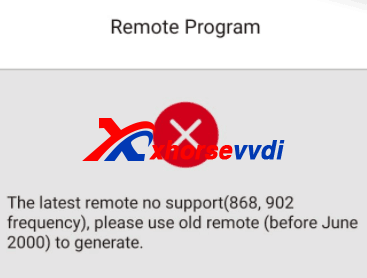
And we received feedback that when generate the proxy key, got the error "The latest remote no support (868.902 frequency), please use old remote (before June 2000) to generate."
The error pic is like the following pics:

And this blog we will introduce how to distinguish old and new type of vvdi smart remote key
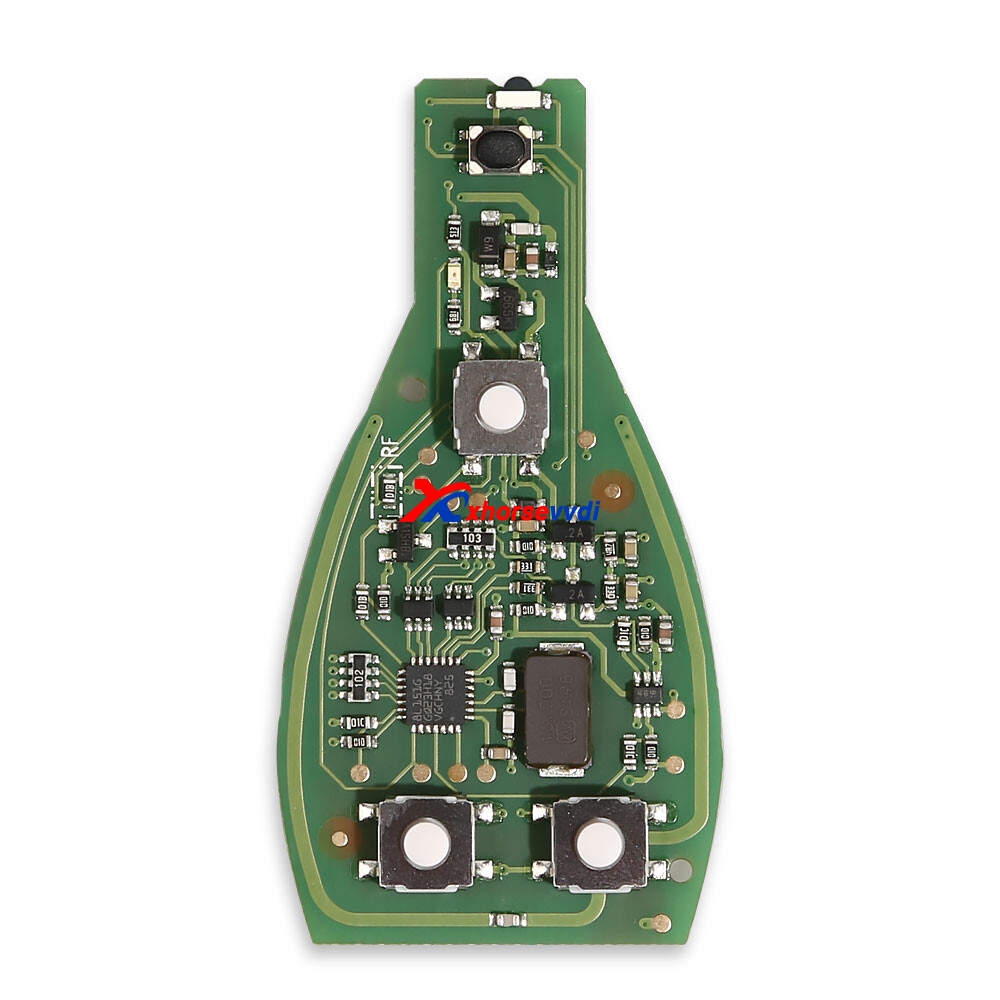
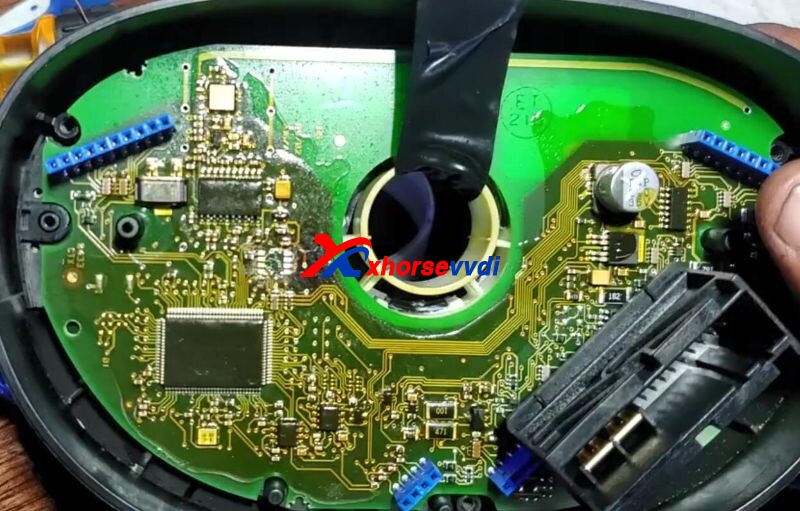
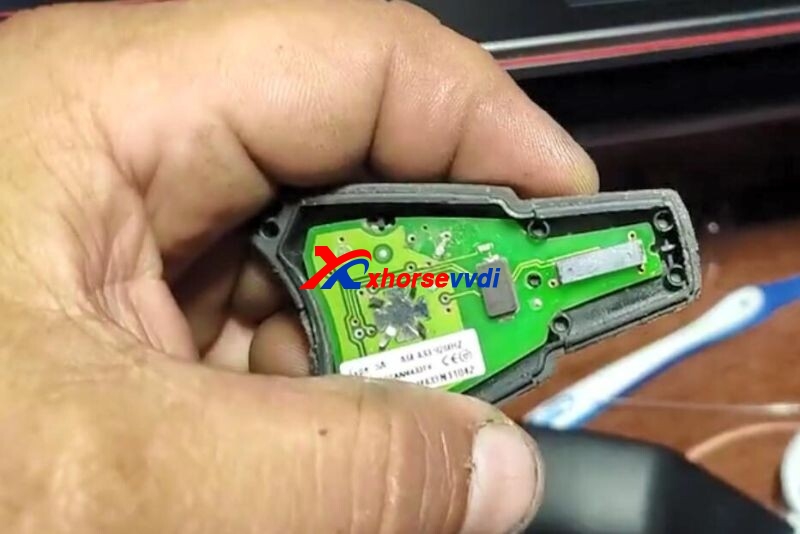
1. View the circuit board of the smart remote key
The new red frame position chip has pins on both sides, and the old one has pins on 4 sides
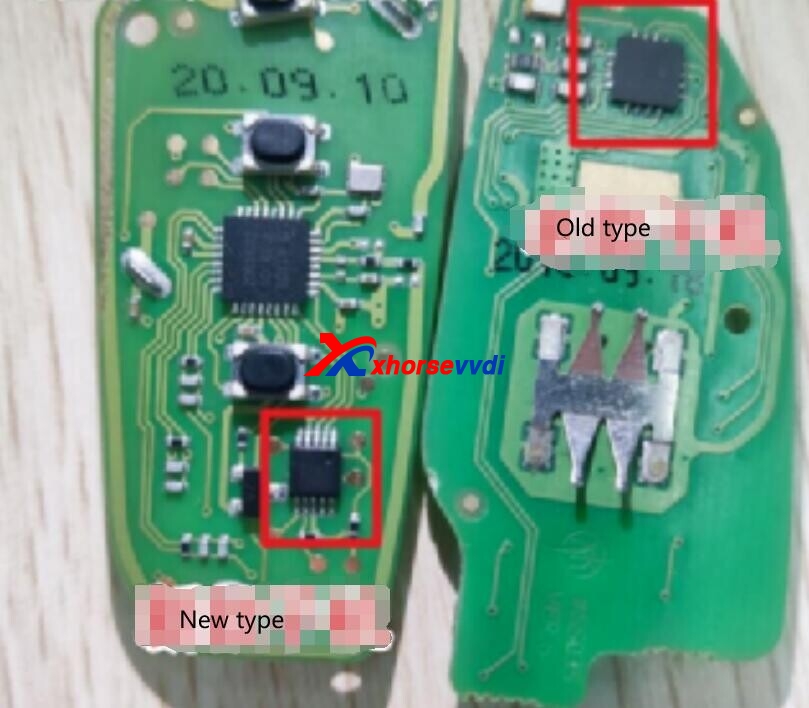
There is also a type with pins on both sides, but it is also an old type that the component is with 6 pins.

Here is the photo shared from customer
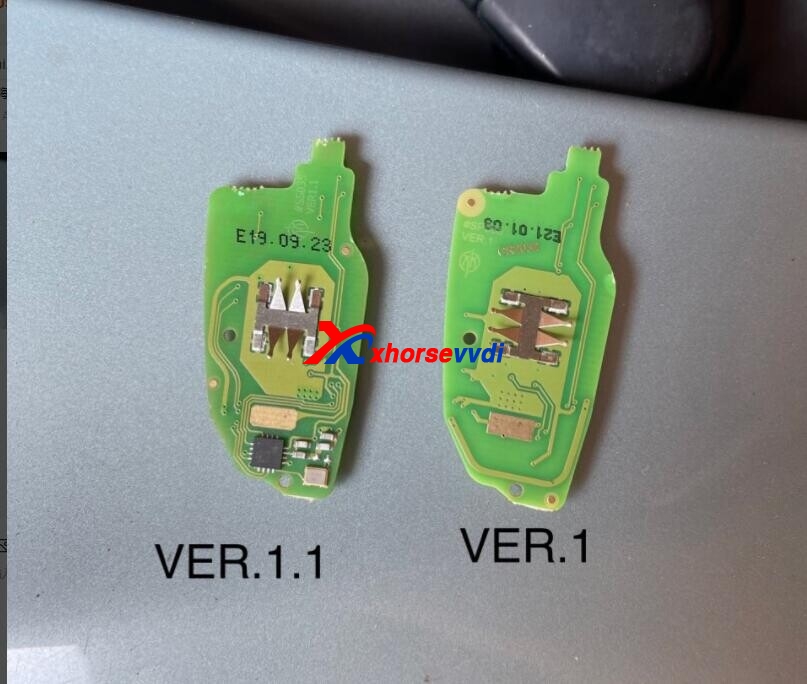

The old type and new type vvdi smart key difference is:
The new model does not support 868.902, the others are the same.
If you feel that it is troublesome to disassemble the key shell and take out the circuit board, you can also use key tool series to check. Here we will take vvdi key tool plus as an example, vvdi key tool, vvdi mini, key tool max also can be OK to check.
2. Enter key tool plus>>special function
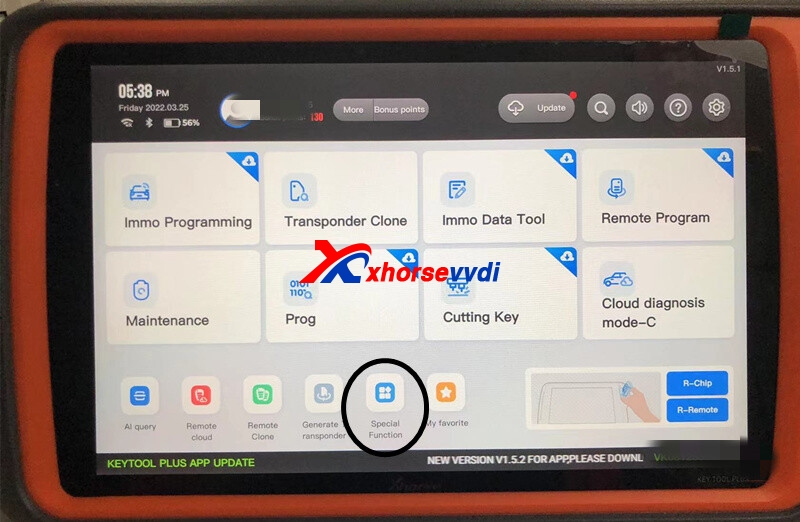
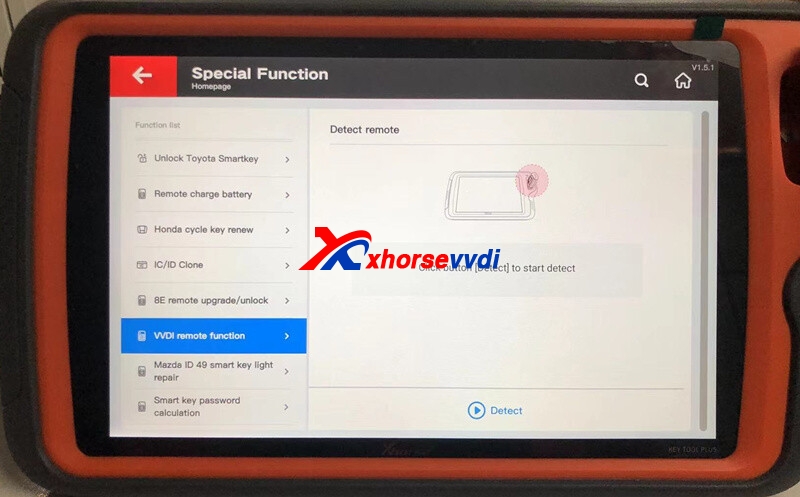
VVDI Remote Function
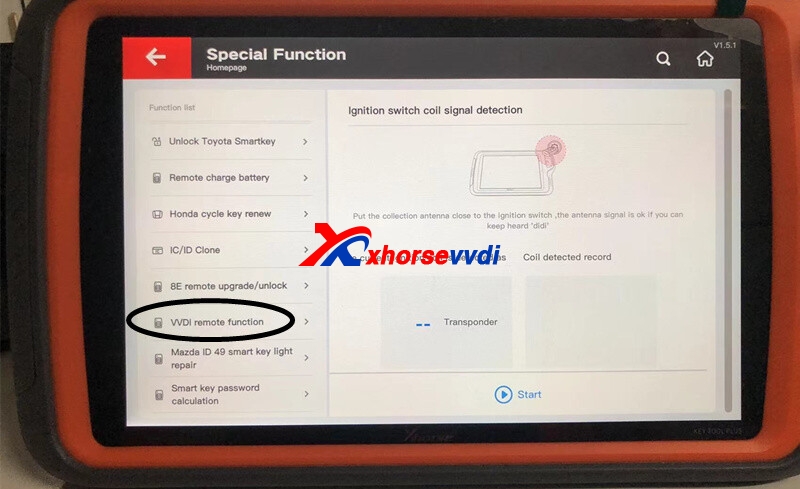
Detect remote
Put the smart remote into coil, then press detect.
And the result version will tell you how to distinguish:
The version lower than 2.0 is the old smart key, and version 2.0 or above is the new type VVDI smart key.
http://blog.xhorsevvdi.com/how-to-distinguish-xhorse-vvdi-smart-remote-old-type-and-new-type/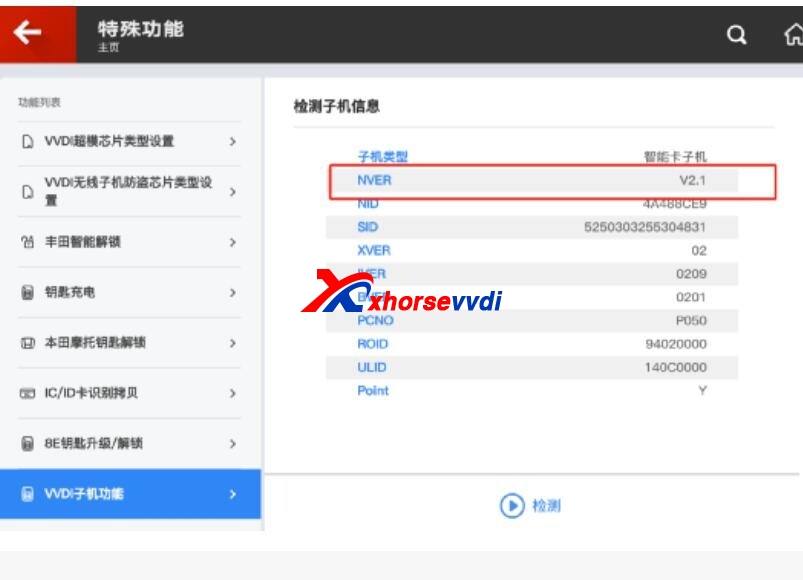
Source: http://blog.xhorsevvdi.com/how-to-distinguish-xhorse-vvdi-smart-remote-old-type-and-new-type/
Posted by: xhorsevvdi at
10:58 AM
| No Comments
| Add Comment
Post contains 297 words, total size 6 kb.
March 25, 2022
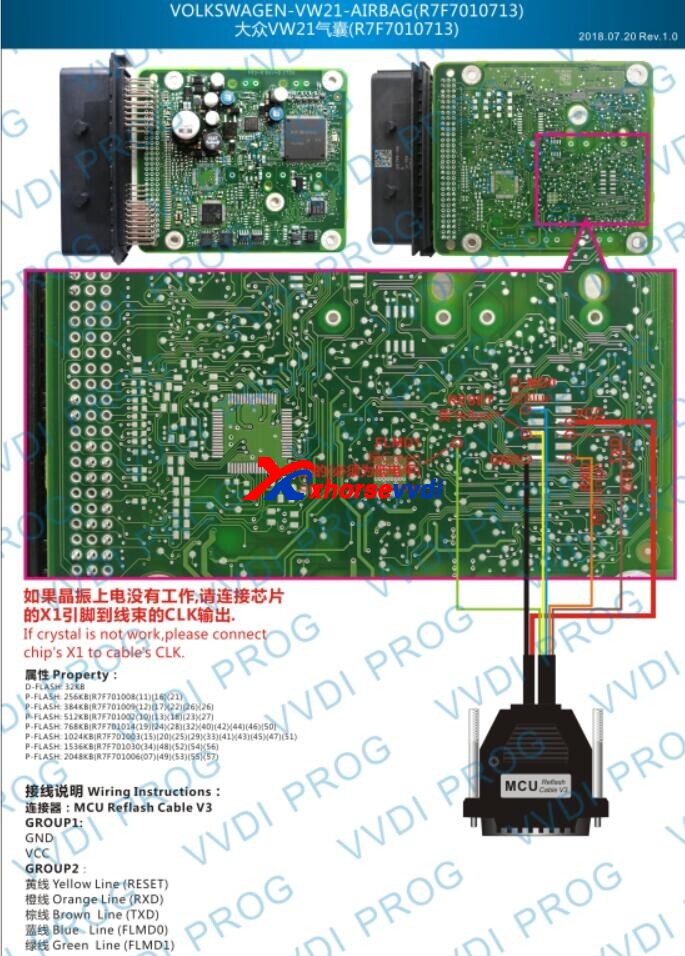
VVDI PROG V5.1.3 Software is released on Mar. 25th 2022. Newly add VW12(TC224-16F), VW22(TC224-16F), VW30(TC27X), VW31(TC27X) options in <7-AIRBAG>->

1. Free Download V5.1.3 VVDI PROG Software (Password:123456)
https://mega.nz/file/UcUmWb6S#PvSiEr20x5nHajzRphCNUtSNqXqhbwrYkBnxLKAKvj0
2. V5.1.3 VVDI Prog Update Info (2022-03-25)
* This version DON't need update firmware
+ Add TC275 option in <2-MCU>->
+ Add PIC16F882, PIC16F883, PIC16F884, PIC16F886, PIC16F887 options in <2-MCU>->
+ Add R5F61725S, R5F61726S, R5F61727S, R5F61797S options in <2-MCU>->
+ Add R5F212L2SD, R5F212L2SN, R5F212L4SD, R5F212L4SN options in <2-MCU>->
+ Add VW12(TC224-16F), VW22(TC224-16F), VW30(TC27X), VW31(TC27X) options in <7-AIRBAG>->
Posted by: xhorsevvdi at
10:36 AM
| No Comments
| Add Comment
Post contains 92 words, total size 2 kb.
Question:
To get the password to a W215 1D69J EIS with VVDI MB,
Try like this, put volts to pin16 and land to others and couldn't get the password.
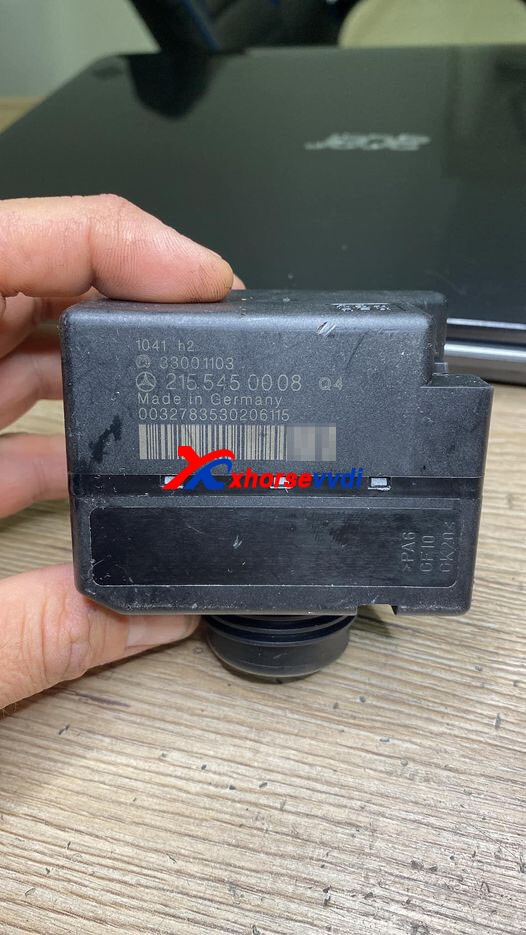
Here Xhorsevvdi engineers raise the
Solution:
Read the MCU, load EIS file into VVDI MB Tool to get the password. (Here we use VVDI PROG Programmer to read the MCU, and you can also use Mini Prog or Key Tool Plus to do it).
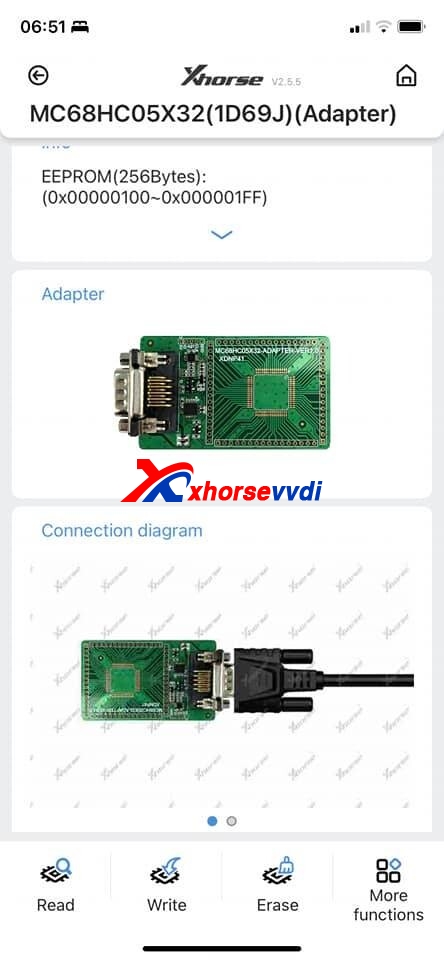
Step 1.
Desolder the chip on EIS and solder it on the MC68HC05X32 Adapter.
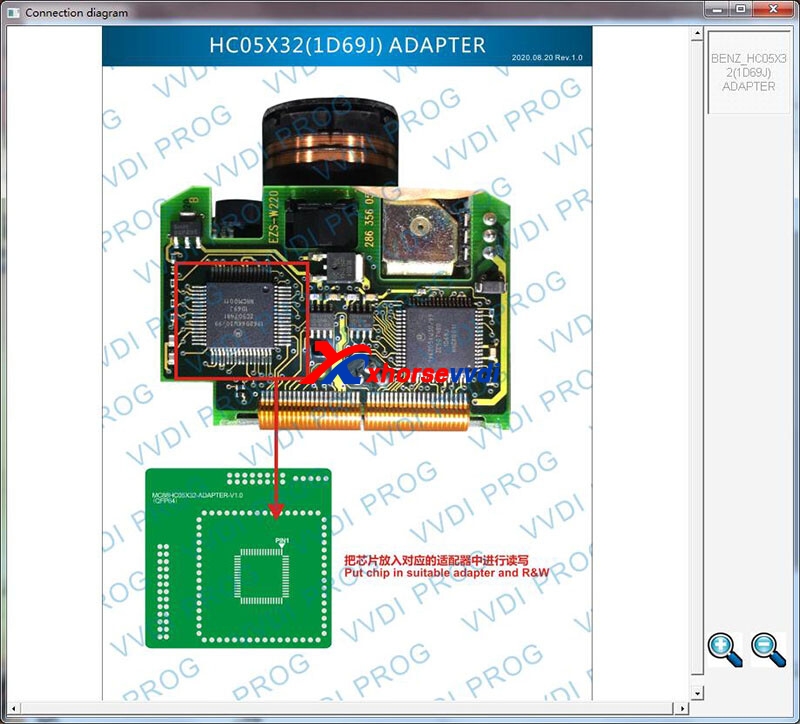
Step 2.
Read EIS data by VVDI PROG with the adapter

Step 3.
Load EIS data file into Xhorse VVDI MBto get the password.
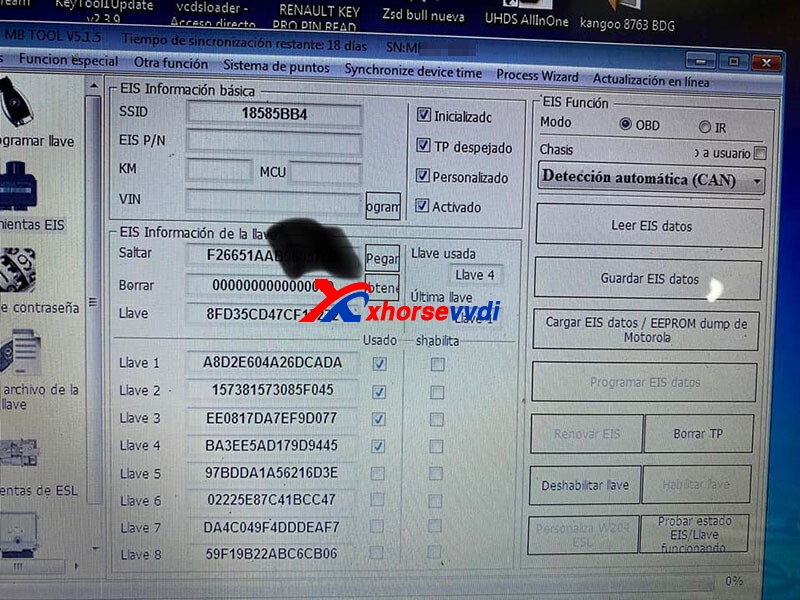
Step 4.
Then we can prepare a dealer key by VVDI MB.
Source: http://blog.xhorsevvdi.com/can-vvdi-mb-get-mercedes-w215-password-from-eis/
Posted by: xhorsevvdi at
10:35 AM
| No Comments
| Add Comment
Post contains 136 words, total size 3 kb.
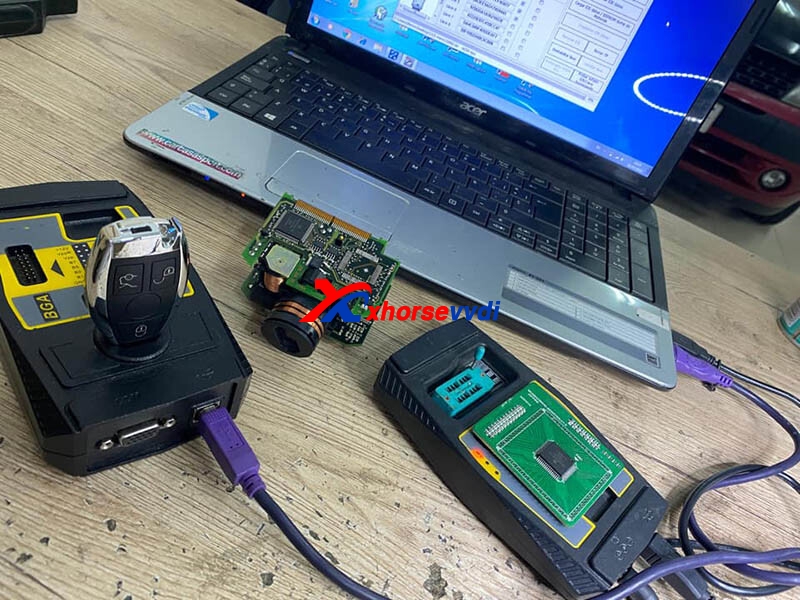
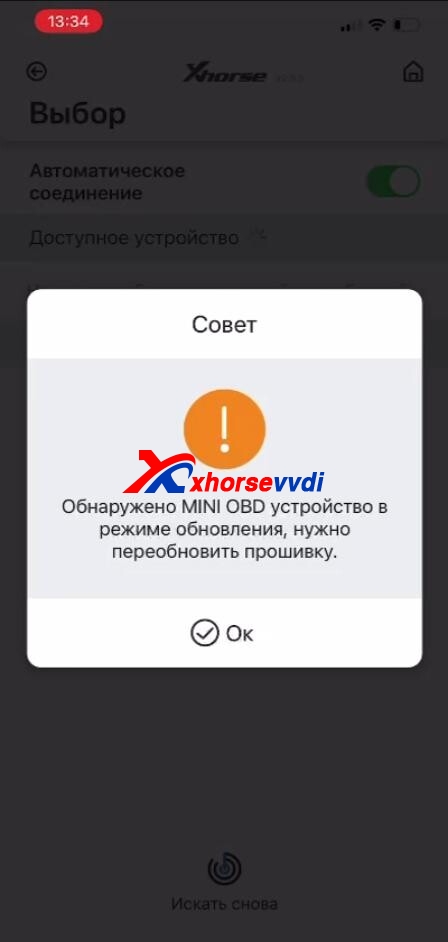
Issue:
Mini OBD Tool can't update Wi-Fi firmware. The update screen hangs for seconds then disappears.
Solution:
Update Mini OBD Wi-Fi firmware. (A PC is required.)
Repair program download link: https://mega.nz/file/C10CUTaJ#32G8GgasV1uK-llQMUpF1tYUVgephXlMzxjWT5nmuNs
Procedure
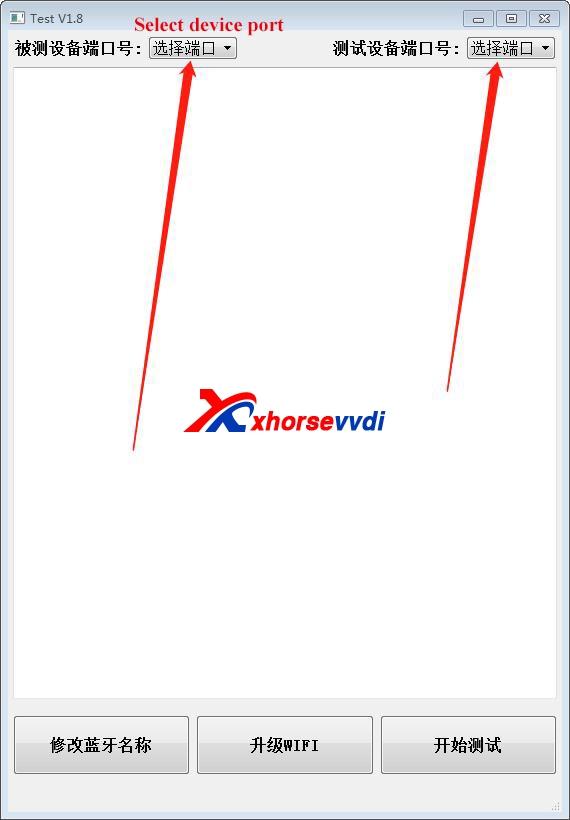
Step 1
Run "factoryTest _V1.8.exe" on PC, connect Xhorse Mini OBD to your PC, and select device port number.
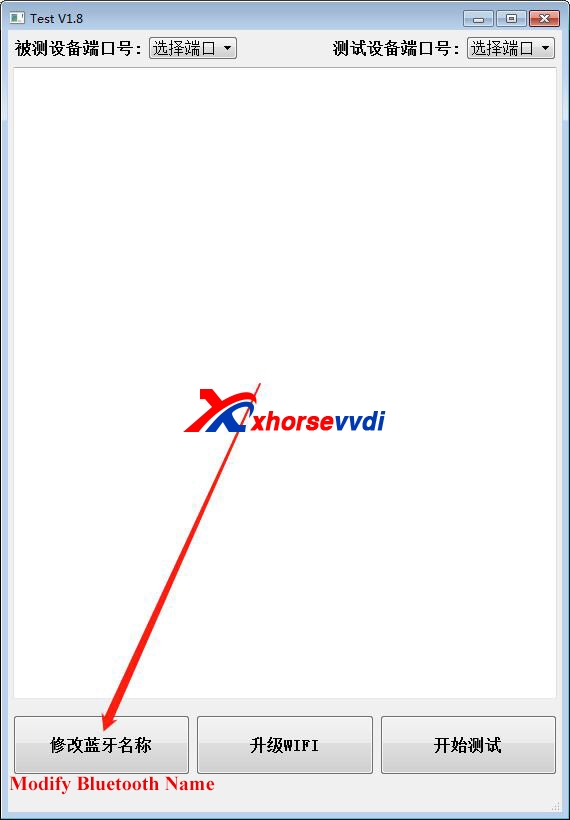
Step 2
Click this button asbelow.
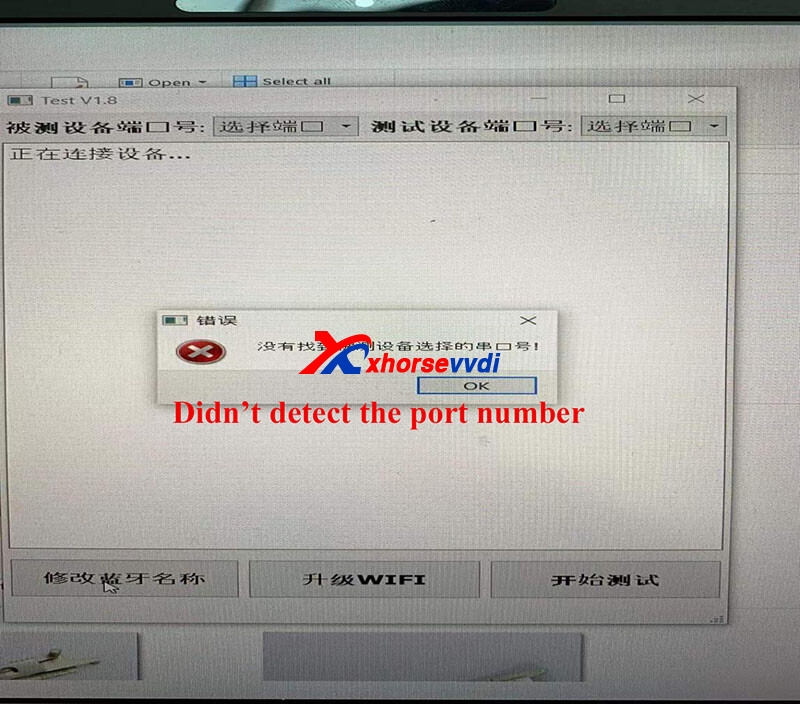
Step 3
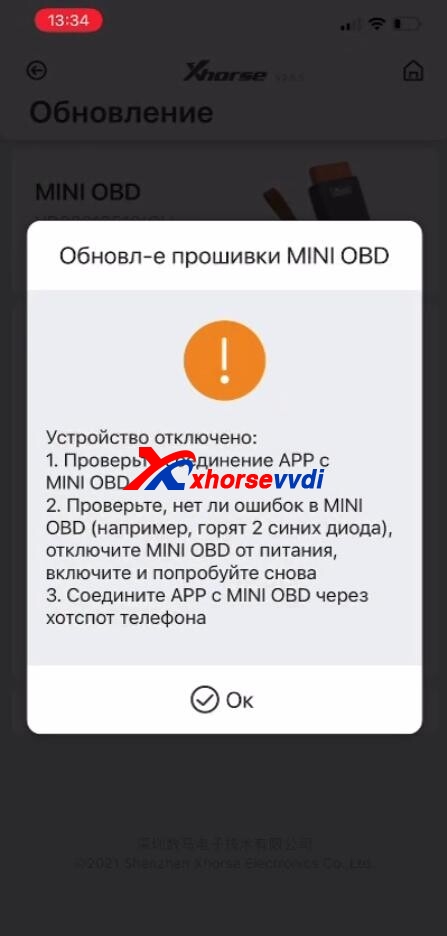
If it has these errors, please restart the software, re-plug yourdevice, and try agian.

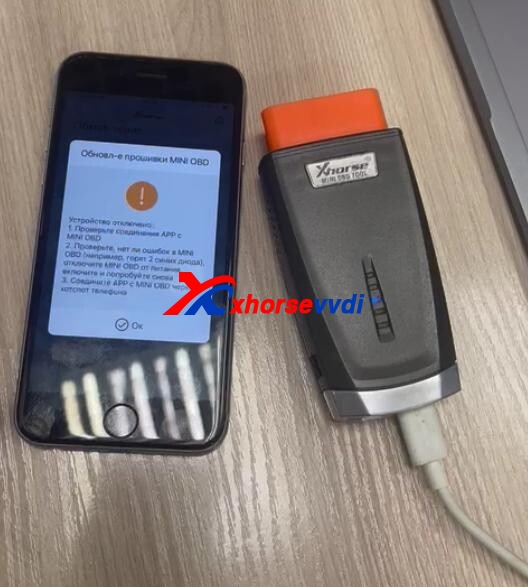
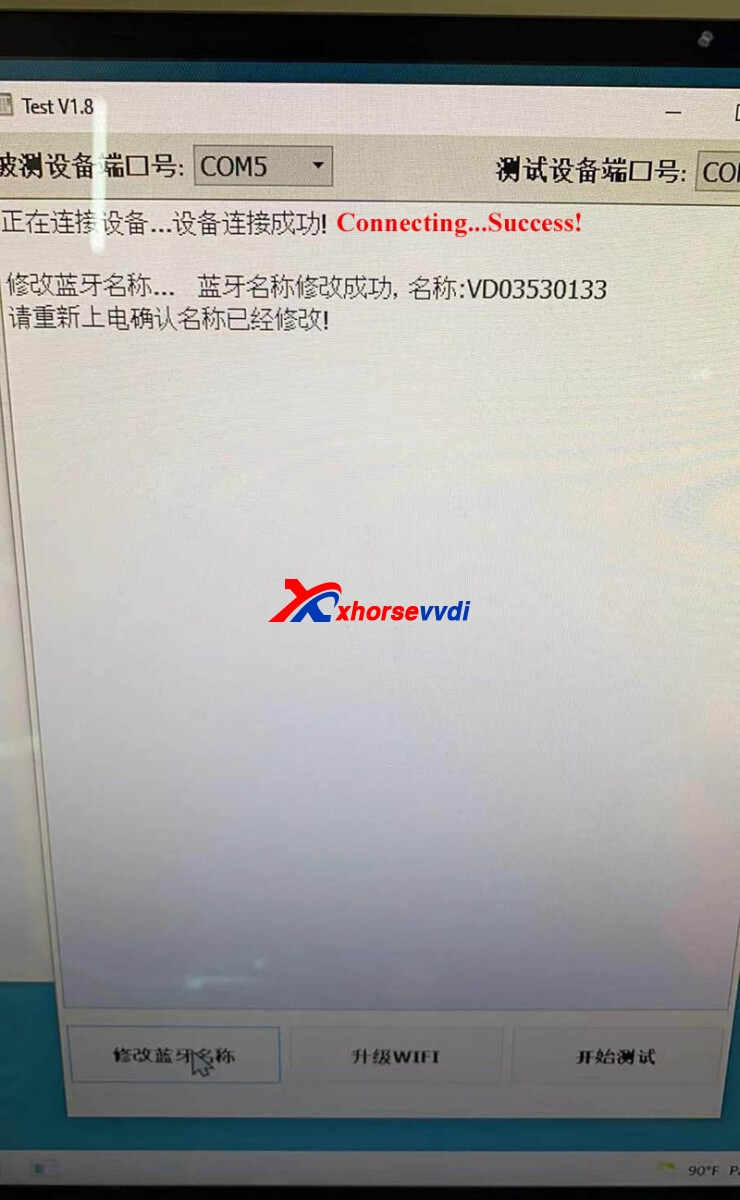
Step 4
This prompt below means the device is connected.
Then unplug the device and use a phone to update the device's Wi-Fi firmwarebythe Wi-Fi connection method. You need to use the phone to connect another Wi-Fior hotspot (don't use this phone's hotspot) to update the device's Wi-Fi firmware.
Source: http://blog.xhorsevvdi.com/solved-mini-obd-tool-cant-connect-to-xhorse-app-via-wi-fi/
Posted by: xhorsevvdi at
09:19 AM
| No Comments
| Add Comment
Post contains 134 words, total size 4 kb.
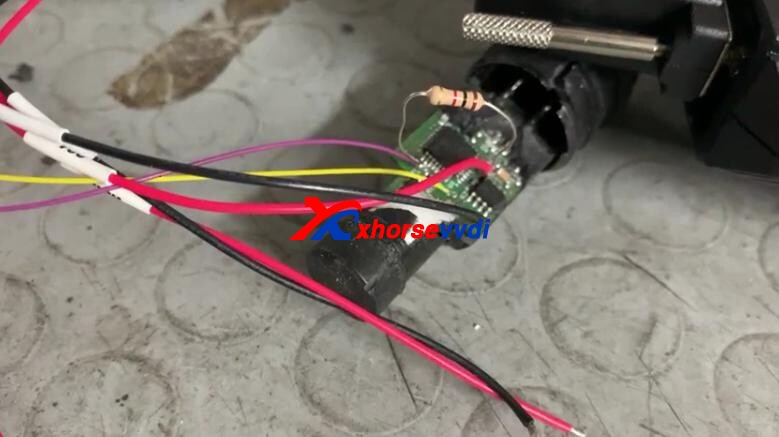
Question:
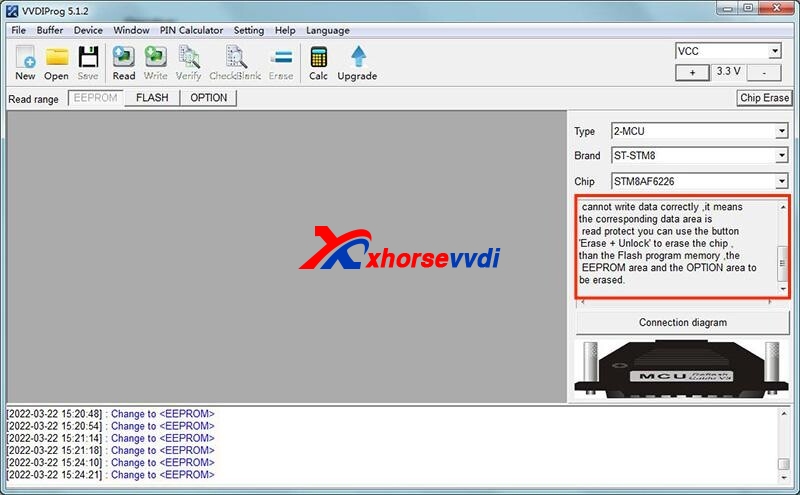
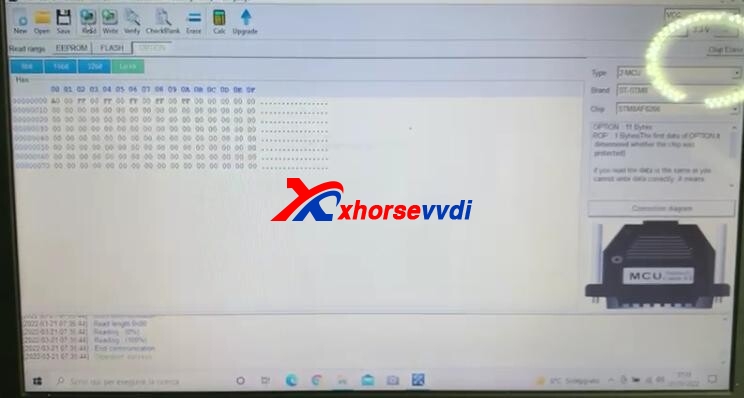
Can I use VVDI PROG to read EEPROM and FLASH of a STM8AF6266 MCU with active ROP protection?
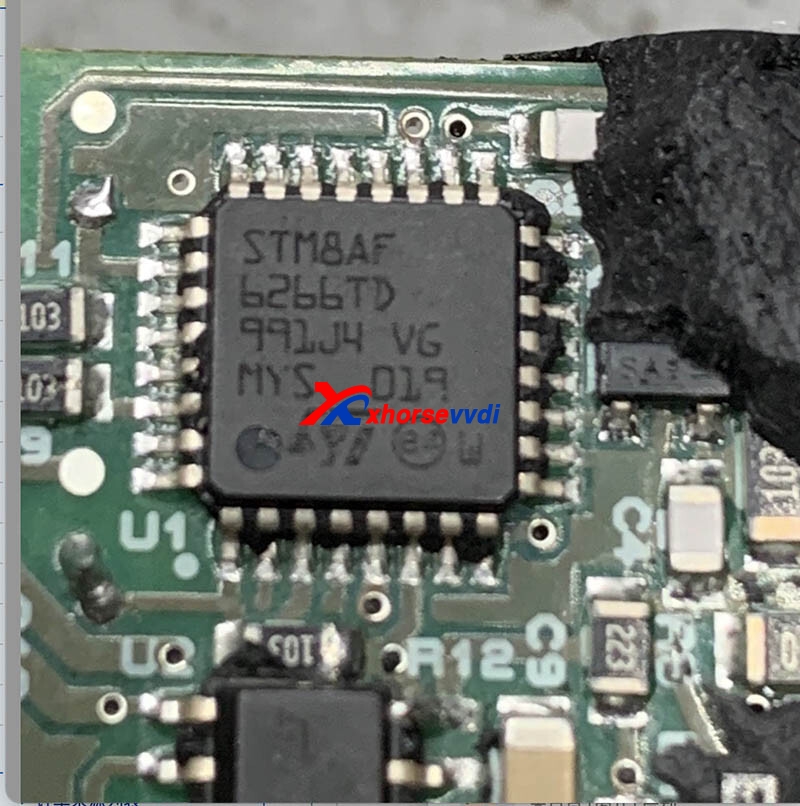
EEPROM, FLASH, OPTION, all data show "00â€.
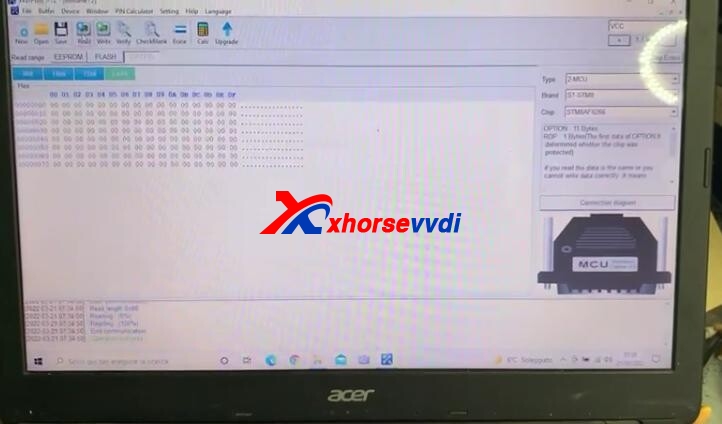
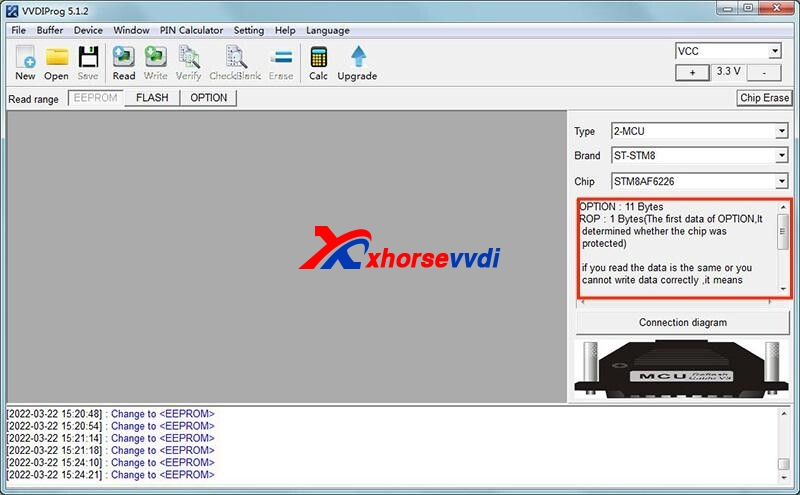
Answer:
As the prompt, if the data we read is the same or we cannot write data correctly, it means the corresponding data area is read-protected.
ROP: 1 Bytes (The first data of OPTION, it determined whether the chip was protected)
If so, we can’t read the encrypted MCU, and we can only erase it by "Chip Eraseâ€.
Source: http://blog.xhorsevvdi.com/can-vvdi-prog-read-stm8af6266-mcu-with-active-rop-protection/
Posted by: xhorsevvdi at
09:17 AM
| No Comments
| Add Comment
Post contains 98 words, total size 2 kb.
March 18, 2022
In this article, we'll show you how to use an Xhorse BOSH Adapterwith Key Tool Plus Pad to read BMW MEVD17.2.4 N20 computer.
Firstly show you how to connect all parts:
1)Connect ECU Cable-B to Key Tool Plus
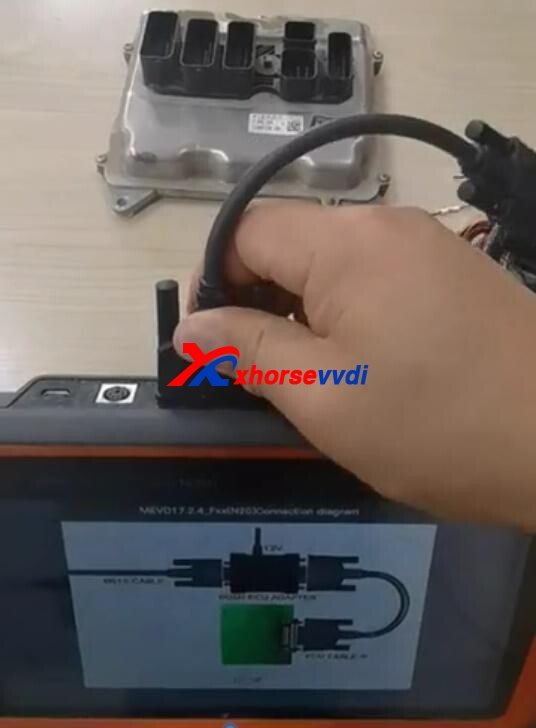
2)Connect ECU Cable-B to BOSH Adapter
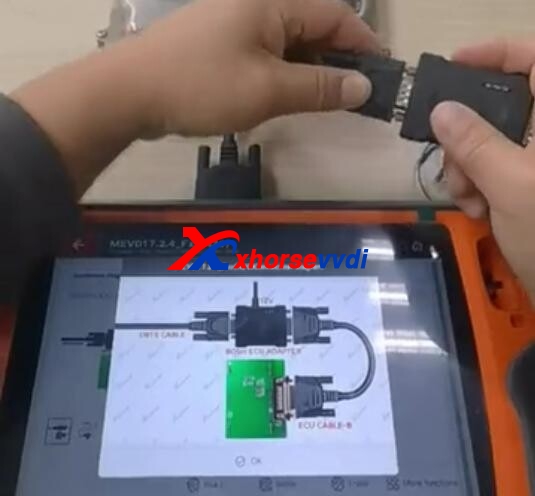
3)Supply 12 volts power to BOSH Adapter

4)Connect ECU Cable-A to N20 computer by diagrams.
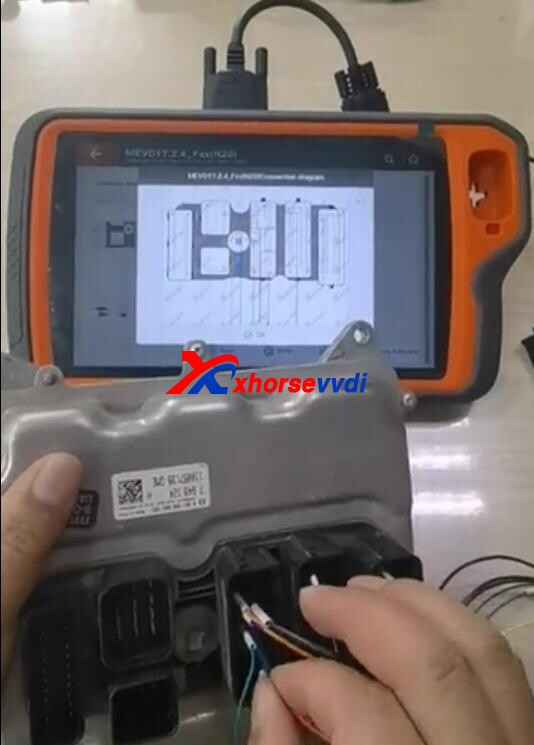
5)Finally connect ECU Cable-A to BOSH ECU Adapter
Then select
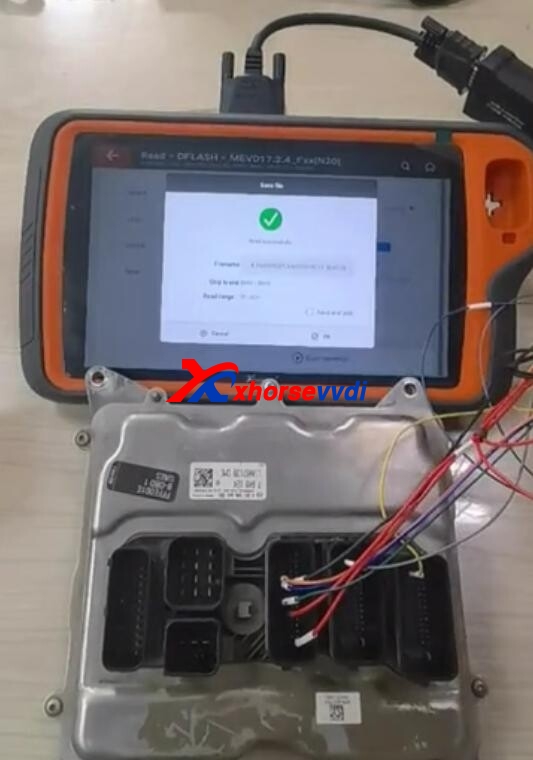
Prog>>Read ECU with CAN>>BMW>>MEVD17.2.4_Fxx(N20)
Read and save data.
Skype: xhorsevvdi.com
Whatsapp: +86-13983756354
Posted by: xhorsevvdi at
09:31 AM
| No Comments
| Add Comment
Post contains 93 words, total size 3 kb.
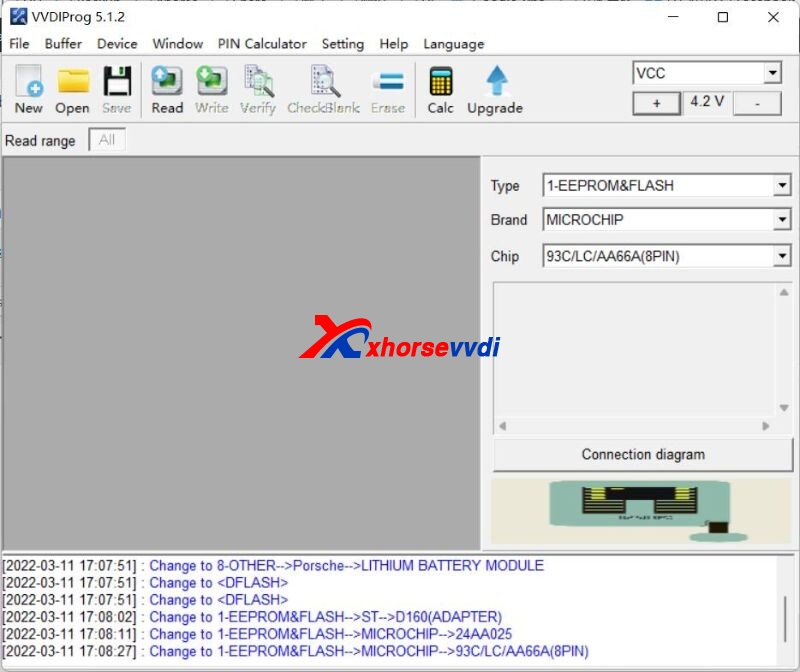
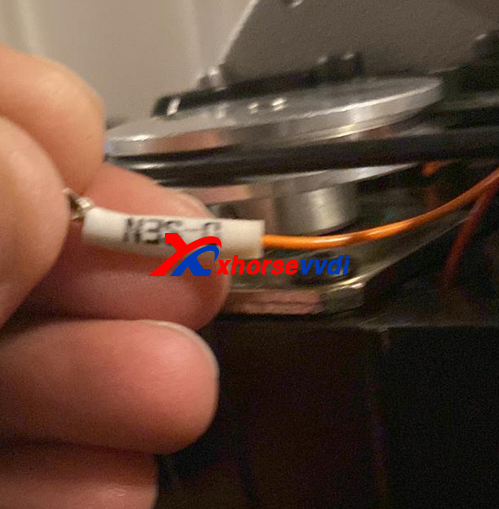
This article will talk about the Xhorse XDNP17 Solder-free Adapters for Porsche IMMO.
This adapter is designed to simplify the process of reading Porsche BCM data. Here we will show you the key programming process with or without this adapter.
1. How to add key for Porsche without adapters?
Tools: VVDI PROG + VVDI2
Model: Porsche Macan 2016
Mask: 1N35H
Connect VVDI PROGto the PCB.
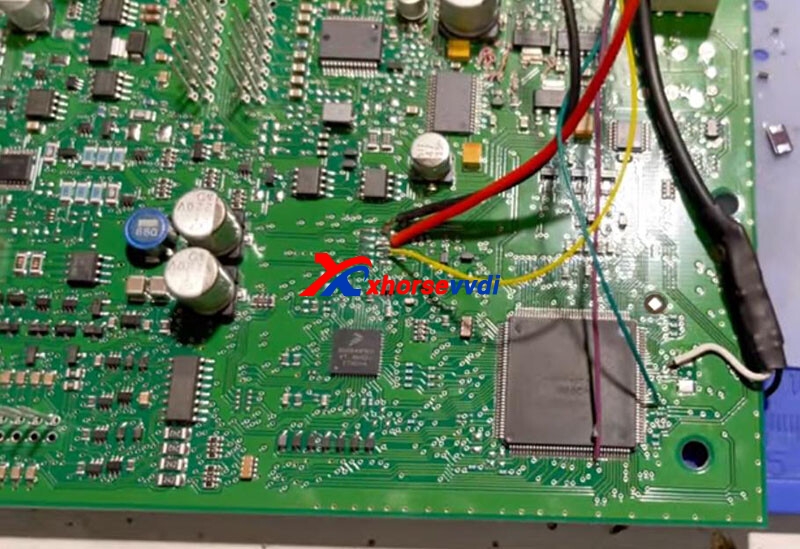
Read and save D-Flash data.
On VVDI2,
Select key position, load the immo file, and put the new key into the coil.
Save the new file.
Install the BCM module back to the car and learn the new key to it.
Go to
Key Learn>>New Porsche Key>>Learn
Load the new file, and usually insert keys in and out to learn.
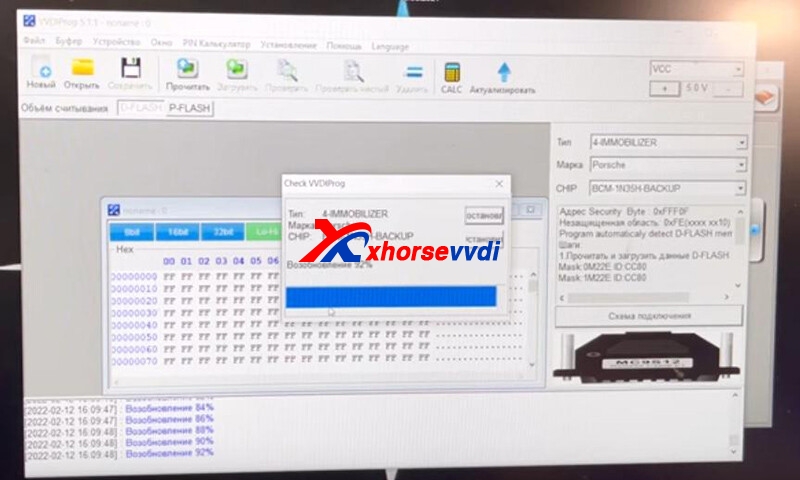
2. How to add key for Porsche with adapters?
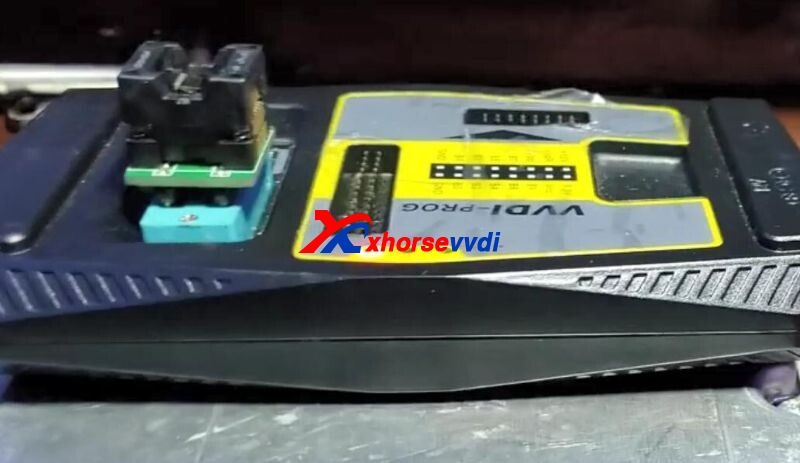
Tools: VVDI Key Tool Plus
Model: Porsche Macan
Mask: 1N35H
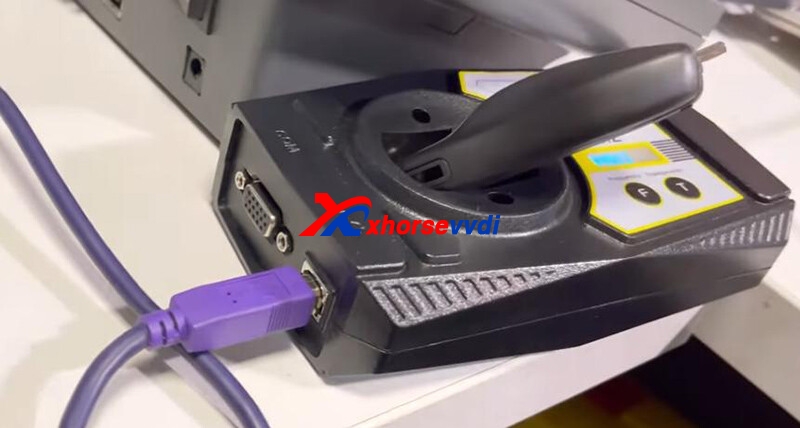
Connect Key Tool Plusto the PCB via XDNP17 Porsche Adapter.
Go to
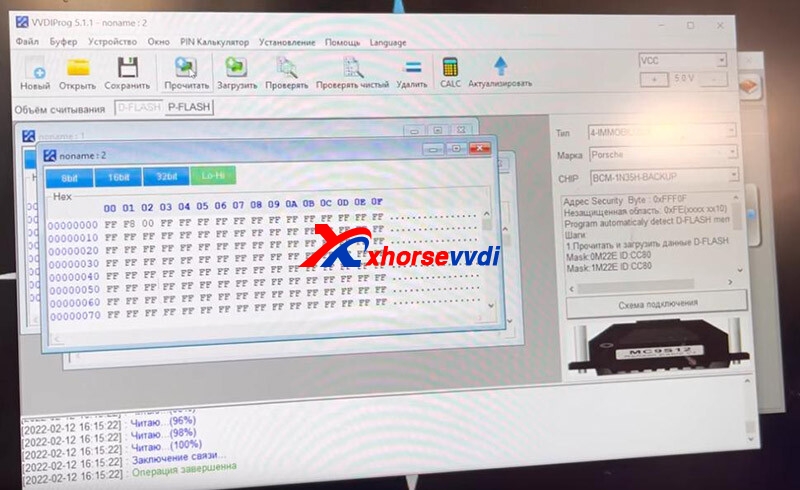
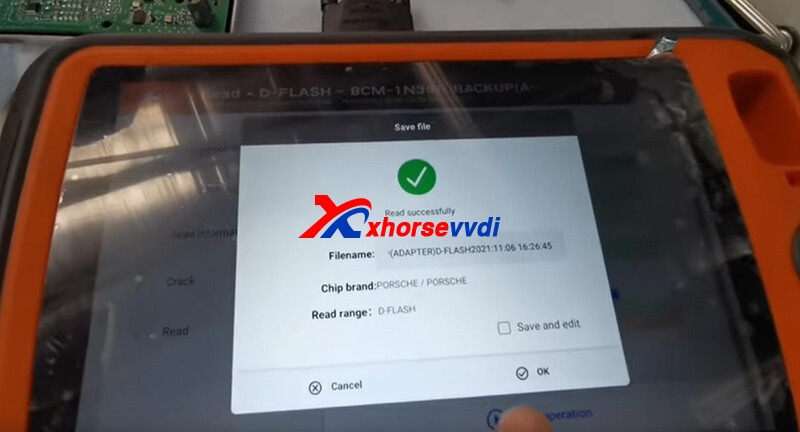
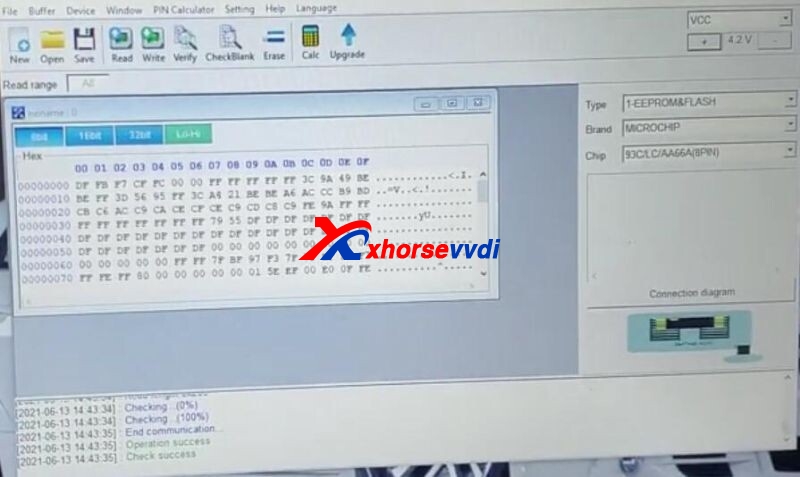
Prog>>Immo>>PORSCHE>>BCM-1N35H-BACKUP>>Adapter>>Read>>D-FLASH
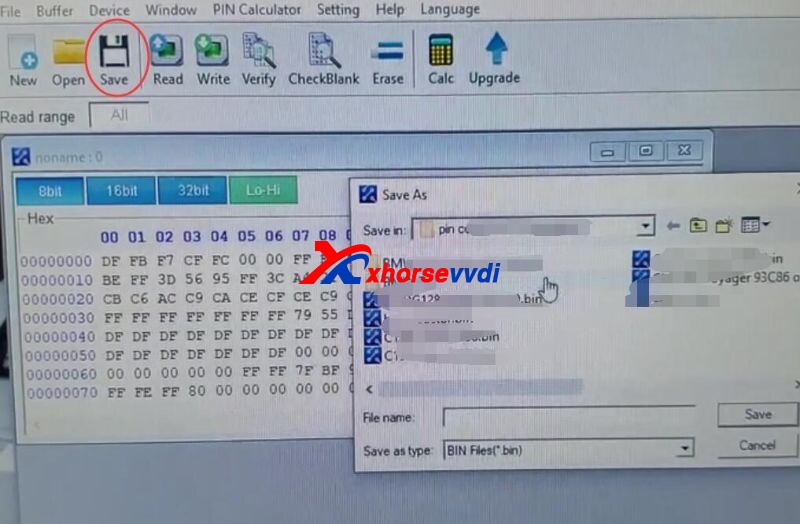
Read and save the data file.
Go to
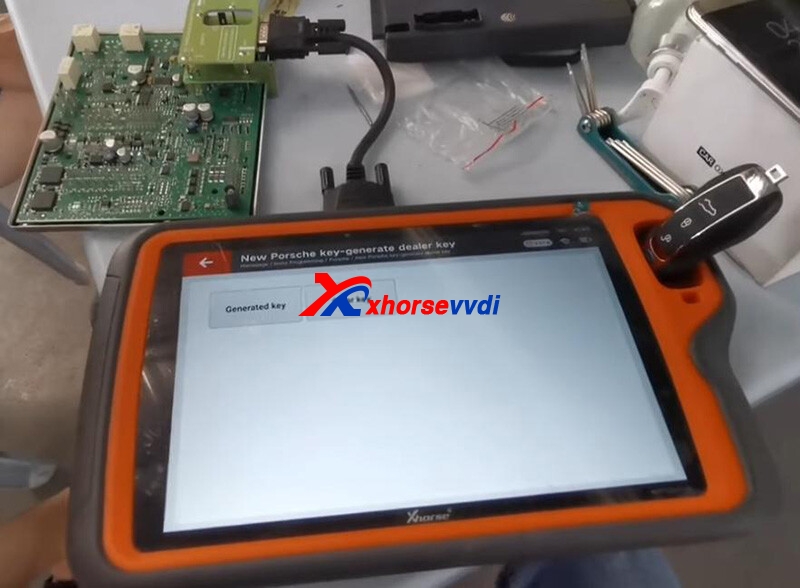
Immo Programming>>Porsche>>New Porsche key-generate dealer key>>Start programming>>Generated key>>EEPROM(1N35H)
Insert the new key, load immo file, and save the new file.
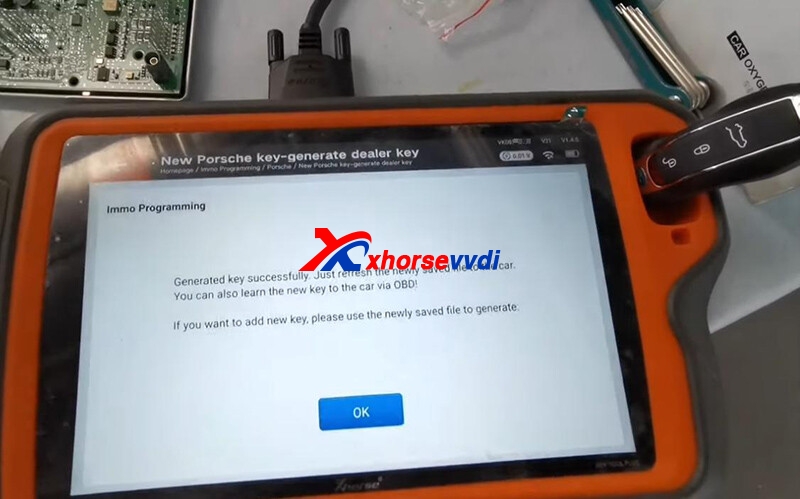
Install the BCM module back to the car and learn the new key to it.
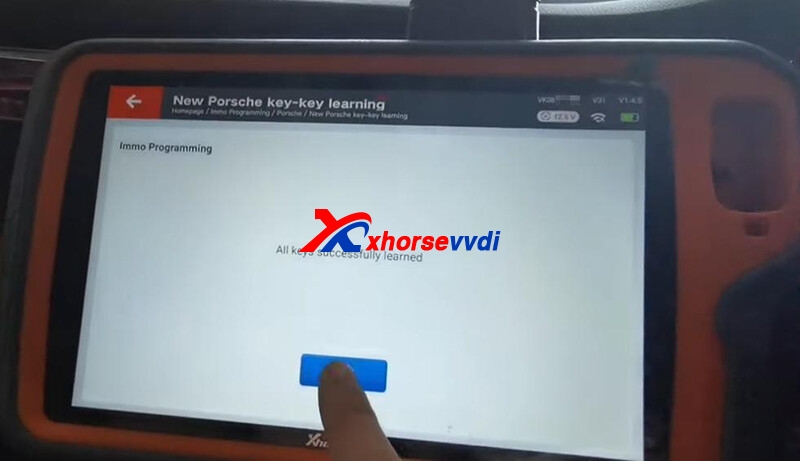
Go to
Immo Programming>>Porsche>>New Porsche key-key learning>>Start programming>>Learn key
Load the new file, and insert keys to learn as part 1.
Summary
Adapters are designed for simplifying procedures and reducing risks. Soldering has certain requirements, and if anything goes wrong, we have to check every soldered pins and solder always has risks on data loss. Anyway, why not prepare some adapters to make work easier when we have a budget?
Source: http://blog.xhorsevvdi.com/how-is-xhorse-solder-free-adapter-for-porsche/
Posted by: xhorsevvdi at
09:30 AM
| No Comments
| Add Comment
Post contains 279 words, total size 5 kb.
One customer gave feedback that he made an Audi A5 key by Key Tool Plus, and the start works well but not the remote on the key.
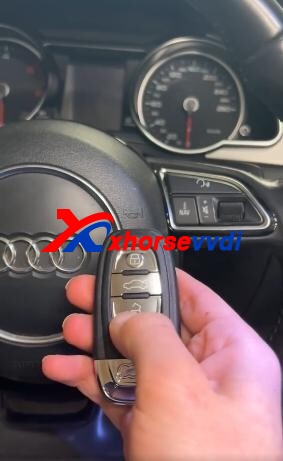
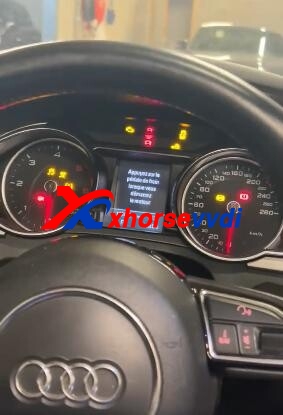
Also, he detected two keys' frequency and wondered why Key Tool Plus Pad can't show the original key's figure.
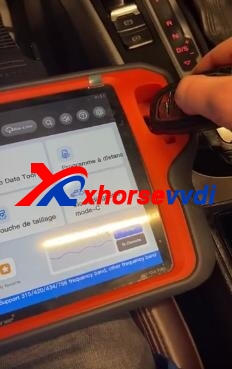
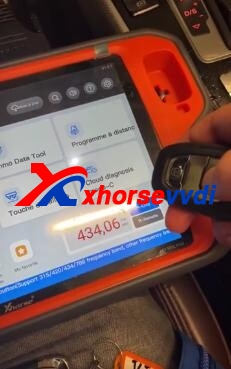
How to Detect 868MHz Key by VVDI Key Tool Plus?
If the frequency is 868MHz, we can go to "Remote Clone" and switch to 868MHz on the right, and then we can read 868MHz keys.
So, here comes the reason:
The original key is 868MHz, but the new key is 434MHz - the frequency doesn't match.
We need to switch frequency, and then the remote part should work fine.
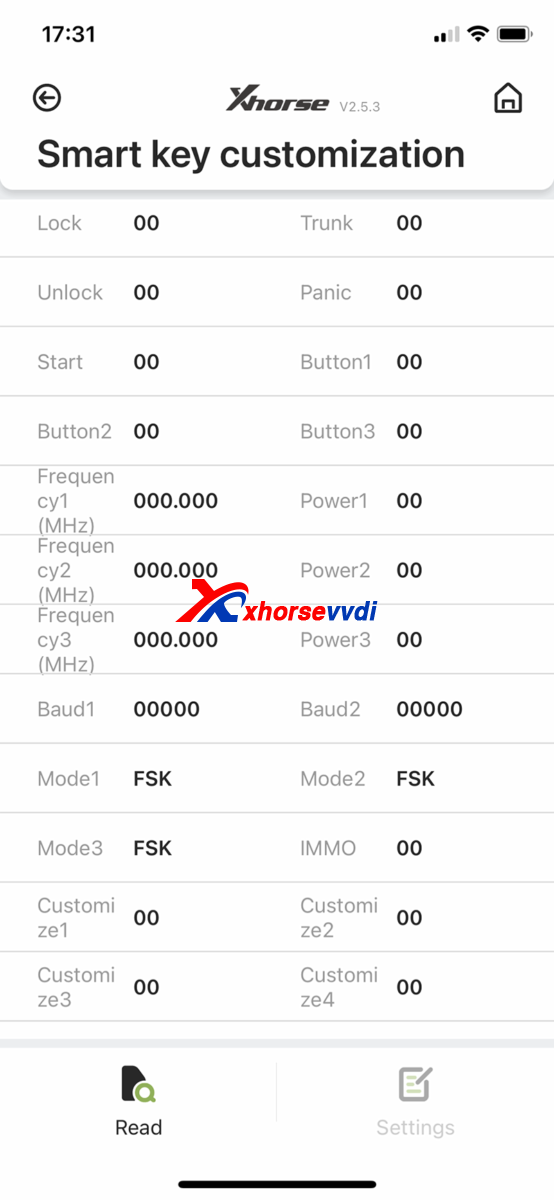
How to change frequency of Xhorse Smart key?
If the new key is VVDI Audi Smart Key, just go to
Special Function>>VVDI Remote Function>>Smart Key Customization
Any questions, contact us.
Skype: xhorsevvdi.com
Whatsapp: +86-13983756354
Posted by: xhorsevvdi at
08:54 AM
| No Comments
| Add Comment
Post contains 164 words, total size 3 kb.
V7.2.2 VVDI2 Software is released, and please do not forget use xhorse update kit software to update vvdi2 firmware, this version needs to update firmware too.
1.Free Download V7.2.2 VVDI2 Software
https://mega.nz/folder/kdkDWChL#-0MFqV5zfrtkh9sQKES1hg
Folder includes two parts:
one is BMW Configuration file, if it ask to update BMW database, download is to install is OK. If without error, just download VVDI2 installer V722 is OK.
2.V7.2.2 VVDI2 Update
!!!ThisversionrequireupdatefirmwareV7.2.2!!!
=====VAGV7.2.2=====
1.ImprovementautodetectforVAGimmobilizersystem
2.Bugfix
=====BMWV7.2.2=====
1.Bugfix
=====PorscheV7.2.2=====
1.Bugfix
=====PSAV7.2.2=====
1.Bugfix
=====TransponderProgrammerV7.2.2=====
1.Improvementprepareremotefunction
2.Immobilizerdatatool:USA->Chevrolet->Captiva->2005-95040
3.Immobilizerdatatool:Europe->Saab->9-3->200393C66
4.Bugfix
=====Copy48(96bits)V7.2.2=====
1.Bugfix
=====J2534V7.2.2=====
1.Bugfix
=====OnlineUpateToolV7.2.2=====
1.Bugfix
=====QuickStartV7.2.2=====
1.Bugfix
Posted by: xhorsevvdi at
08:49 AM
| No Comments
| Add Comment
Post contains 96 words, total size 2 kb.
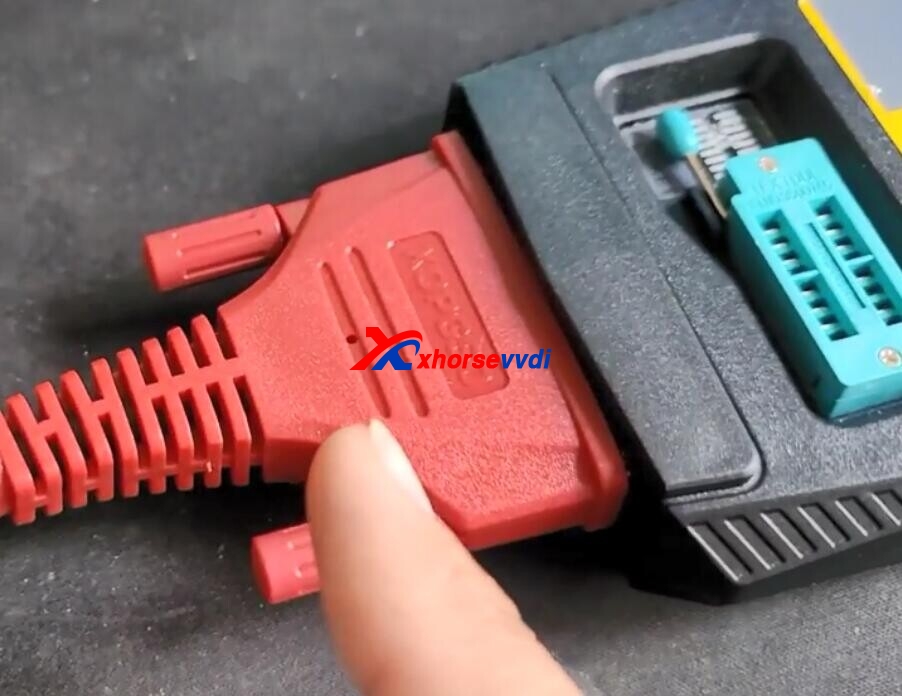
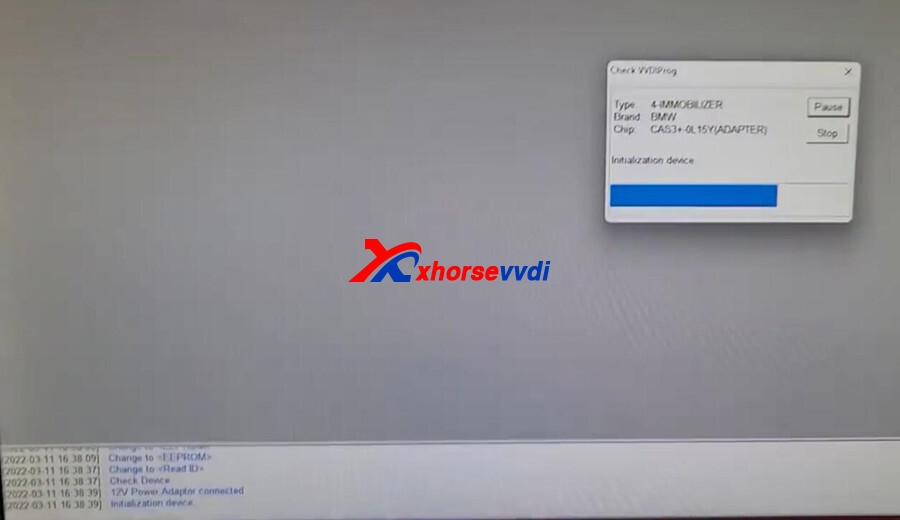
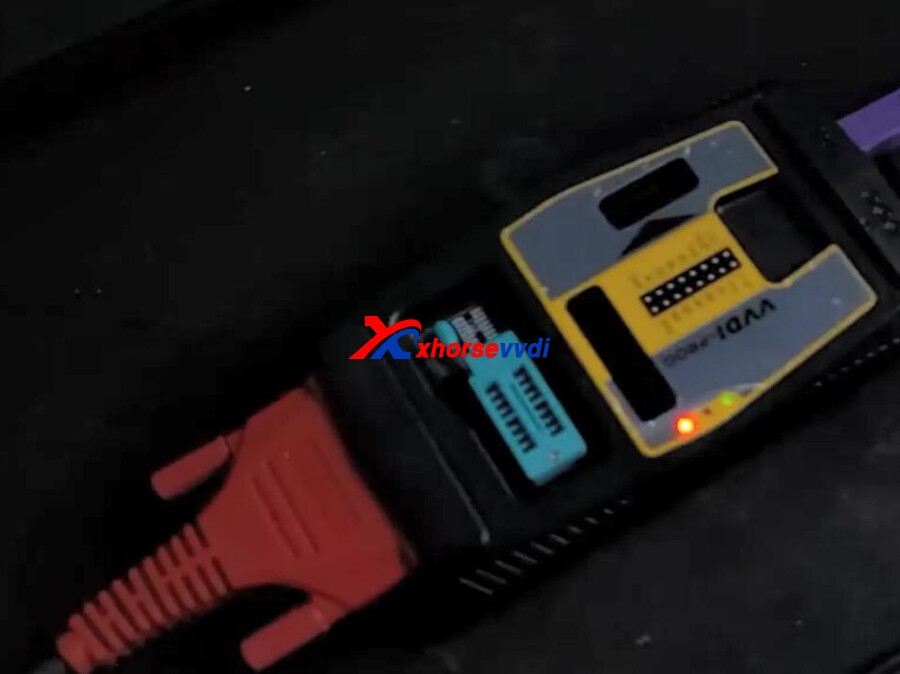
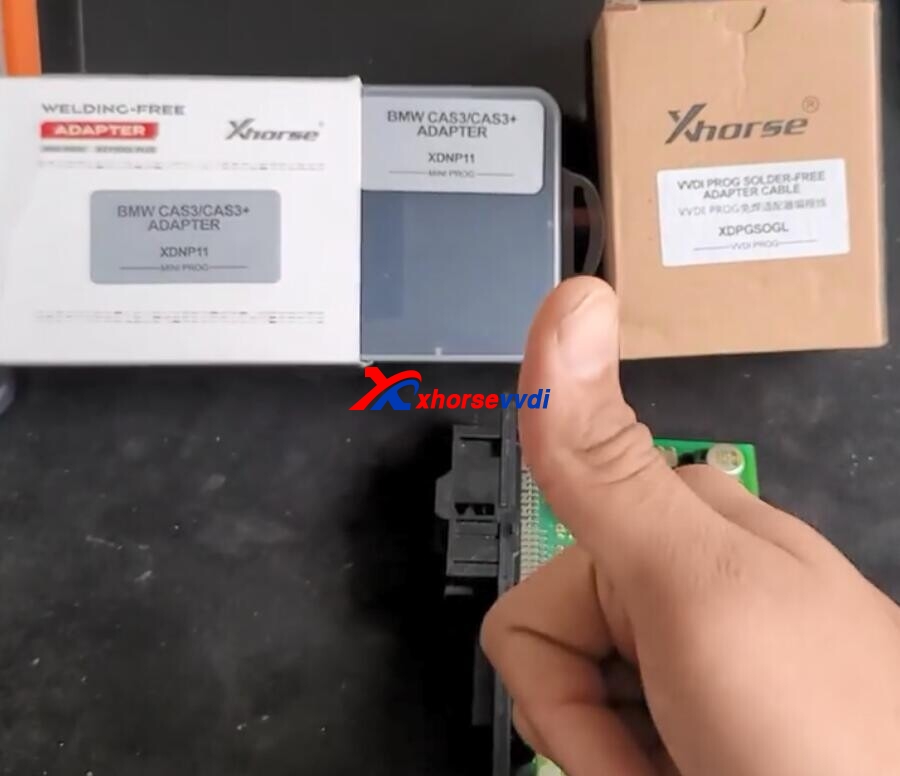
Xhorse XDNP11 CAS3/CAS3+ Solder Free Adapter for BMW, it is for MINI Prog and Key Tool Plus, now use with XDPGSOGL DB25 DB15 cable, you can use with VVDI PROG for CAS3 BMW no need welding.
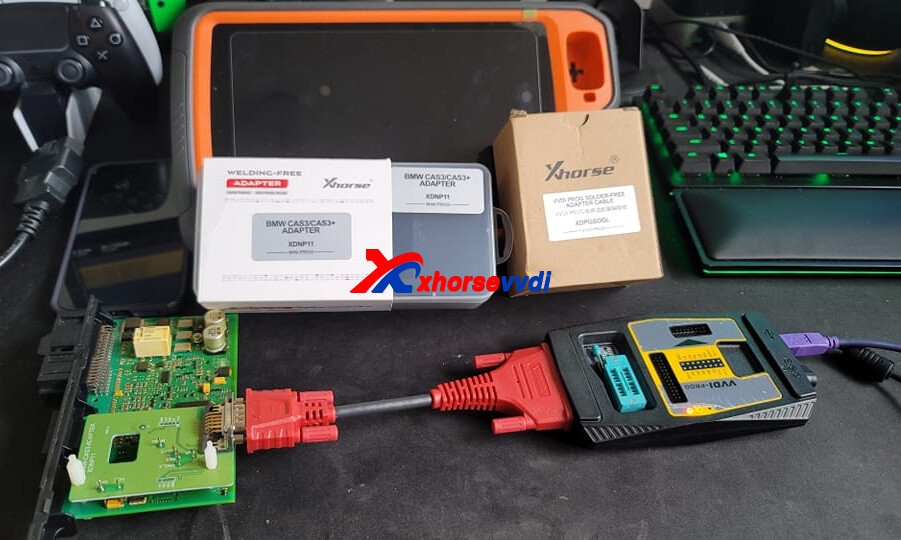
Here is the steps:
Choose the CAS3+ BMW IMMO in VVDI Prog software
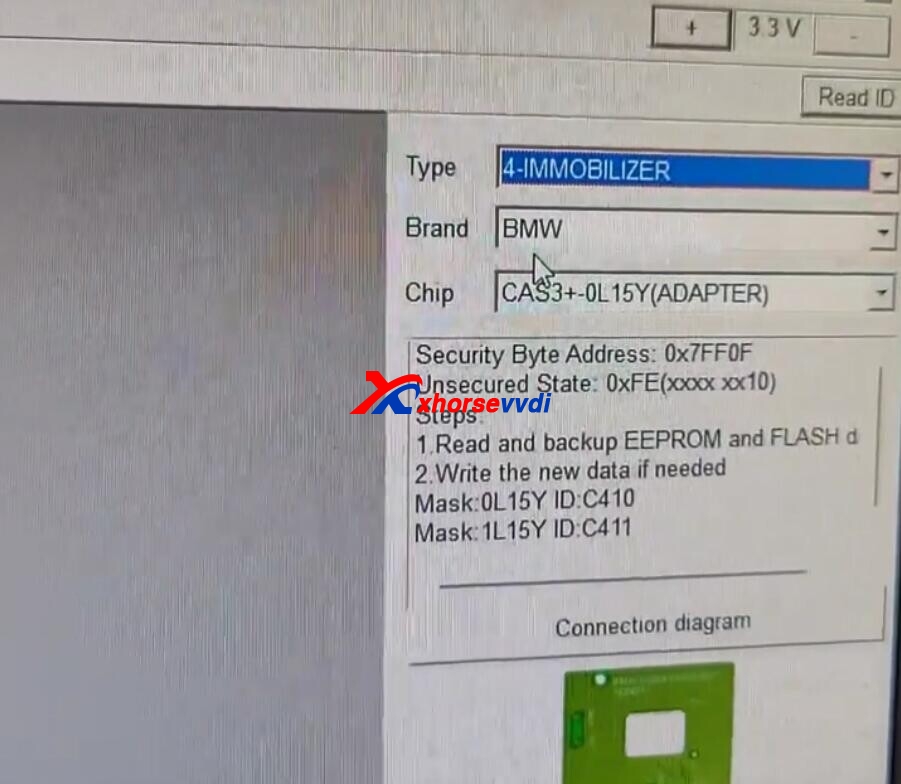
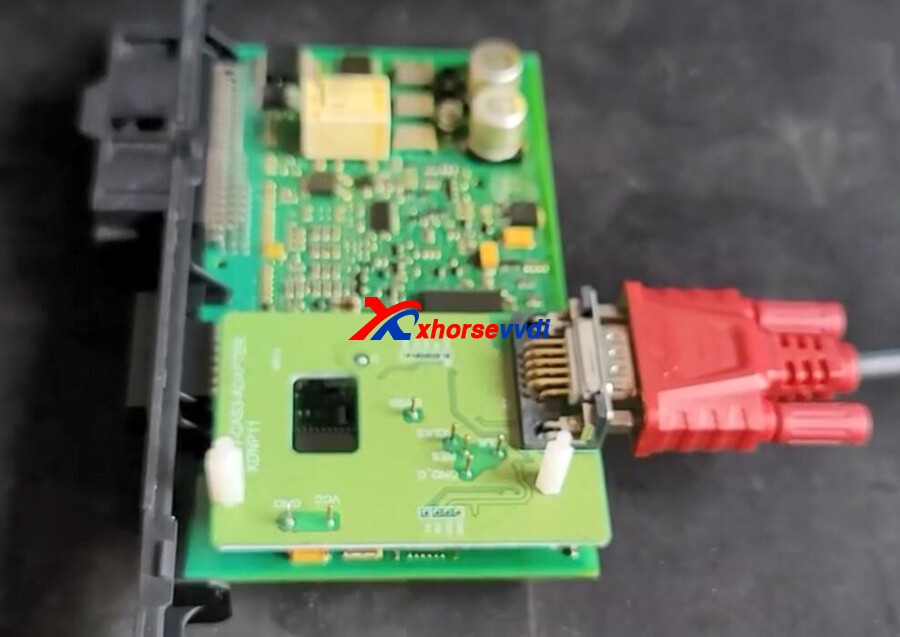
Check connection diagram, and connect like the diagram
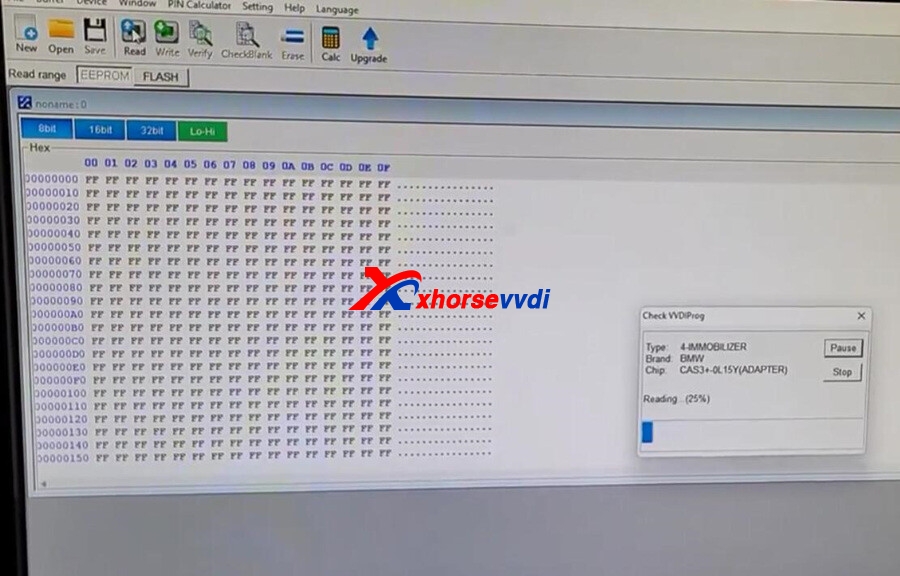
Then click check read eeprom
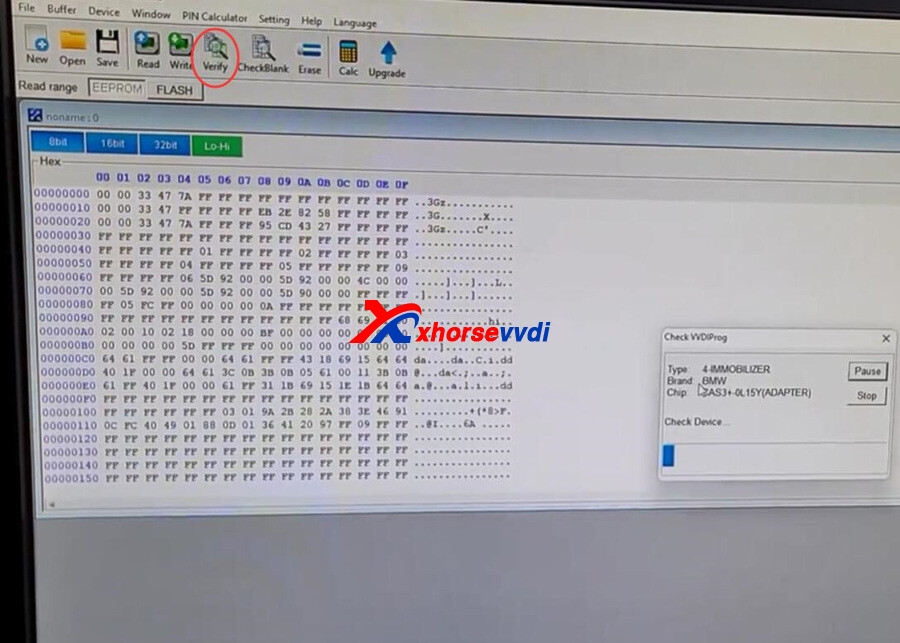
Verify

Then read flash
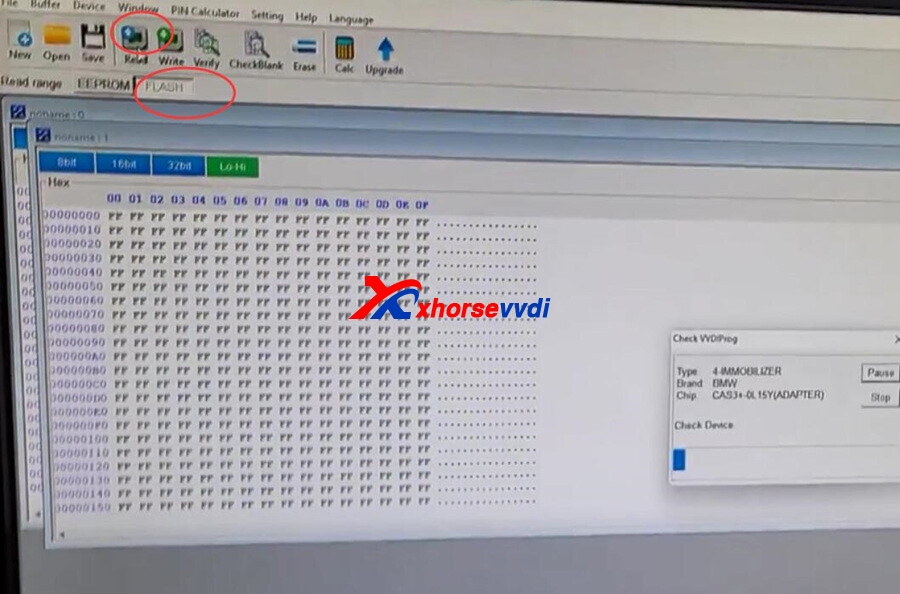
Both read OK.
Video:
https://www.youtube.com/watch?v=L63TStg1oc4[/embed]https://youtu.be/L63TStg1oc4
Posted by: xhorsevvdi at
08:48 AM
| No Comments
| Add Comment
Post contains 85 words, total size 4 kb.
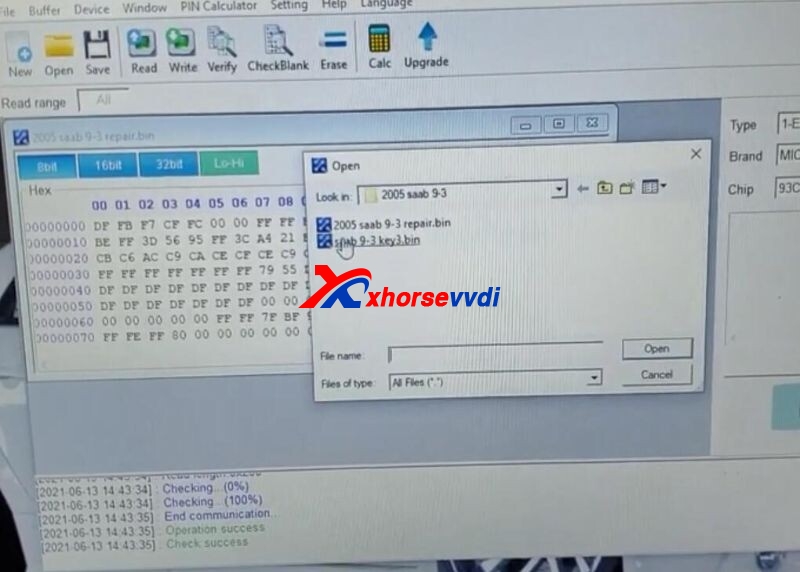
VVDI PROG and VVDI2 key programmer can support 2005 Saab Key, but Autel and Tango failed. Here is the review and steps about VVDI2 and VVDI Prog 2005 Saab Key Programming.
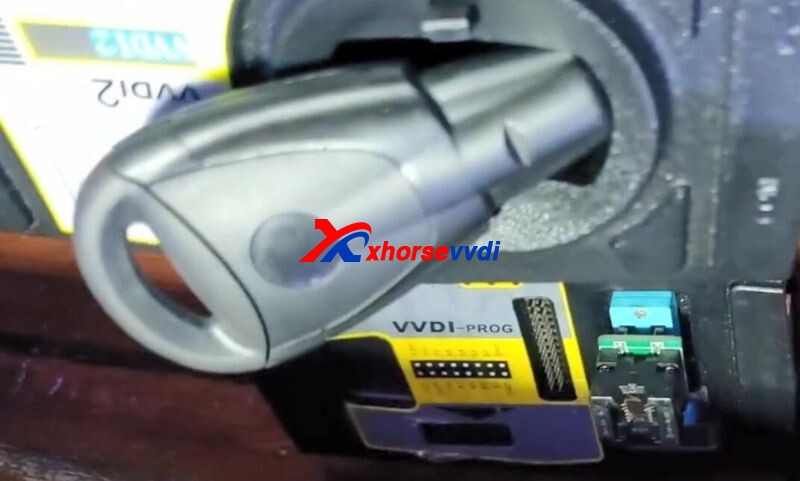
1. VVDI Prog read dump data.
Remove the chip and put into the socket.
Click read. Read OK.
Save the data.
2. VVDI2 Load dump file, prepare dealer key
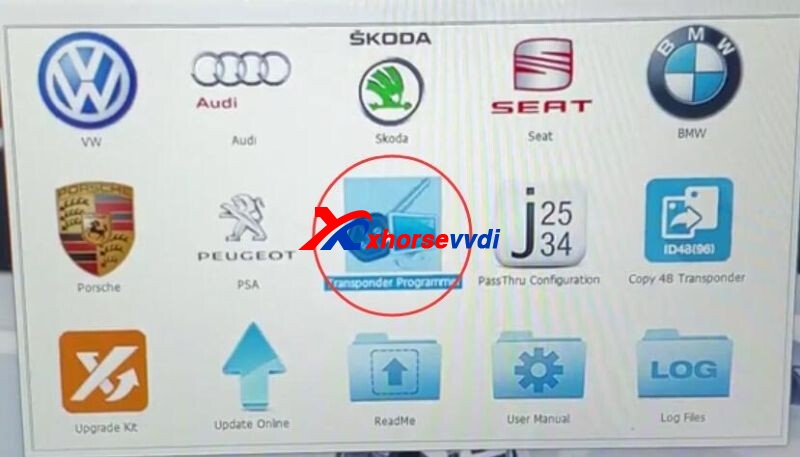
Start VVDI2 software>>Transponder programmer
Choose IMMO Data Tool
Then select the EURO SAAB 9-3 2003-93C66
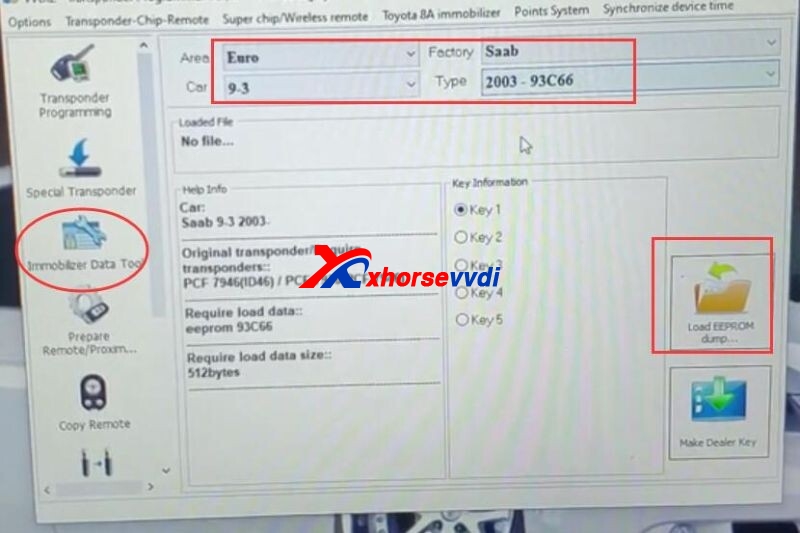
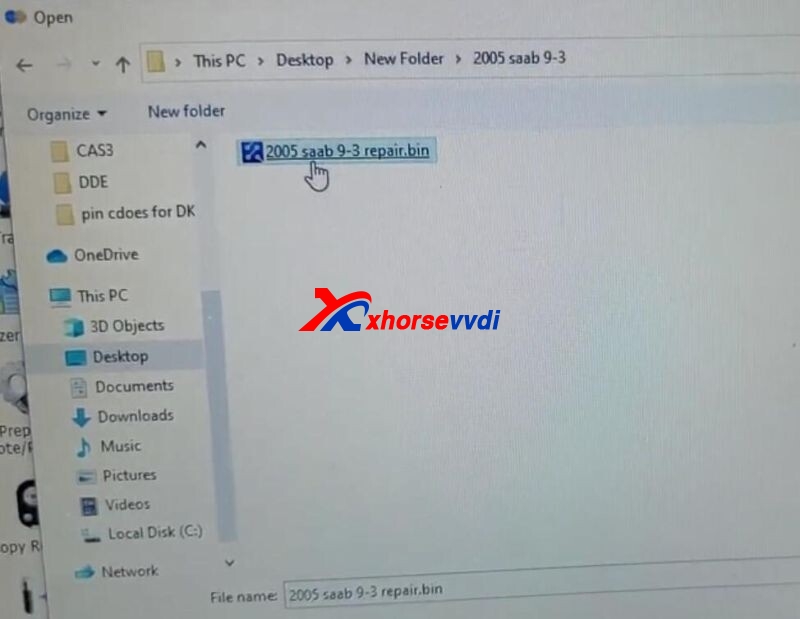
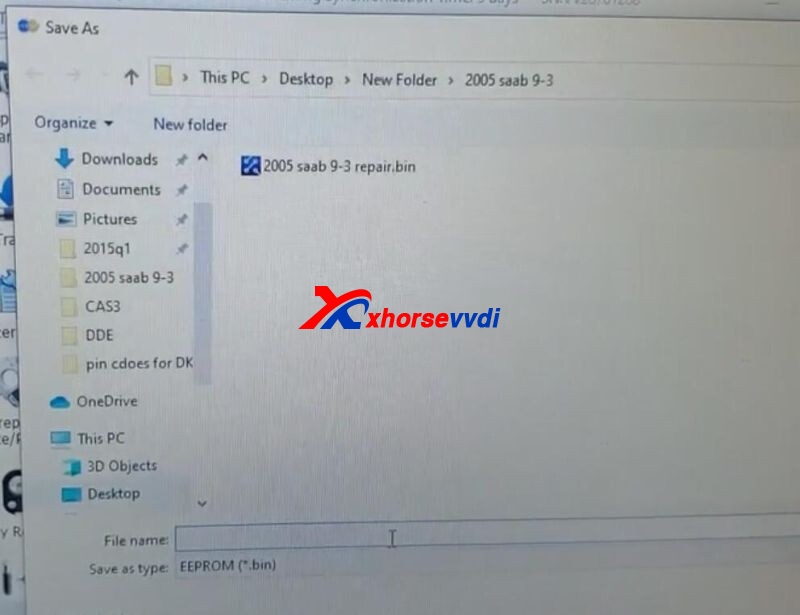
Click Load EEOPROM dump
Prepare Dealer Key. PCF 7936
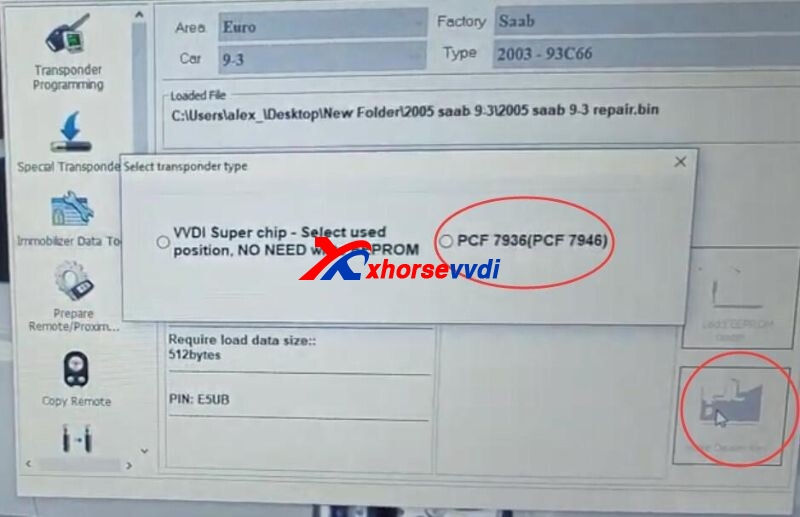
Put blank transponder
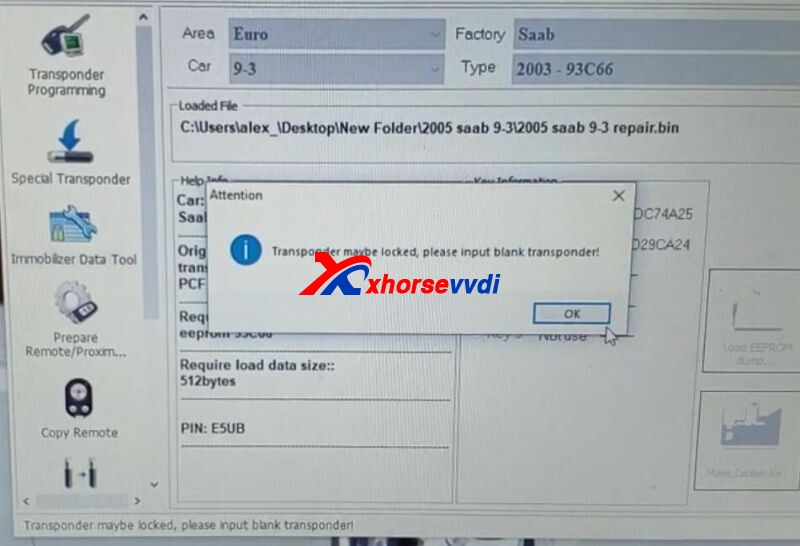
Save the data
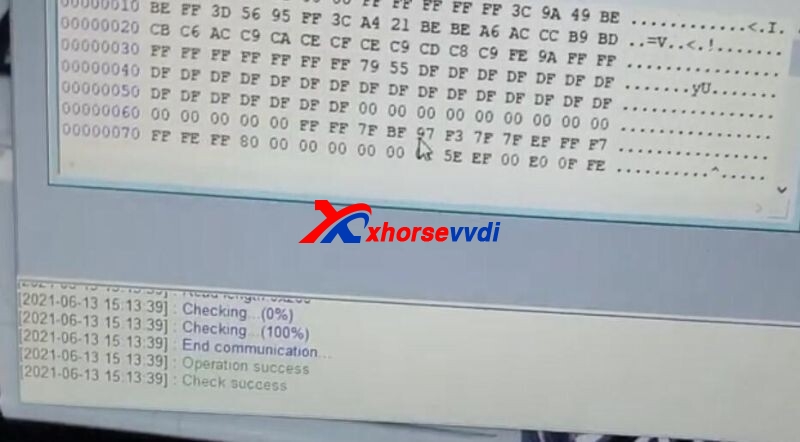
3. VVDI Prog write back the data
Start VVDI Prog software, click "New",load the data you save in Step2
Then write.
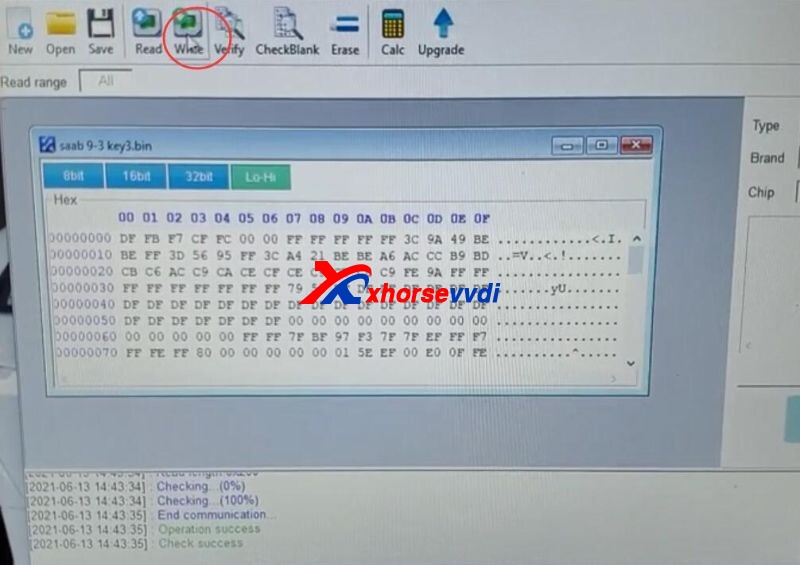
Write back OK.
Posted by: xhorsevvdi at
08:47 AM
| No Comments
| Add Comment
Post contains 127 words, total size 5 kb.
Recent time we received feedback that I have a condor mini xc and when I turn it on, the white LED light comes on and the cutter moves around, and then the white led light blinks one time and turns off. The screen for the machine does not come on at all.
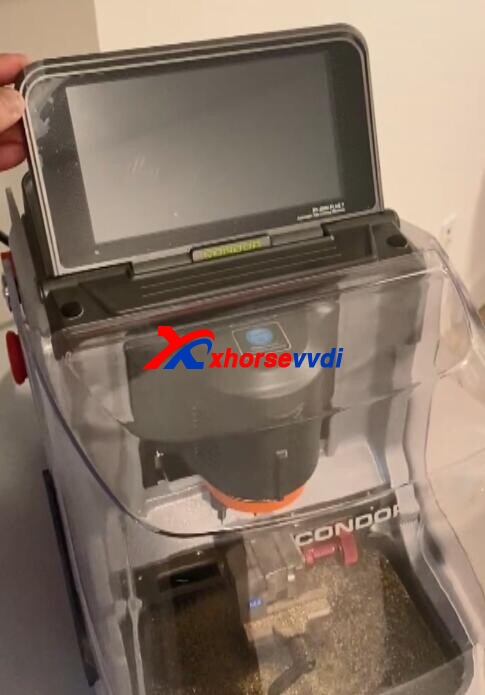
And engineer suggest to disassemble the device to see if the screen is broken or the cable is loosen. And here is the guide about how to remove the back cover of the condor xc-mini plus key cutting machine.
1. The screws in the red box need to be removed.
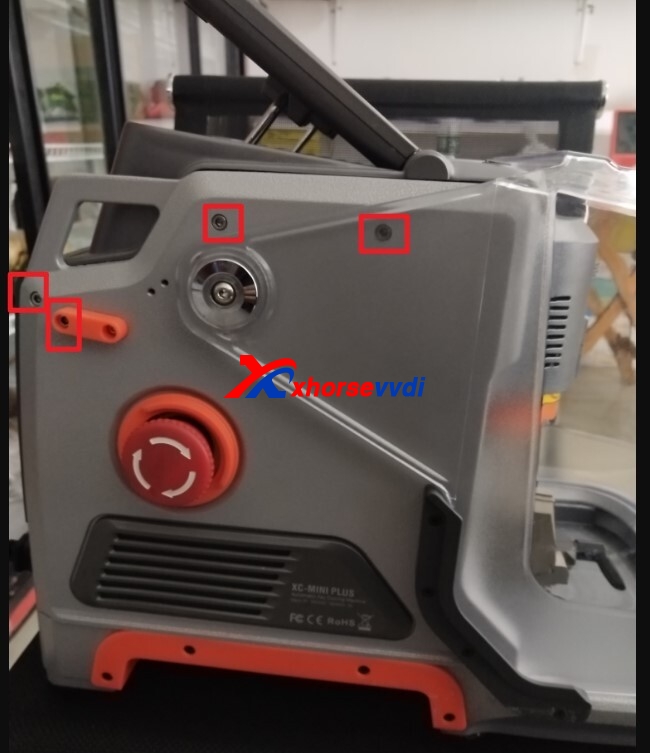
2. The screws on the back cover also need to be removed
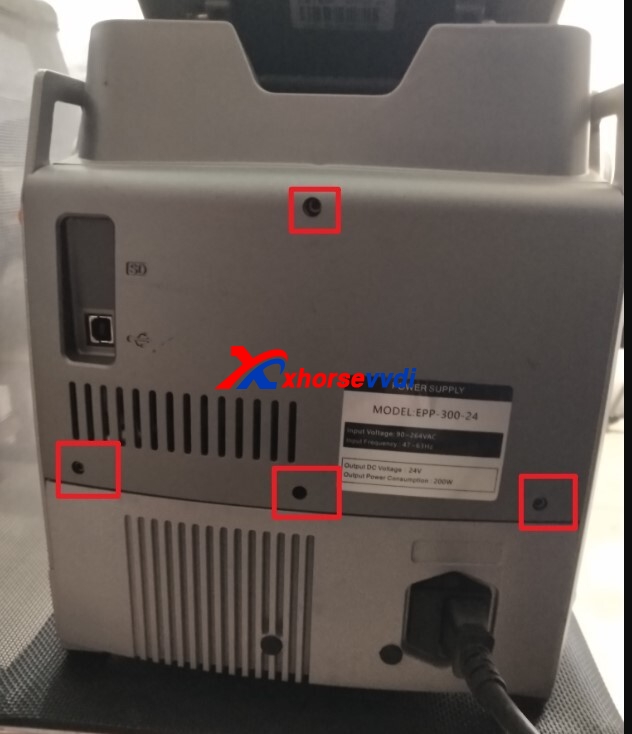
The device of km02 and km03 can be operated according to Figure 1 and Figure 2. The device of plus also needs to remove the screws of the screen. Pull out the rubber plugs on the left and right sides of the screen to remove the fixing screws.
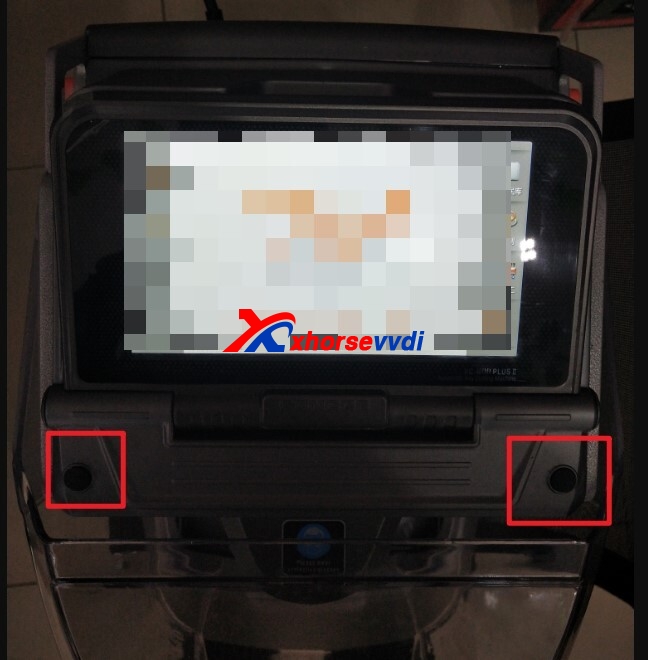
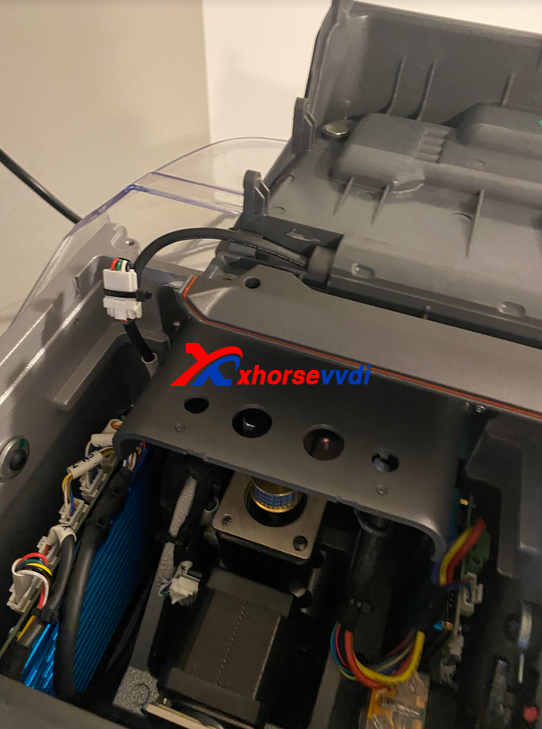
4.After removing the above screen and back cover fixing screws, you can take off the screen. Then you can check the cable whether it is loosen or not.
Posted by: xhorsevvdi at
08:46 AM
| No Comments
| Add Comment
Post contains 202 words, total size 2 kb.
One customer gave feedback that his Dolphin XP005 showed "error code: 29" during height level adjustment.
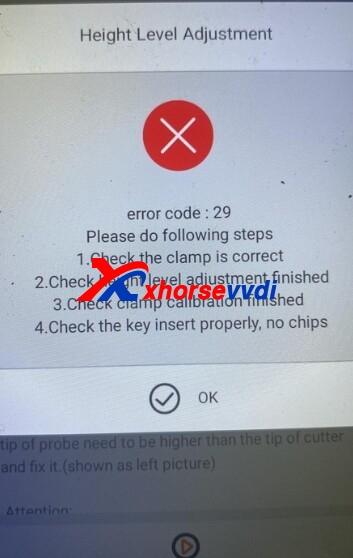
Here is how Xhorsevvdi engineers solve the problem:
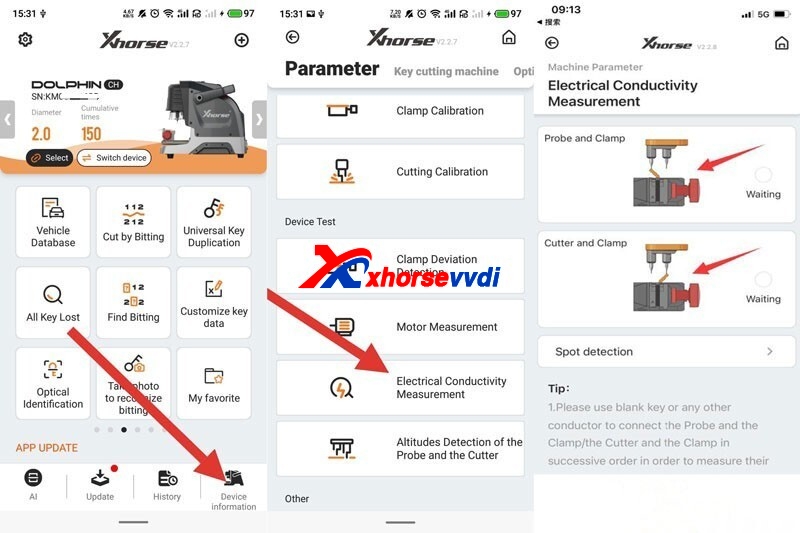
1. Electrical Conductivity Test
We need a video of electrical conductivity test.
How to do electrical conductivity test?
Device information>>Electrical Conductivity Measurement
1)Probe and clamp
2)Cutter and clamp
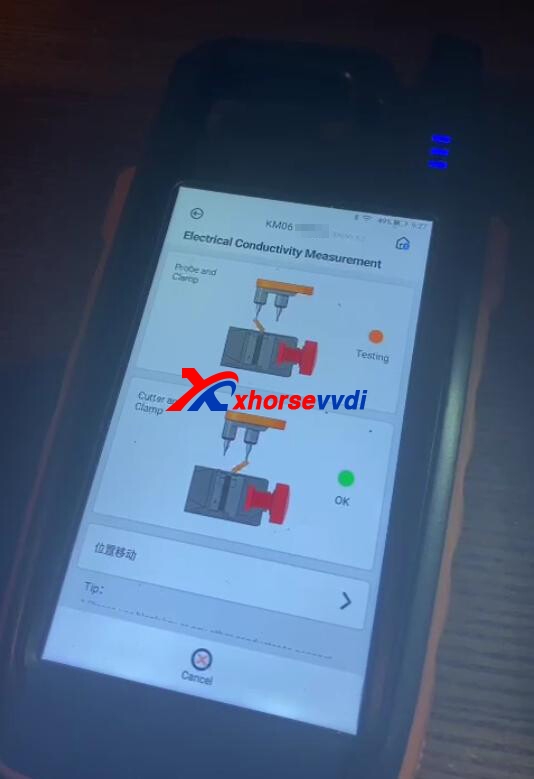
Use a blank key or a conductor to short-circuit the clamp and the probe/cutter as the prompt.
Then we find the cutter is short-circuited.
So, we need to open the machine, check the cutter's wire, and clean the iron filings around the wire.
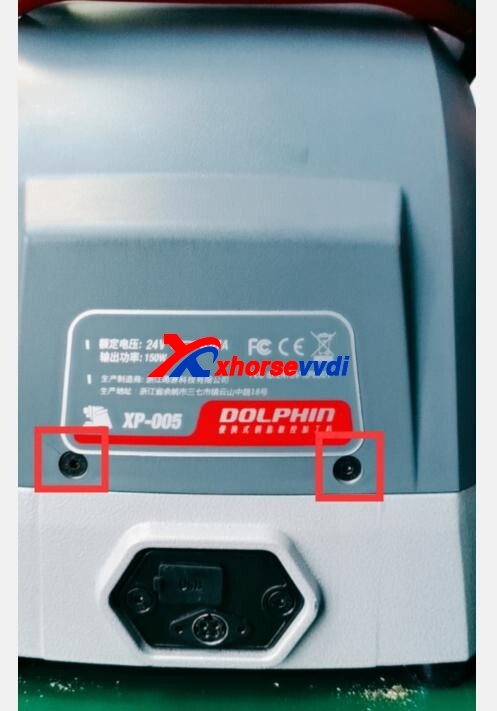
2. How to open Xhorse XP005 Machine?
1)Unscrew the back of XP-005 (*Watch the wires inside)
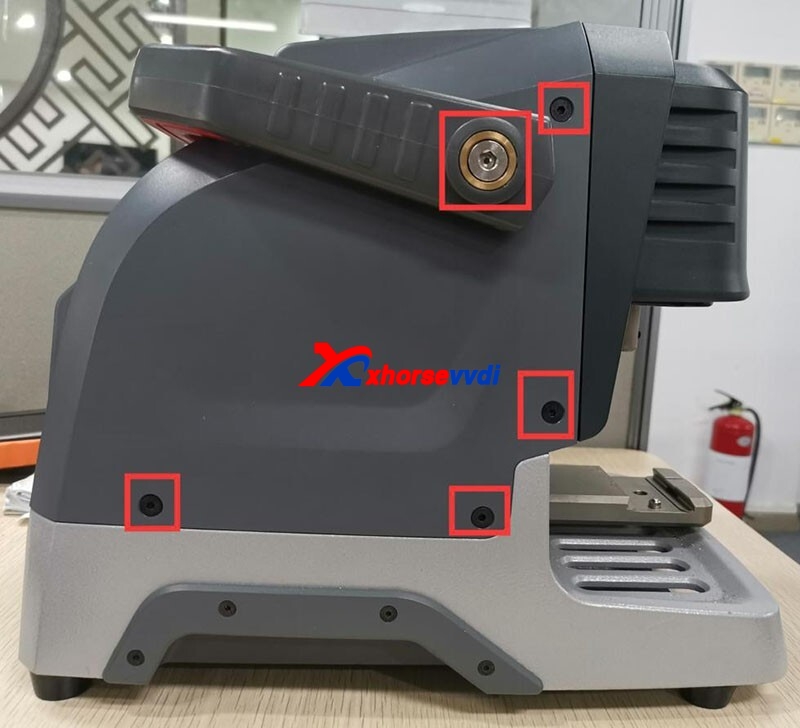
2)Plug out wires connected and unscrew the two screws to remove the back.
3)Turn to the front side.
Unscrew the little rubber cover, and at behind are screws.
Then unscrew the long metal.
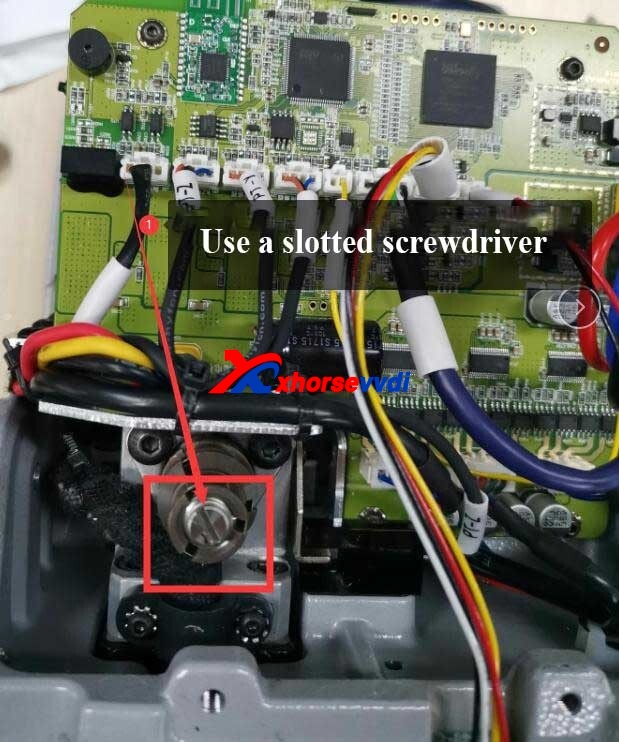
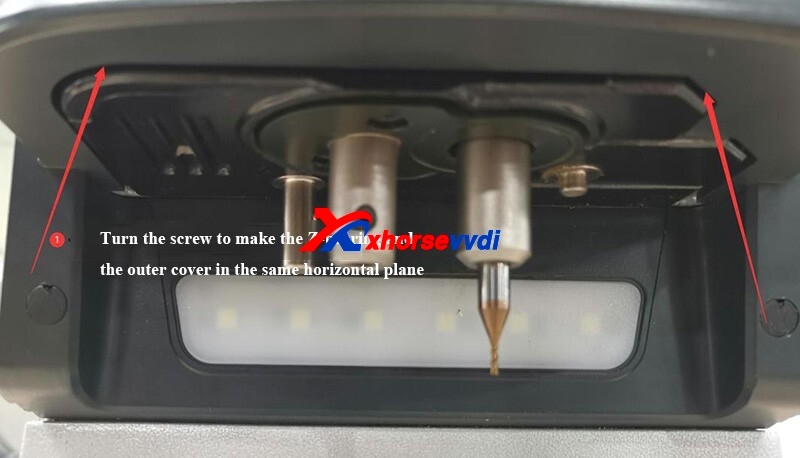
4)Use a slotted screwdriver to turn the screw so that the Z-bearing and the outer cover are in the same horizontal plane.
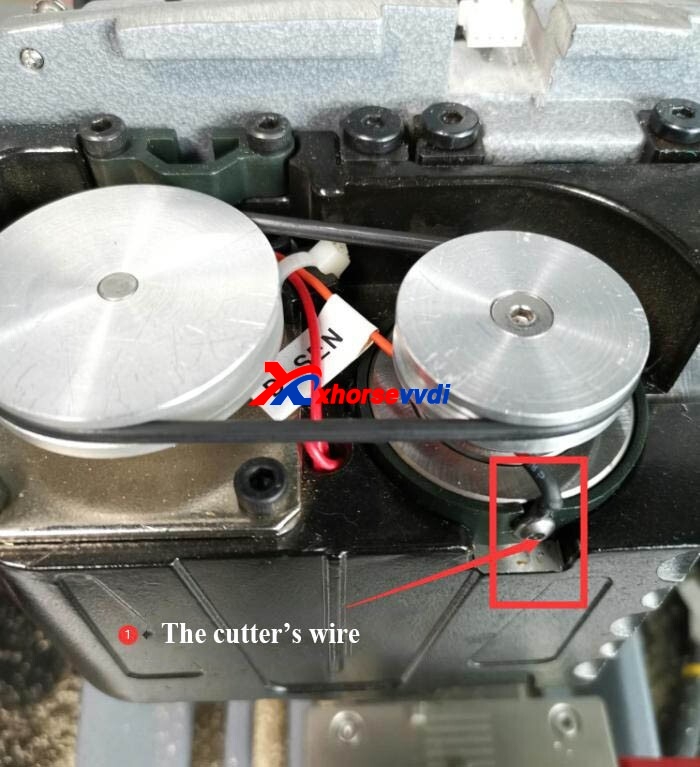
Then find the cutter's wire, and clean the iron filings on it.
Done!
Reference:https://www.xhorsevvdi.com/service/detecting-abnormal-conductivity-on-xp005-probe.html
Source: http://blog.xhorsevvdi.com/solved-dolphin-xp005-height-level-adjustment-error-code-29/
Posted by: xhorsevvdi at
08:46 AM
| No Comments
| Add Comment
Post contains 191 words, total size 5 kb.
March 09, 2022
Issue:
Dolphin XP005, the probe works well, but the cutter will restore itself once it touches the key blade. Have done the electrical conductivity test: X- and Y-axiz are normal, but the main axiz has something wrong.
Here Xhorsevvdiengineer gives Reason and Solution:
Reason
The problem is a dysfunctional battery.
The machine disconnects and the probe & the cutter restore because it is powered down and reboot automatically.
Solution
Buy a new battery and replace the broken one.
Source: http://blog.xhorsevvdi.com/fixed-xhorse-dolphin-xp005-cutter-cannot-touch-key-blade/
Posted by: xhorsevvdi at
10:00 AM
| No Comments
| Add Comment
Post contains 89 words, total size 2 kb.
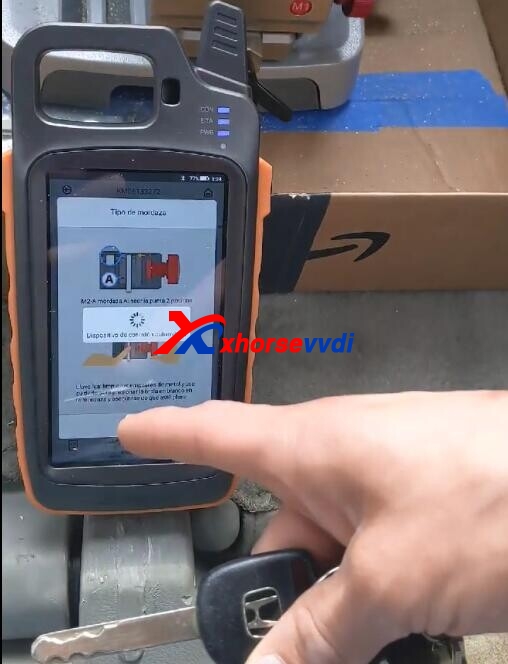
VVDI Key Tool Max can work as Xhorse Dolphin XP005 Key Cutting Machine screen, and here is the review from Humberto Leal Guzman that Working on a 2008 Honda Odyssey duplicate
Here is the details
Dolphin xp005 and key tool max connect OK via bluetooth
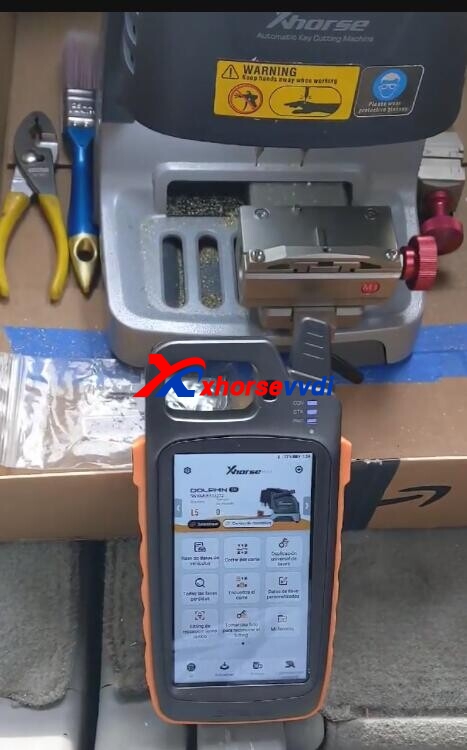
Choose the detailed type in key tool max dolphin xp005 page>>vehicle database
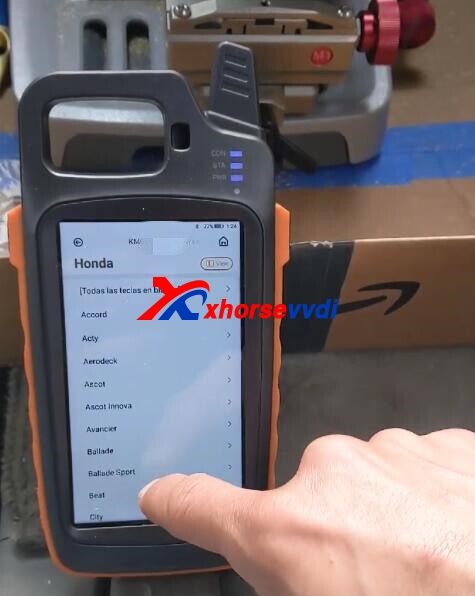
HON66
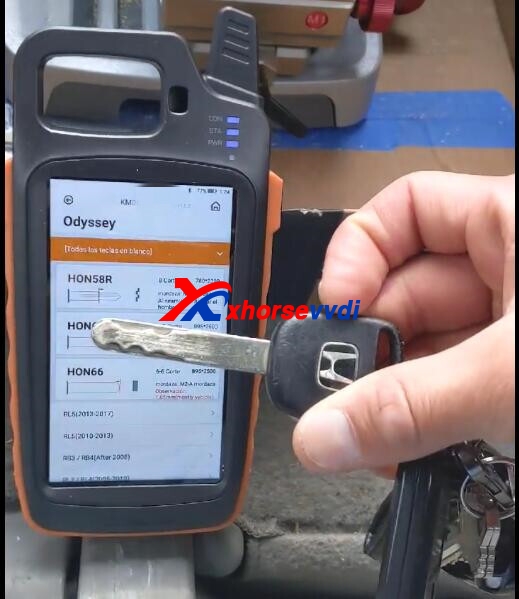
Put original key on the clamp, fasten it
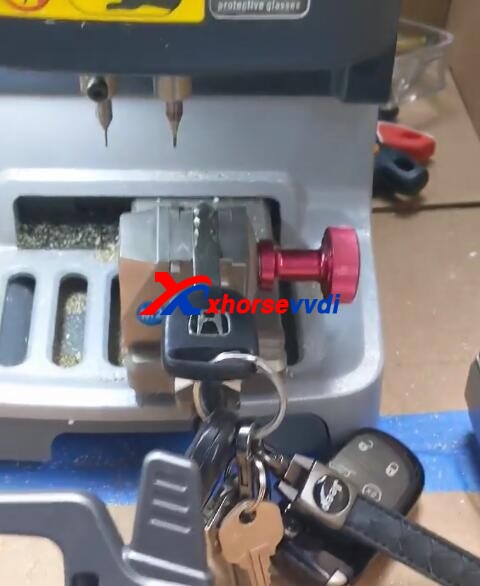
Then decode key
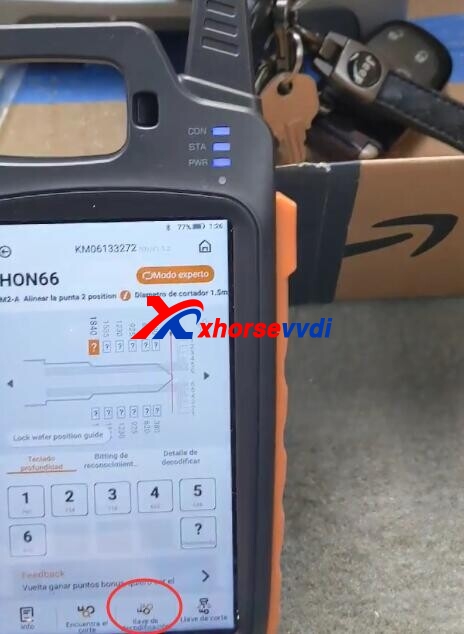
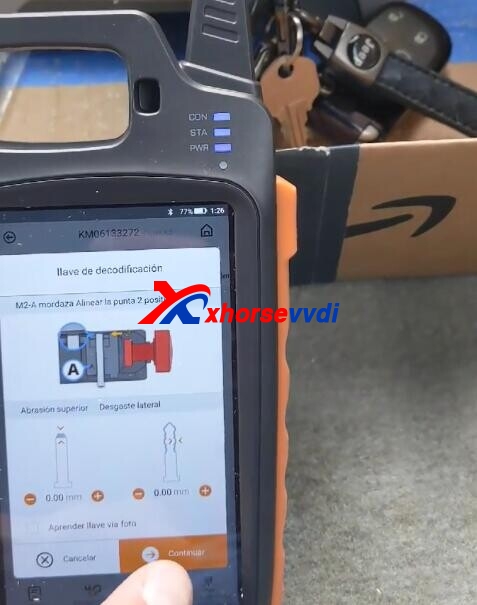
Start decoding
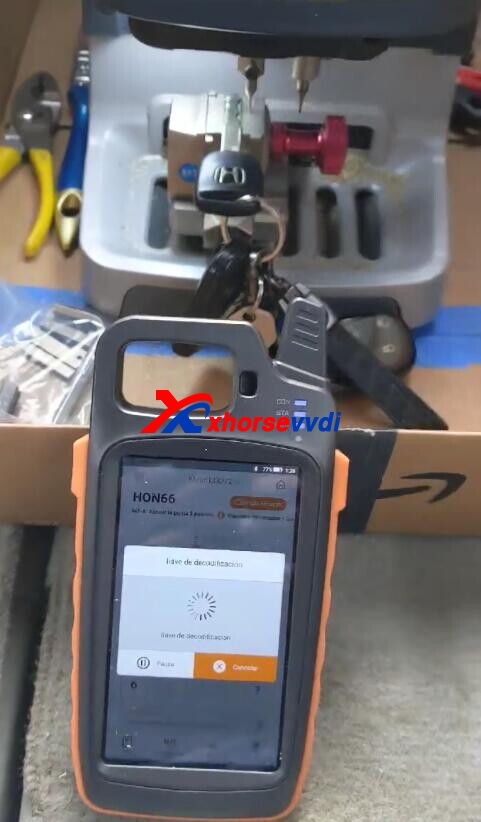
Processing decoding.
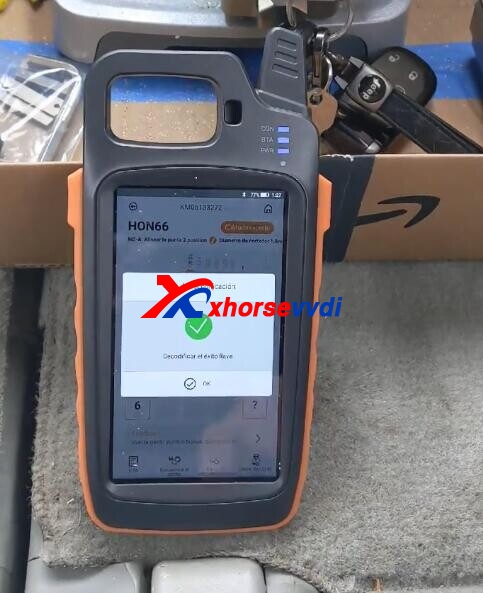
Decode OK
Then put new key blade on the clamp, click cutting key.
Posted by: xhorsevvdi at
09:59 AM
| No Comments
| Add Comment
Post contains 101 words, total size 3 kb.
32 queries taking 0.034 seconds, 131 records returned.
Powered by Minx 1.1.6c-pink.

