


July 13, 2022
Xhorse TOY8A AKL Smart Key Adapteris released! Here we have collected the most frequently asked questions.
Q1: What models it support?
A1:
Q2: Work with VVDI2, or only KTP?
A2: Only with Key Tool Plus.
Q3: No need smart key emulator, right?
A3: Right, smart key emulator is not required.
(Review from Ng Choo Ming:
Read eeprom direct write into xm 38, IS WORK ON 2019 ALPHARD... HARRIER...)
Q4: Must use Xhorse Toyota Key?
A4: Xhorse Toyota key is recommended.
Posted by: xhorsevvdi at
10:12 AM
| No Comments
| Add Comment
Post contains 88 words, total size 1 kb.
Now we have two new solutions for Toyota: TOY8A AKL Smart Key Adapterfrom Xhorse & Super ADP 8A/4A Adapter from Lonsdor. What is their difference? Here we will show you.
Xhorse XDBASK Adaptervs Lonsdor ADP Adapter:
| Item | TOY8A AKL Adapter | Super ADP 8A/4A Adapter |
| Brand | Xhorse | Lonsdor |
| Price | 199USD | 399USD |
| Image | 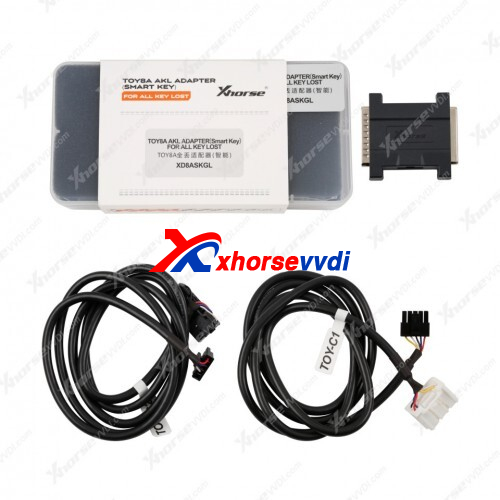 |
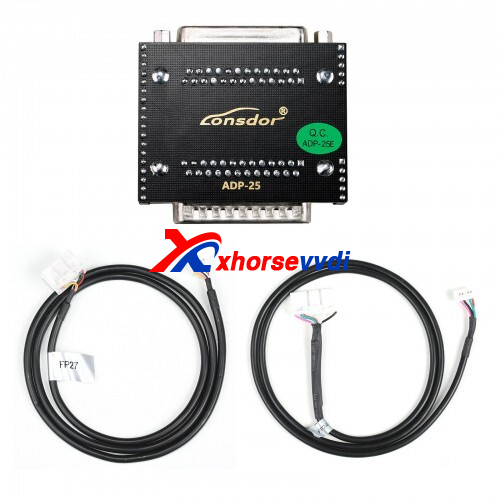 |
| Compatible Device | VVDI Key Tool Plus | Lonsdor K518S/ISE/USA/PRO |
| Transponder Type | 8A (A8/A9/AA) 4A | 8A (88/A8/A9/AA) 4A |
| PIN CODE | No Need | No Need |
| Add Key/All Key Lost | √ | √ |
| Emulator (All Key Lost) | No Need | Need Lonsdor LKE Emulator |
| Compatible Key | Xhorse Toyota Key(Recommended) | OEM/Lonsdor Toyota Key |
| Other Charge | × | × |
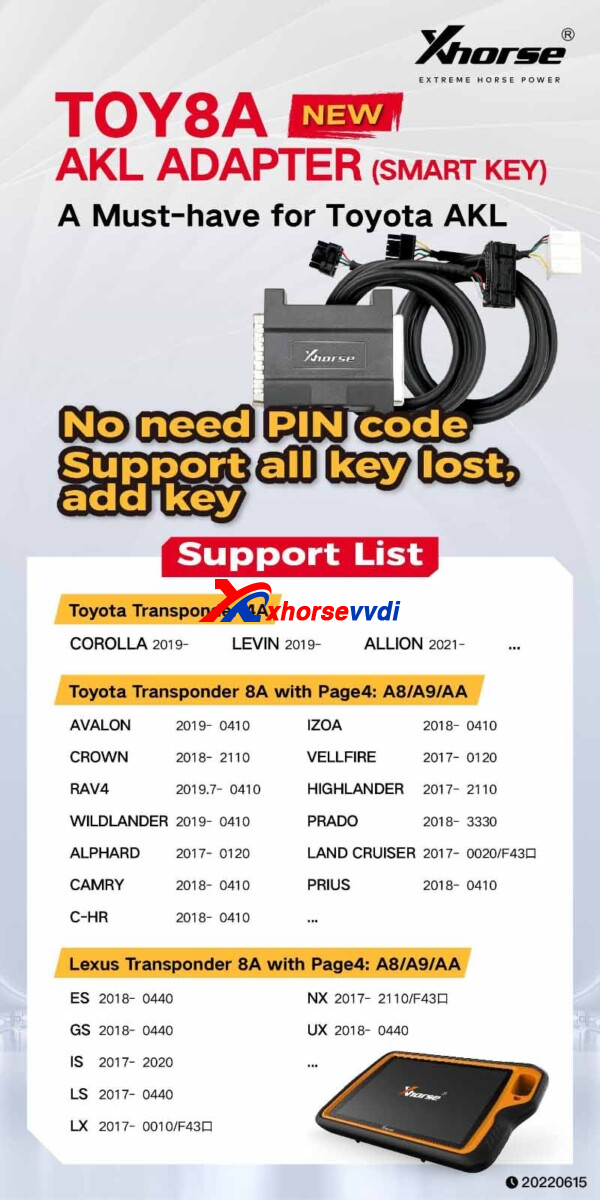
| Support Model | Toyota 4A: COROLLA 2019- LEVIN 2019- ALLION 2021-Toyota 8A with Page4: A8/A9/AA AVALON 2019- 0410 IZOA 2018- 0410 CROWN 2018- 2110 VELLFIRE 2017- 0120 RAV4 2019.7- 0410 HIGHLANDER 2017- 2110 WILDLANDER 2019- 0410 PRADO 2018- 3330 ALPHARD 2017- 0120 LAND CRUISER 2017- 0020/F43å£ CAMRY 2018- 0410 PRIUS 2018- 0410 C-HR 2018- 0410 Lexus 8A with Page4: A8/A9/AA |
Toyota 4A: LIVIN 2021 Allion 2021 Corolla 2019- Corolla HV 2019-2021 Levin 2019- Levin HV 2019-2021Toyota 8A: Camry 2013-2021 Highlander 2013-2021 Land Cruiser 2014-2021 Prado 2014-2021 Crown 2015-2021 Alphard 2015-2021 Vellfire 2015-2021 Previa 2015-2021 C-HR 2018-2021 Izon 2018-2021 Wildlander 2018-2021 Avalon HV 2019-2021 Rav4 2014-2021 Prius 2015-2021 Avalon 2019-2021 Corolla EX 2013-2019 Harrier 2021 Lexus 8A: |
From above we can see,
Similarities:
1. Both are password-free, and support add/akl
2. Generally they support Toyota models up to 2021, so for 2022 latest models, support or not is not sure, just try with these adapters
Difference:
1. If smart emulator is required for all key lost and if they work with OEM keys,
- Xhorse XM38 Toyota Keyserves as emulator and new key when all key lost, so it doesn’t need smart key emulator, also that’s why xhorse key is recommended;
- For Lonsdor ADP Adapter, it requires LKE Emulator to light dash when all key lost, so it can work with more keys
2. For support model, their sorting ways are different,
- Xhorse sort by the part number of original key;
- Lonsdor sort by the model and the year
http://blog.xhorsevvdi.com/xhorse-toy8a-akl-smart-key-adapter-vs-lonsdor-super-adp-8a-4a-adapter/
Posted by: xhorsevvdi at
10:12 AM
| No Comments
| Add Comment
Post contains 395 words, total size 5 kb.
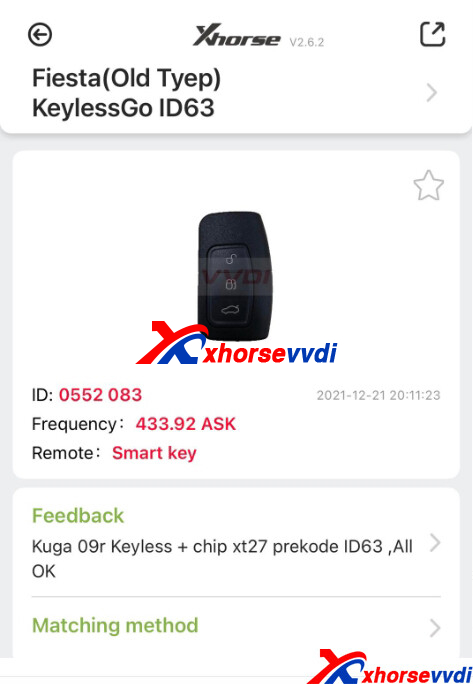
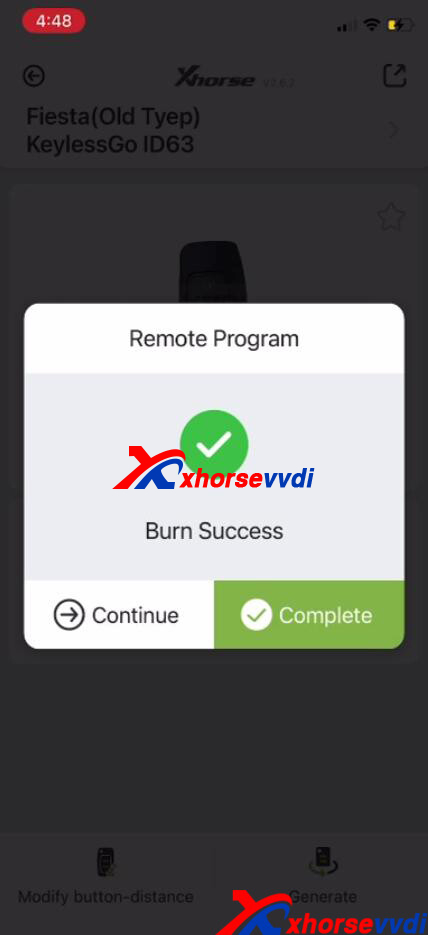
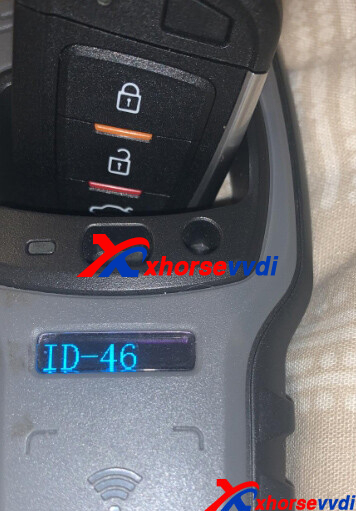
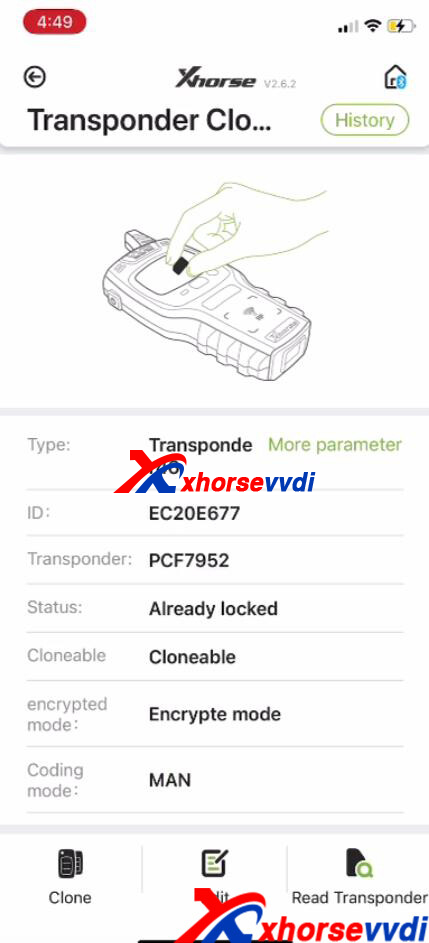
Question:
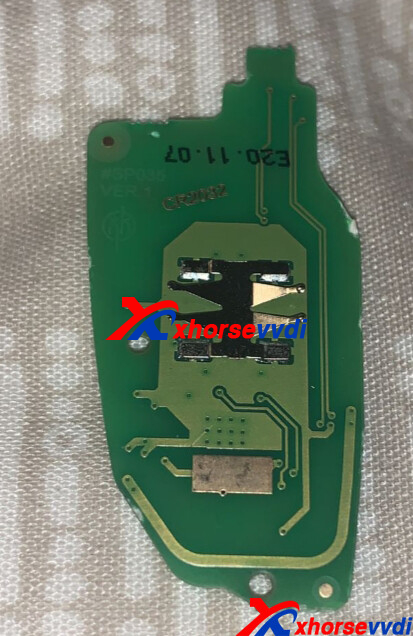
VVDI Smart Key XSKF01EN will not program only to pcf keys cannot generate ford 63 or reset super chip prompt "unknown" and also goes to a pcf chip like ID46.
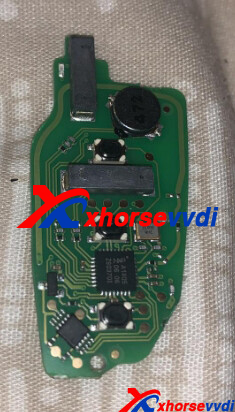
XSKF01EN PCB:
Here Xhorsevvdi technician answers:
Precode VVDI Super Chip as ID63 and install it into XSKF01EN Prox then generate.
Similar Case:
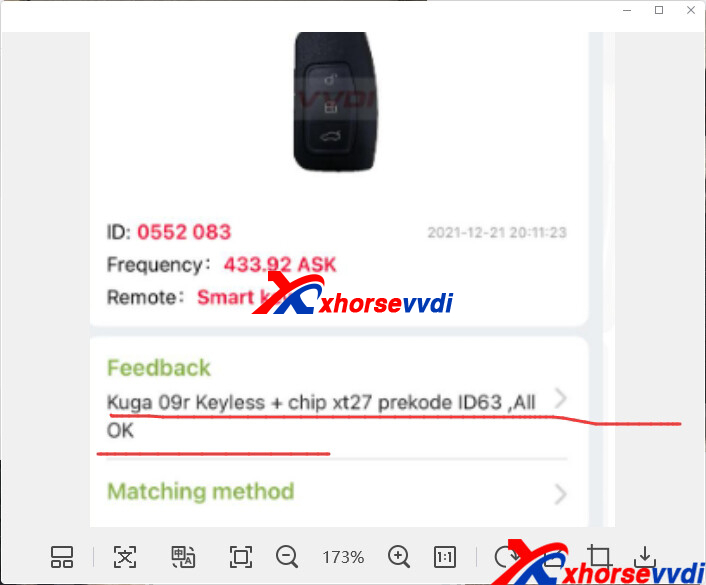
Kuga 09R Keyless + Chip XT27 precode ID63, All OK.
Check also:
Xhorse Remote Full List and Comparison
http://blog.xhorsevvdi.com/solved-vvdi-smart-key-xskf01en-generate-fiesta-old-type-keylessgo-id63-fail/
Posted by: xhorsevvdi at
10:11 AM
| No Comments
| Add Comment
Post contains 84 words, total size 3 kb.
Purpose:
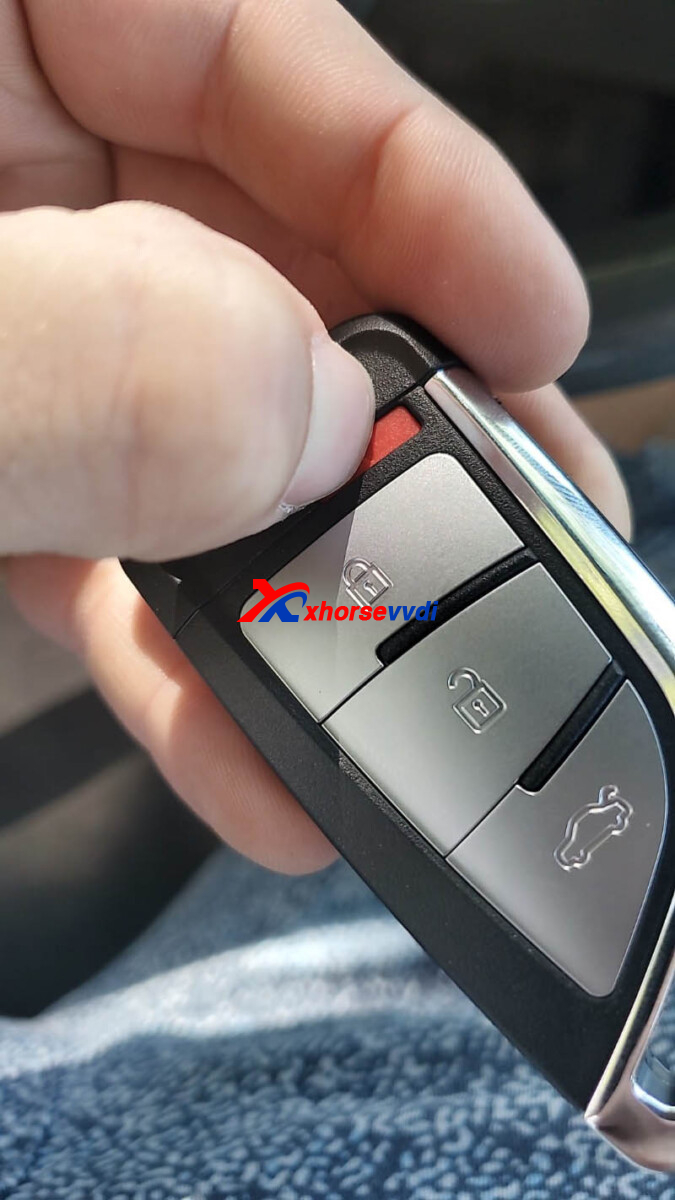
Try to fix faulty panic button on Xhorse Remote. The internal motherboard button works but the silicone mold that actuates the button will not press firmly.
Generally, just grab another one and take the defective one and get it replaced under warranty from key distributors.
How-to-Fix from Customers:
1. Put a dab of super glue on the plastic where it hits the button, then sprinkle some baking soda on to harden it instantly.
2. I made this plastic pieces to make this Wire XKKF20EN Key work! I have CNC 3D printer, but you can just cut a piece of plastic to put it on the bottom! As a pillow or shim!
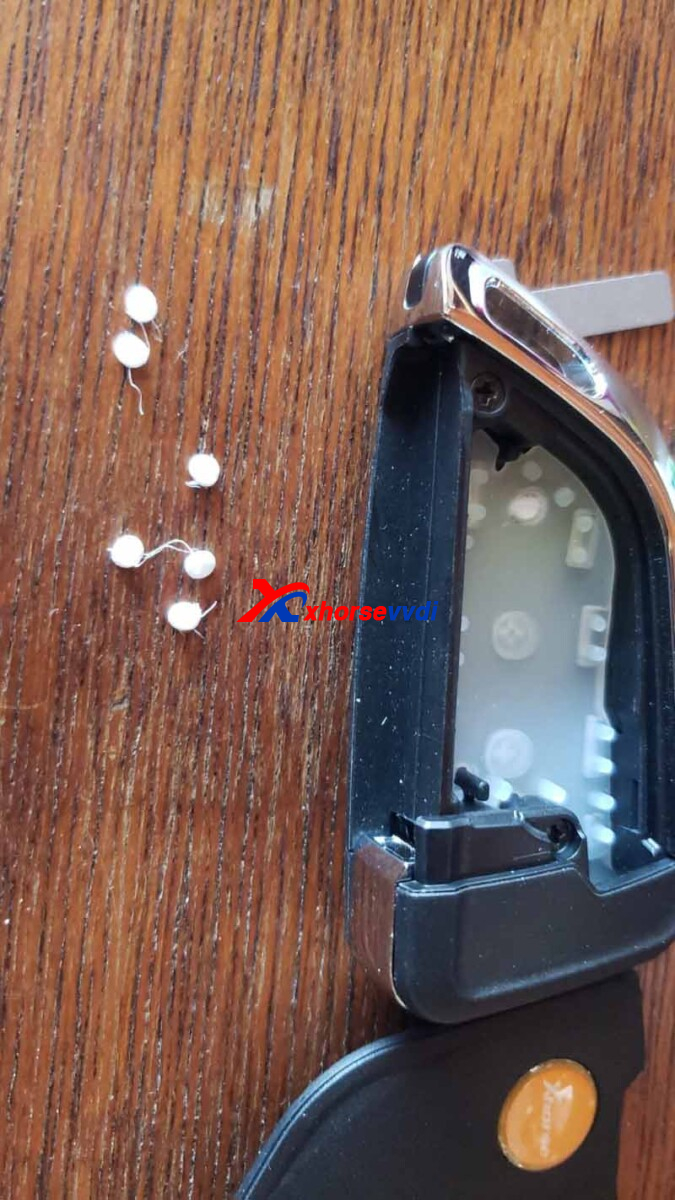
3. Put the chip holder piece or a little cardboard
Thanks to Stephen, Scott, Juan, Evans...
http://blog.xhorsevvdi.com/how-to-fix-xhorse-remote-faulty-panic-button-not-press-firmly/
Posted by: xhorsevvdi at
10:10 AM
| No Comments
| Add Comment
Post contains 140 words, total size 2 kb.
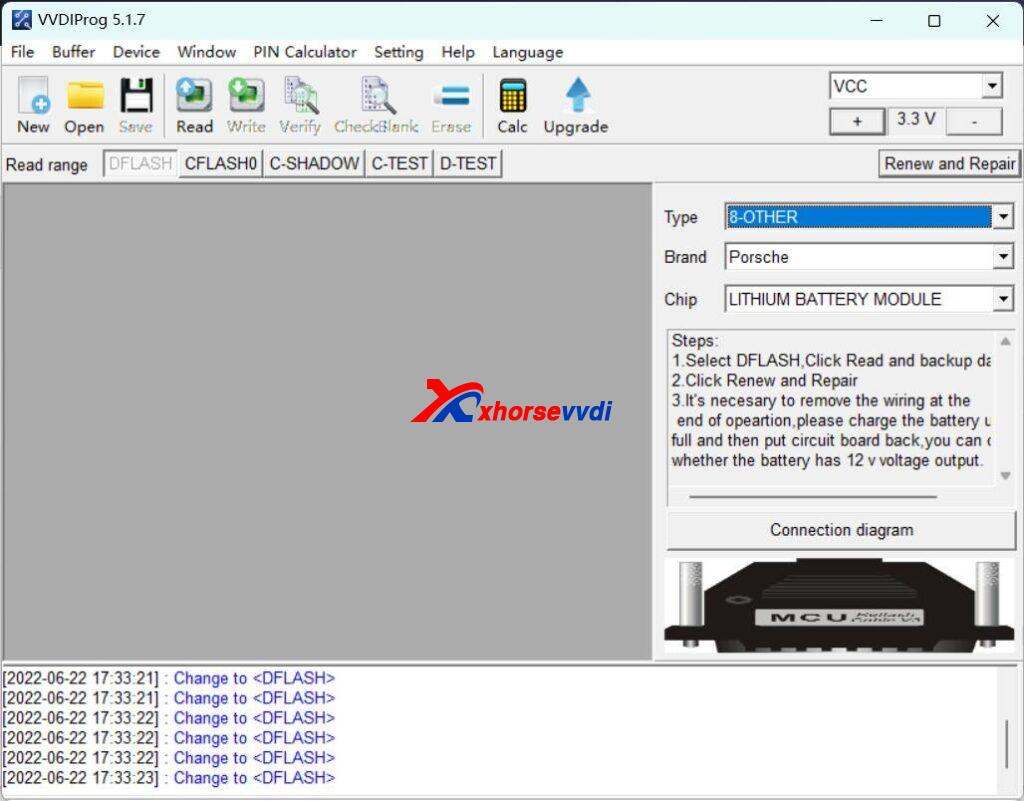
V5.1.7 VVDI Prog software is released now, get free download link from xhorsevvdi.com
1.Free Download V5.1.7 VVDI Prog Software
https://mega.nz/file/BN8lQSIZ#kJ1H0c8huMsHa8F1TScJvXa37I2qx5-VJtSAv21Ws98
Password:123456
2. V5.1.7 VVDI Prog Update Info
v5.1.7 (2022-06-21)
* This version DON't need update
* Fixed some ECU options reading exceptions
* Fixed bug about AT25320 option in <1-EEPROM&FLASH>-><ATMEL>
+ Add M29F400FBXXMXX option in <1-EEPROM&FLASH>-><ST>
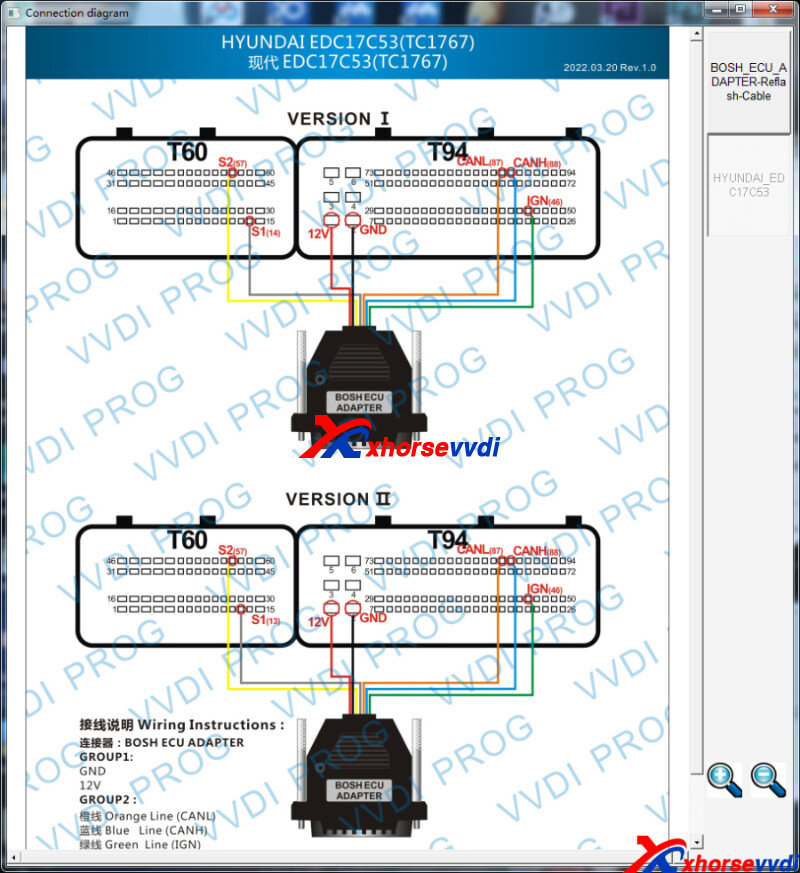
+ Add EDC17C08(ADAPTER), EDC17C53(ADAPTER), ME17.9.11(ADAPTER) options in <10-BOSCH_ECU_ADAPTER>-><Hyundai>
+ Add EDC17C55 option in <10-BOSCH_ECU_ADAPTER>-><JMC>
+ Add EDC17C63(ADAPTER) option in <10-BOSCH_ECU_ADAPTER>-> <MAHINDRA>
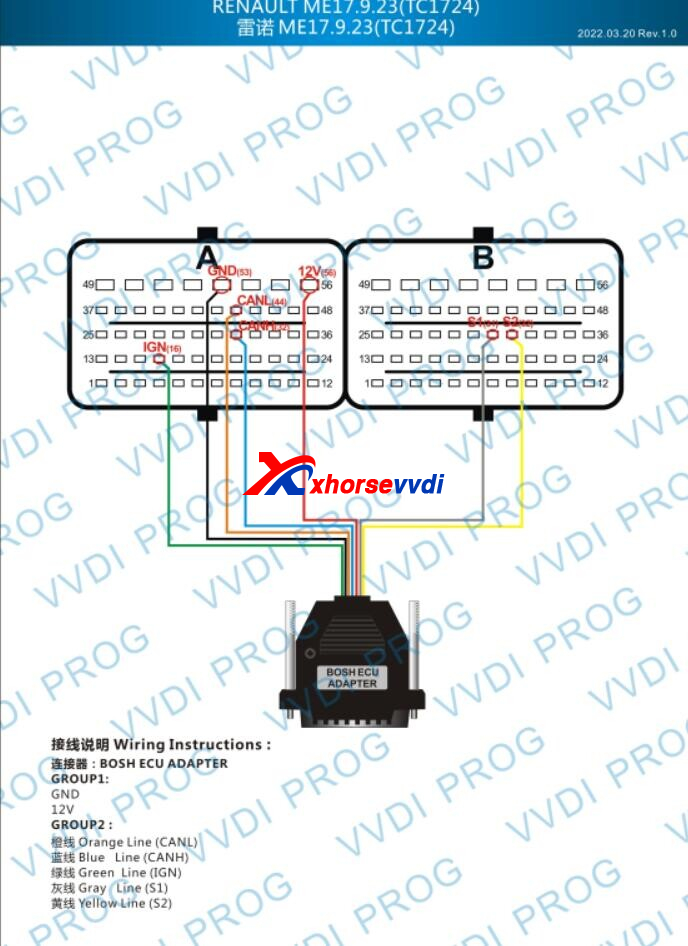
+ Add ME17.9.23(ADAPTER) option in <10-BOSCH_ECU_ADAPTER>-> <Renault>
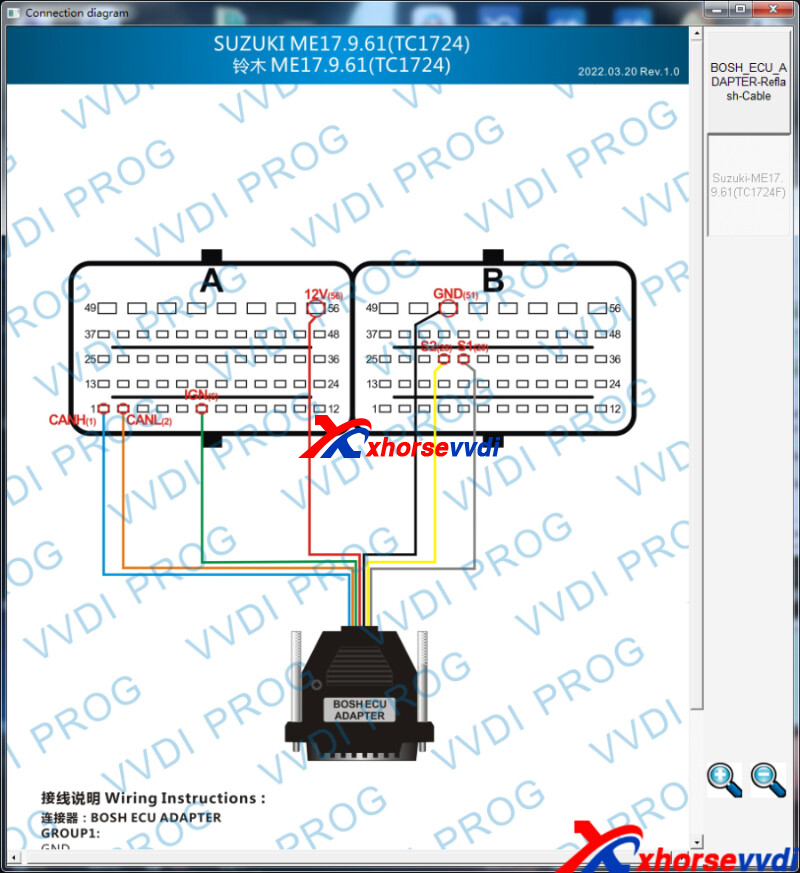
+ Add ME17.9.61(ADAPTER), ME17.9.64(ADAPTER) options in <10-BOSCH_ECU_ADAPTER>-> <Suzuki>
 http://blog.xhorsevvdi.com/free-download-v5-1-7-vvdi-prog-software/
Posted by: xhorsevvdi at
10:09 AM
| No Comments
| Add Comment
Post contains 102 words, total size 2 kb.
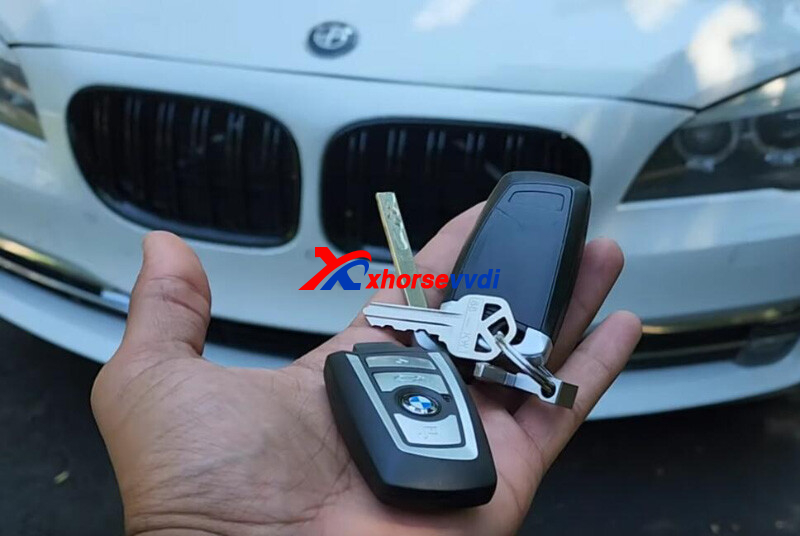
Today we are going to show you how to add a key for BMW 740Li 2015 with CAS4 system.
Tools:
Xhorse CAS4 Solder-free Adapter
BMW CAS Test Platform
1. Remove CAS4 Module
Remove the bottom panel and take out CAS4 module.
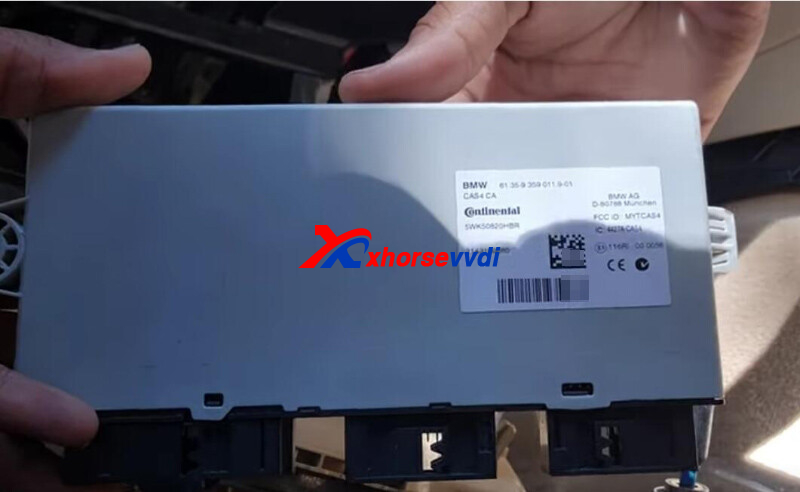
Mask 1N35H.
2. Read D-flash
Connect CAS4 Adapter to CAS4 module. (clear pin contacted and pieces locked)
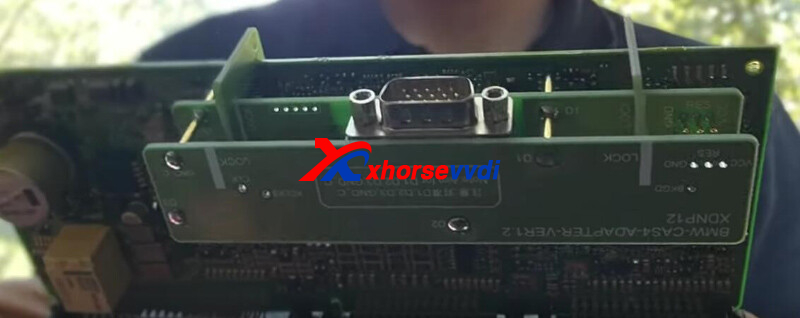
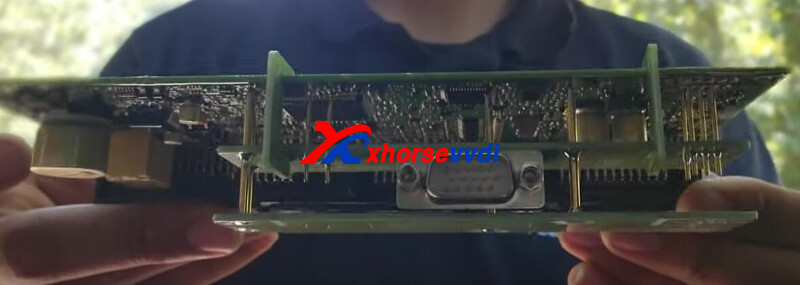
Then connect CAS4 Adapter to Key Tool Plus.
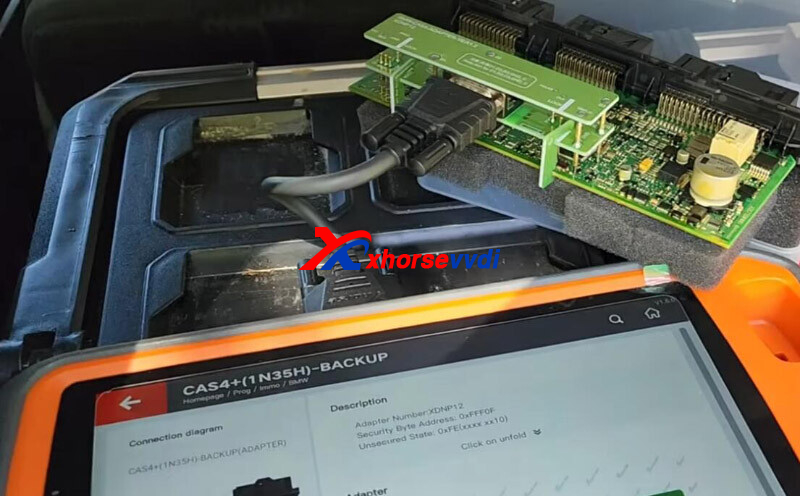
On KTP, go to
Prog>>Immo>>BMW
Read and save D-flash.
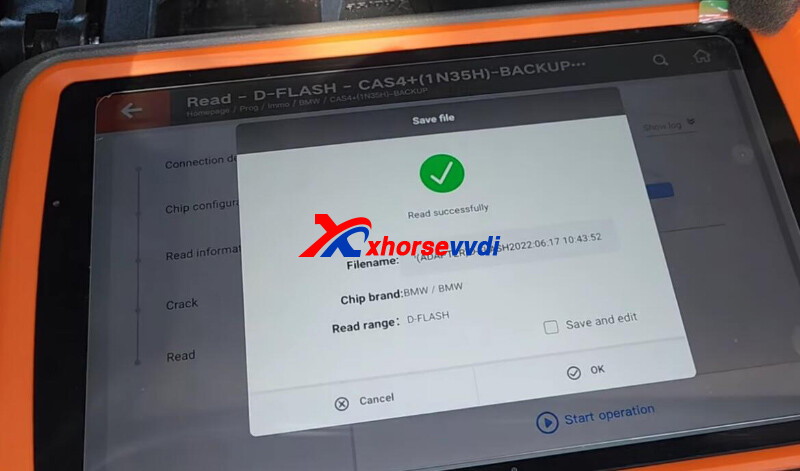
Read and save P-flash in case.
3. Make Dealer Key
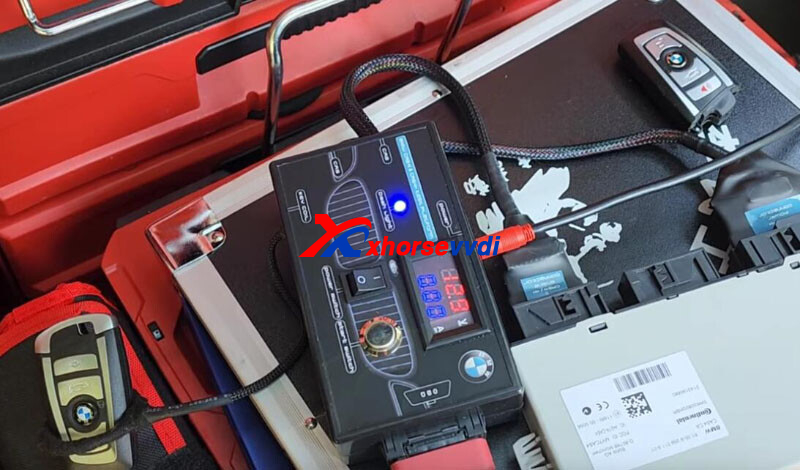
Assemble CAS4 module again and connect it to BMW test platform and VVDI Tablet.
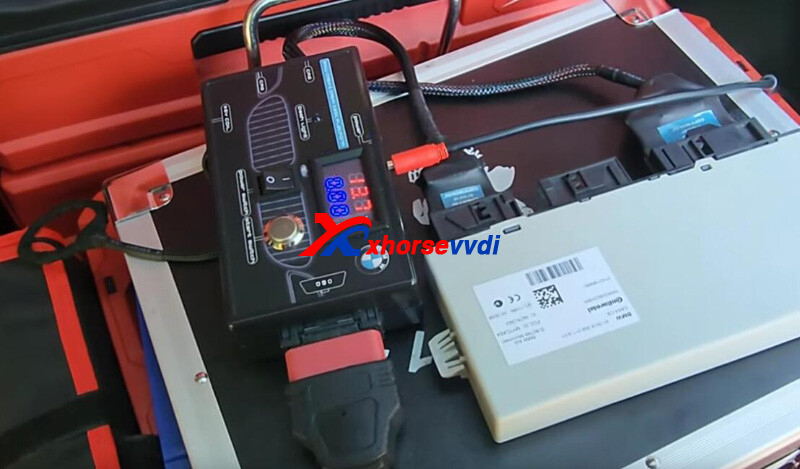
Put original key to the coil to turn on the platform.
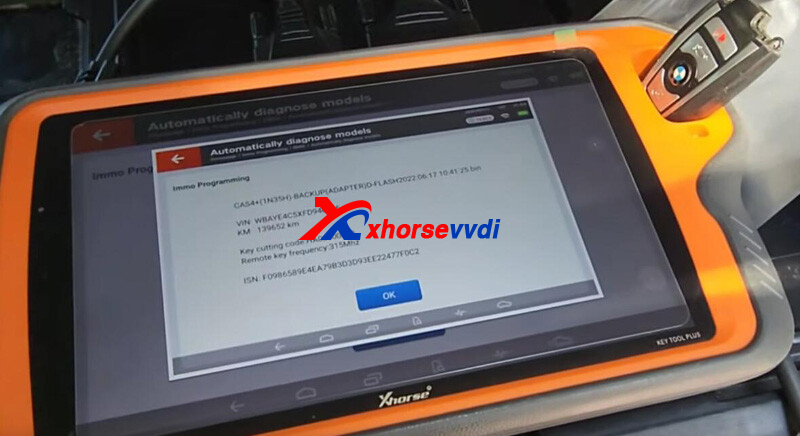
On KTP, go to
Immo Programming>>Europe>>BMW>>Automatically diagnose models>>Generate keys via EEPROM
Put new key into KTP coil.
Select
Make Dealer Key>>CAS4+ (5M48H/1N35H)
Load EEPROM(D-flash) file.
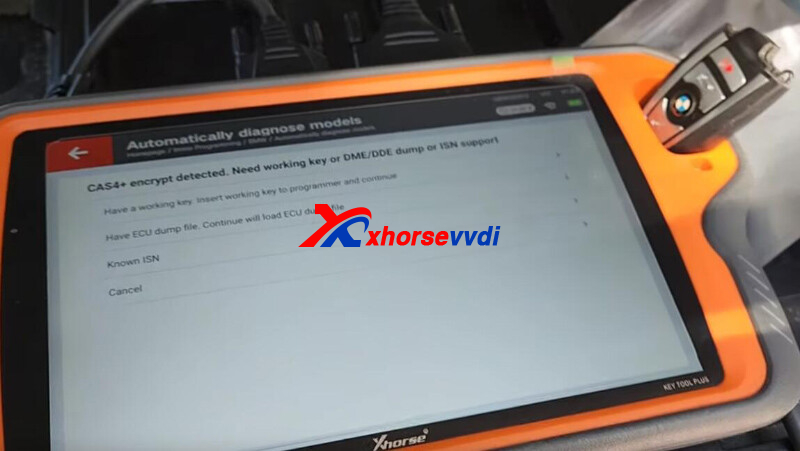
Select key position.
Select "Have a working key. Insert working key to programmer and continue".
Insert original key as prompts.
Take a screenshot of ISN in case.
Insert new key to make a dealer key.
Success.
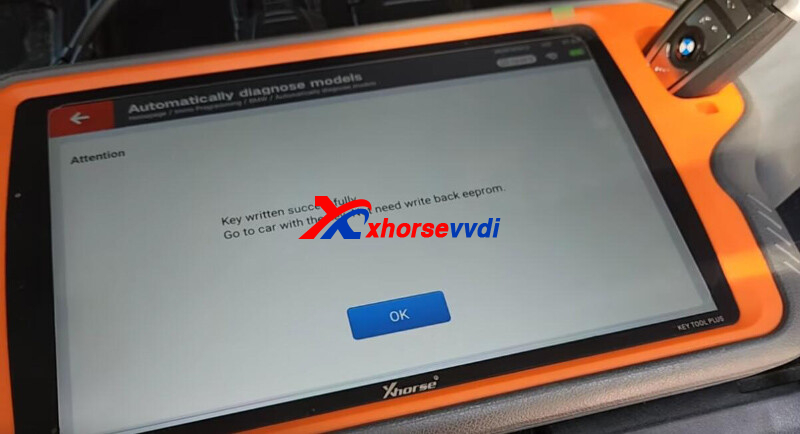
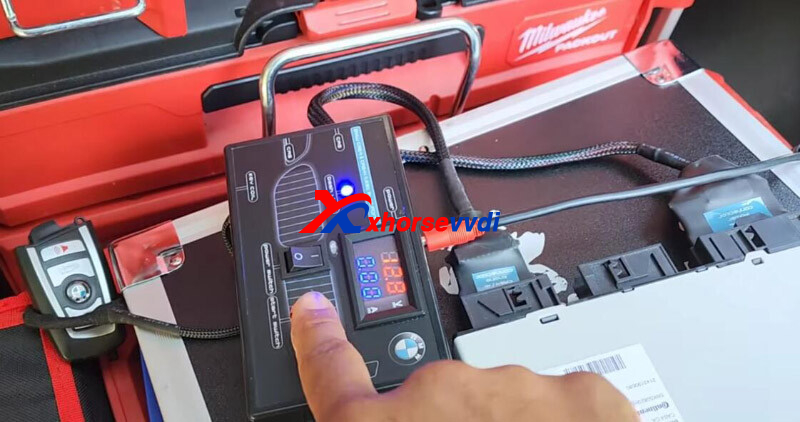
Insert new key to test platform's coil.
Turn on/off platform for several time to make sure it works.
Install CAS4 module back to vehicle.
4. Cut Key Blade
Duplicate key blade by Dolphin XP005L Machine.
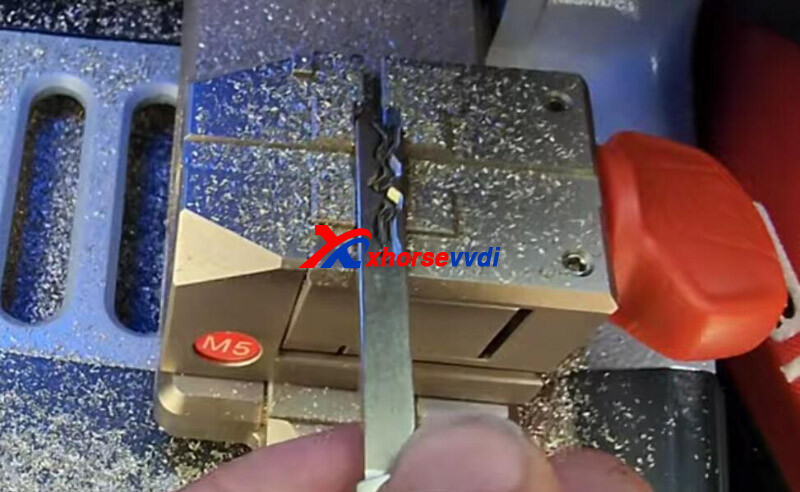
Done! That's how to add a key for BMW 740Li CAS4.
Credit to Richard Ruiz
http://blog.xhorsevvdi.com/vvdi-key-tool-plus-add-key-for-bmw-740li-2015-cas4/
Posted by: xhorsevvdi at
10:08 AM
| No Comments
| Add Comment
Post contains 237 words, total size 5 kb.
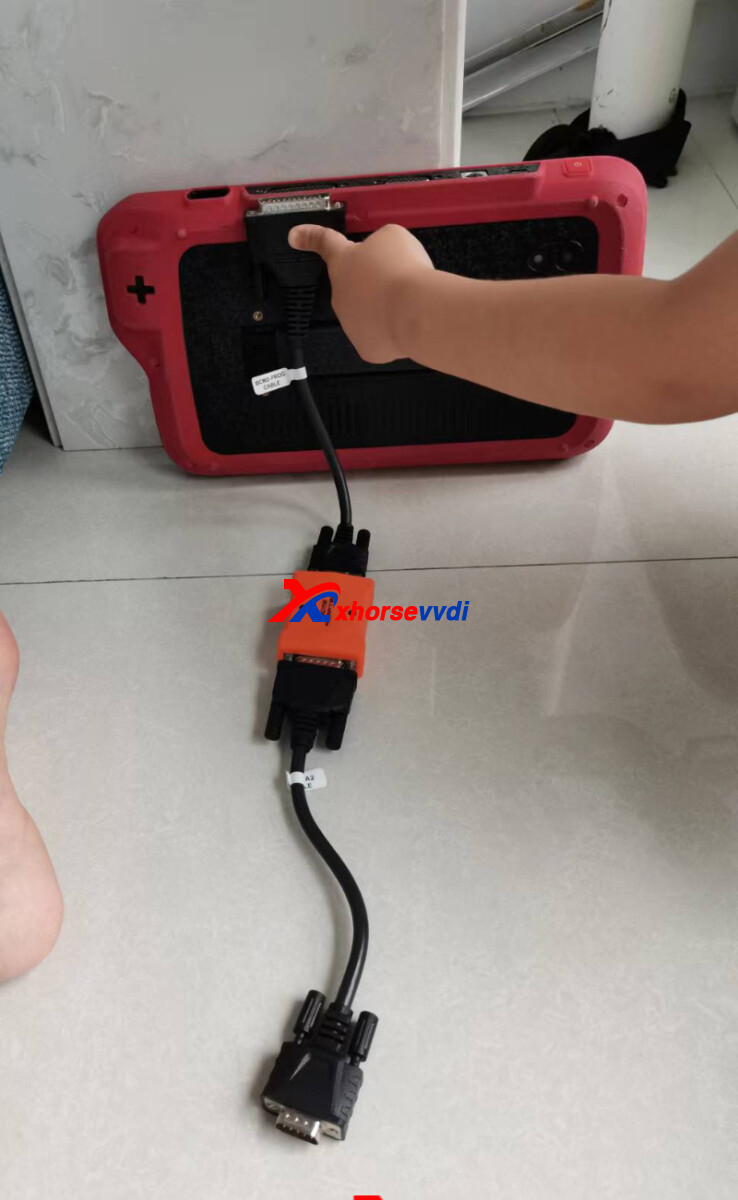
Issue:
Trying to add key for Audi with encrypted BCM2, using VVDI Audi Solder-free Adapter. I have connected 12V power but why my VVDI Key Tool Plus keeps saying "12V power not connected or incorrect adapter connection"?

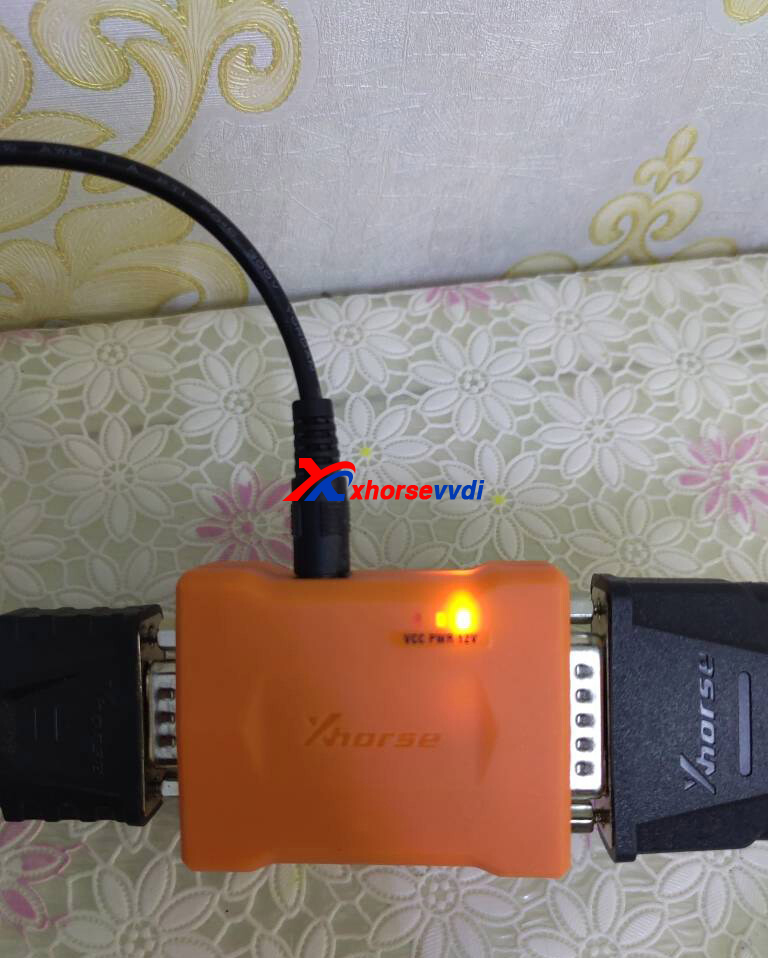
How to Check?
1)If the power is 12V, 3-5A
2)If the connection is correct
The customer's power supply is correct (12V, 4A), then we check the connection and find the
Reason:
Key Tool Plus Pad is connected via the left DB15 port not DB25 port.
Besides, the required cable is in Key Tool Plus package, not this one in VVDI BCM Adapter package (the cable that doesn't match is for VVDI PROG).
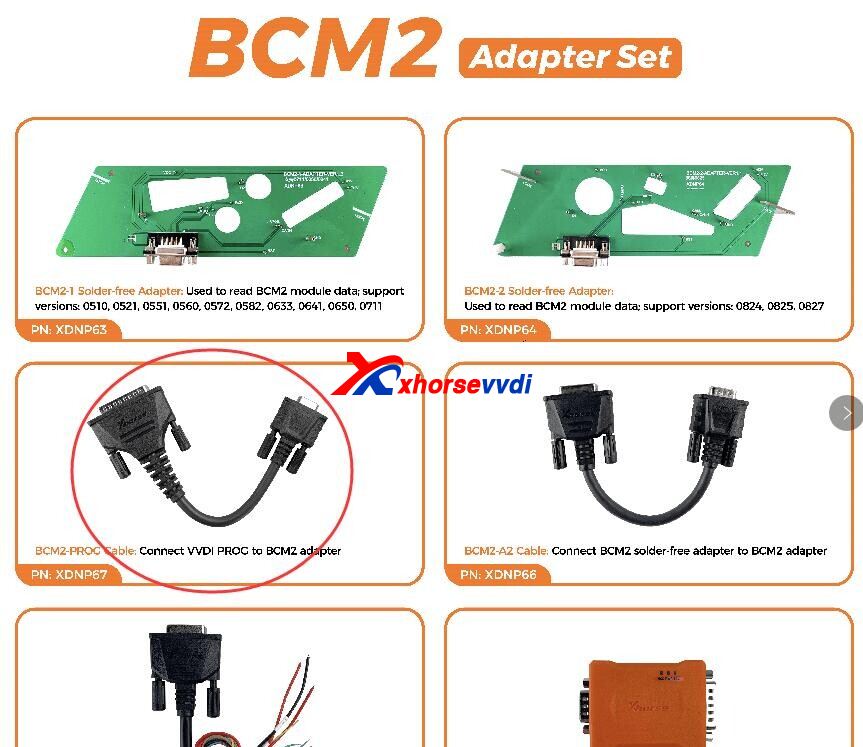
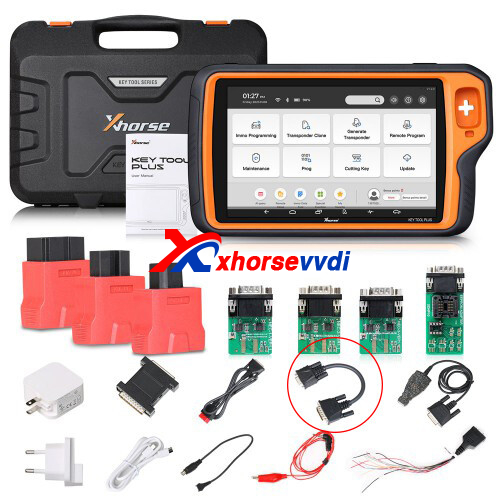
Xhorse VVDI Audi BCM2 Solder-free Adapter is On Sale!
99USD(EU/UK/US Ship): https://www.xhorsevvdi.com/wholesale/bcm2-solder-free-adapter.html
Posted by: xhorsevvdi at
10:08 AM
| No Comments
| Add Comment
Post contains 131 words, total size 3 kb.
This article is going to show you how to add a key for Lada Largus 2018 through block programming.
EEPROM:
M95040
Tools:
Procedures:
Step 1. Remove chip
Remove chip and solder it to VVDI PROG EEPROM Adapter.
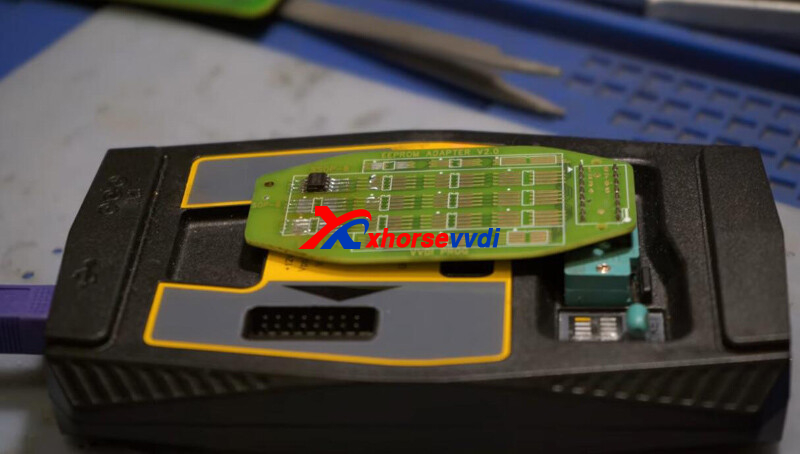
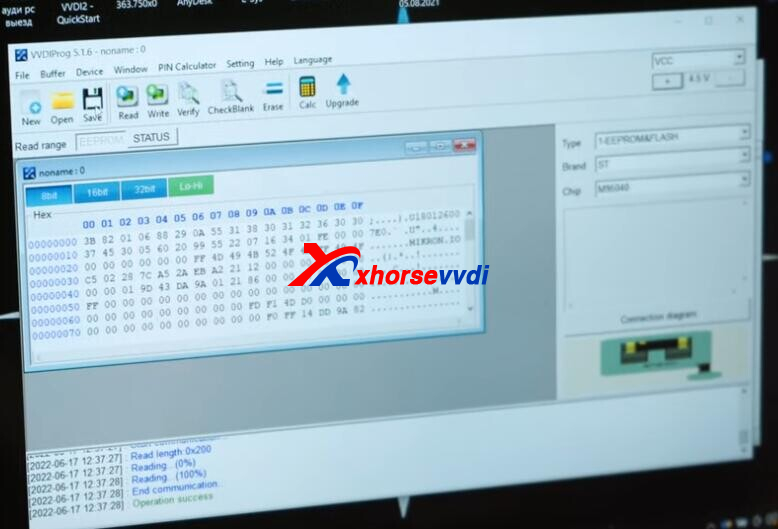
Step 2. Read EEPROM data
Run VVDI PROG software.
Select
"1-EEPROM&FLASH" "ST" "M95040".
Read and save EEPROM.
Step 3. Make Dealer Key
Run VVDI2 software.
Enter "Transponder Programmer".
Select "Euro" "Renault" "Logan" "2010- -95040".
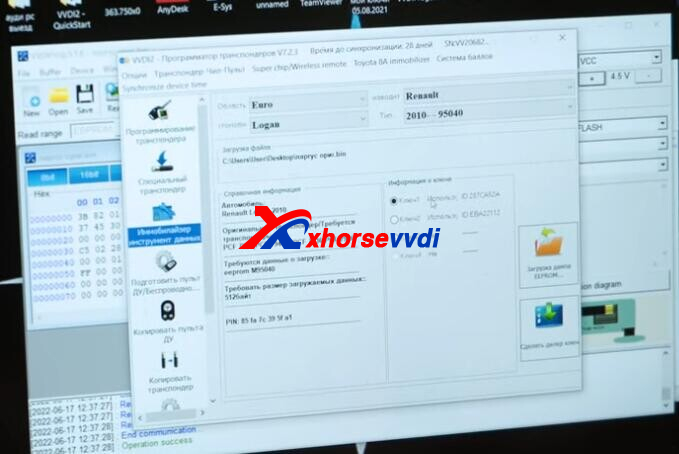
Put a new key into VVDI2 key coil.
Select used key position and load EEPROM file we just got.
Click "Make Dealer Key" and select "PCF 7936(PCF 7946)".
Save new file for writing back to module.
Step 4. Write EEPROM Back
Load new EEPROM file.
Write it back to M95040 chip.
Install chip and module back to the vehicle, and test new key.
Done! That's how VVDI PROG + VVDI2 do AKL programming for Lada Largus 2018.
http://blog.xhorsevvdi.com/vvdi-prog-vvdi2-lada-largus-2018-akl-programming-guide/
Posted by: xhorsevvdi at
10:07 AM
| No Comments
| Add Comment
Post contains 164 words, total size 3 kb.
Here is an Xhorse VVDI PROG review:
VAG Siemens Simos7.1 Immo Off Success
EEPROM: M93C86
Simple Guide:
Read/Write original/edited EEPROM by VVDI PROG.
Edit EEPROM data by Hex Workshop software.
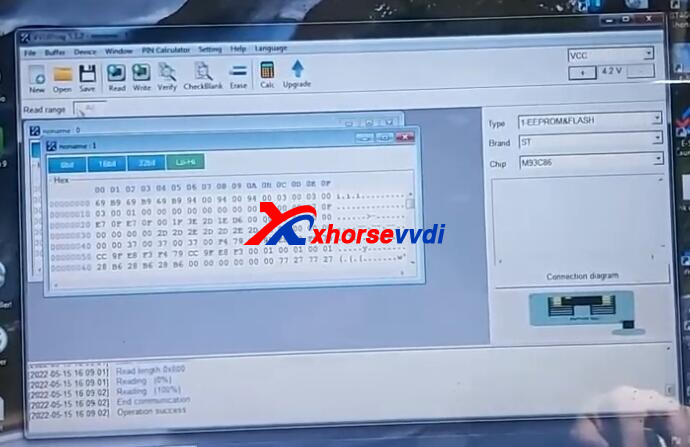
Step 1. Read original data
De-solder M93C86 chip, and put it in VVDI PROG EEPROM socket.
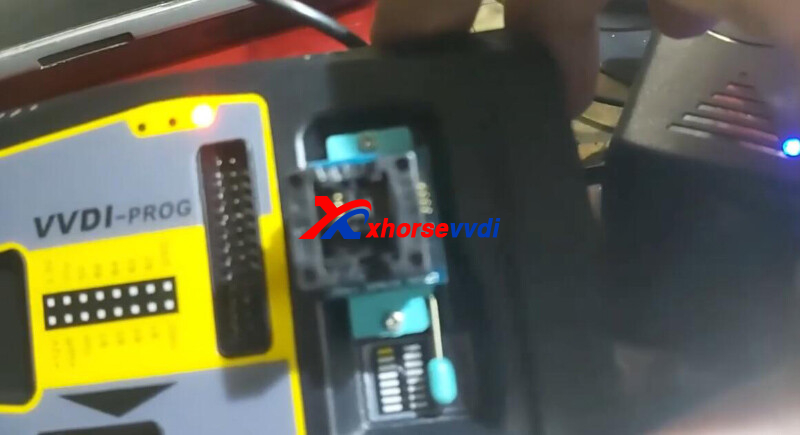
On VVDI PROG software, select
"1-EEPROM&FLASH" "ST" "M93C86".
Read and save original data.
Step 2. Edit data
Run Hex Workshop.
Change "94 00 94 00 94 00" into "31 31 31 31 31 31".
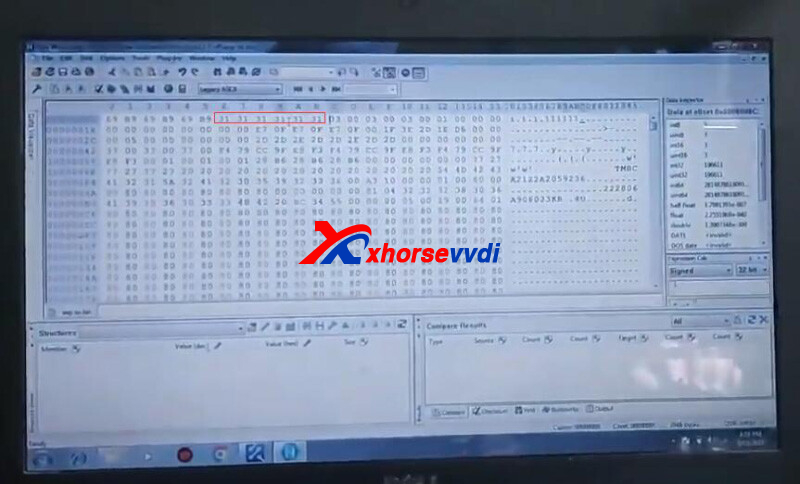
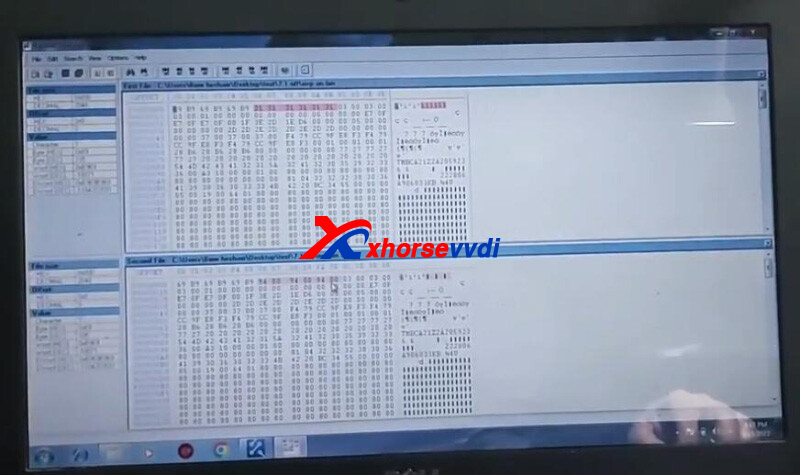
Save edited data.
Step 3. Write new data
Load edited data file, and write it back to 93C86 chip.
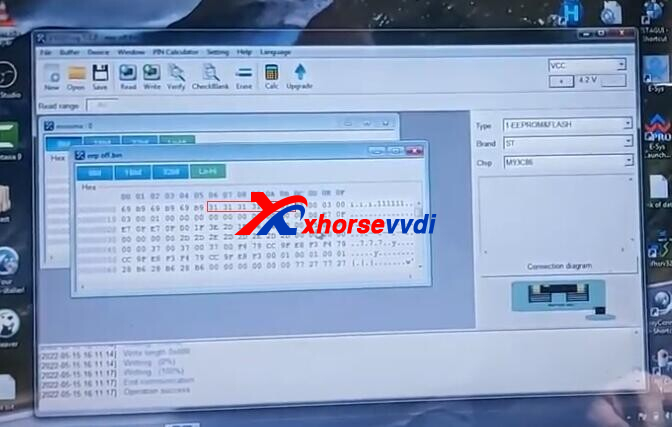
Then IMMO OFF done!
Software you may get interested in,
VVDI PROG V5.1.7: https://mega.nz/file/BN8lQSIZ#kJ1H0c8huMsHa8F1TScJvXa37I2qx5-VJtSAv21Ws98
Hex Workshop V6.8.0:
https://download.cnet.com/Hex-Workshop/3000-2352_4-10004918.html?part=dl-HexWorksh&subj=dl&tag=button
Credit to hesham essam
http://blog.xhorsevvdi.com/vvdi-prog-vag-siemens-simos7-1-m93c86-immo-off-success/
Posted by: xhorsevvdi at
10:07 AM
| No Comments
| Add Comment
Post contains 131 words, total size 3 kb.
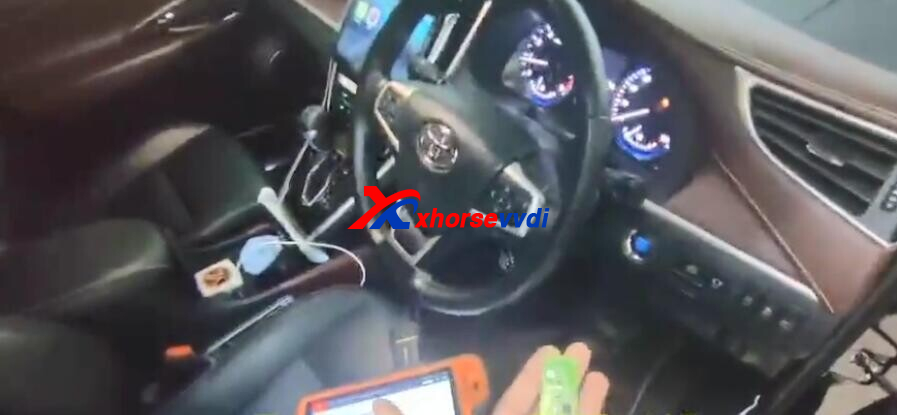
Xhorse Toyota 8A/4A Smart Key Adapter is new released item, can support to add key and all key lost, work with key tool plus only. And it can do "ALPHARD 2017- 0120", this blog is about how to use vvdi key tool plus, Toyota 8a smart key adapter, and XM38 smart key to program Toyota Alphard 2019 all key lost.
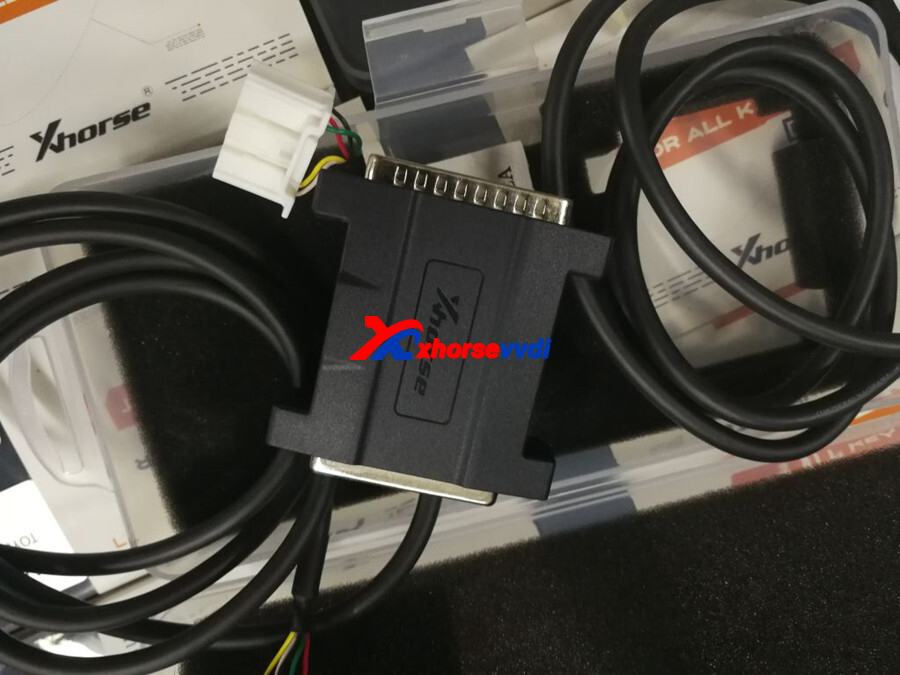
1. Connection Diagram
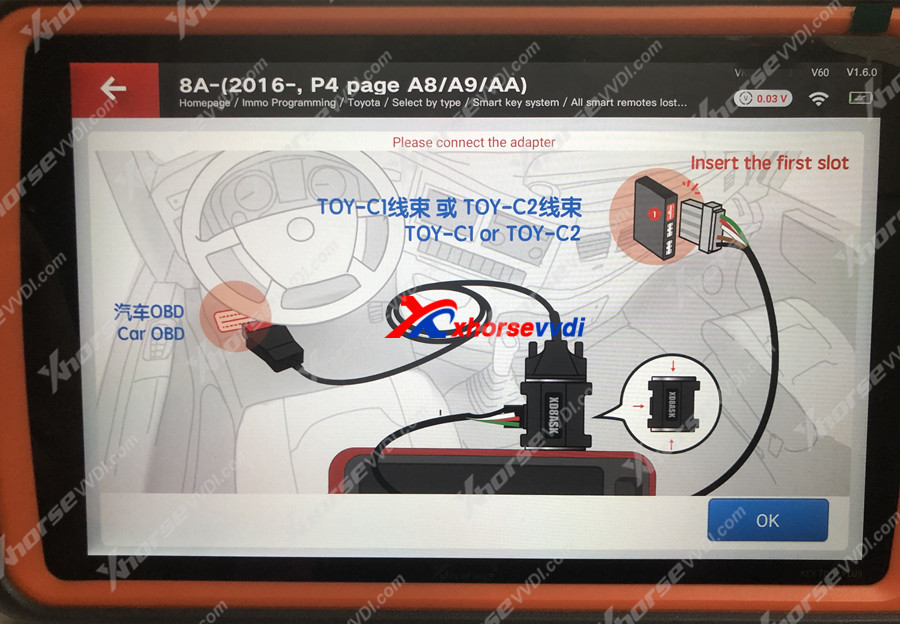
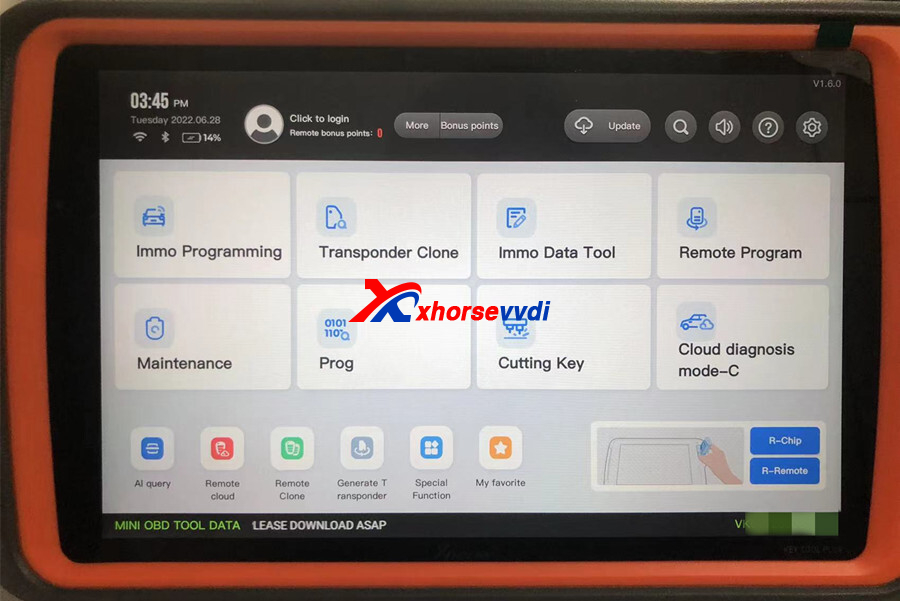
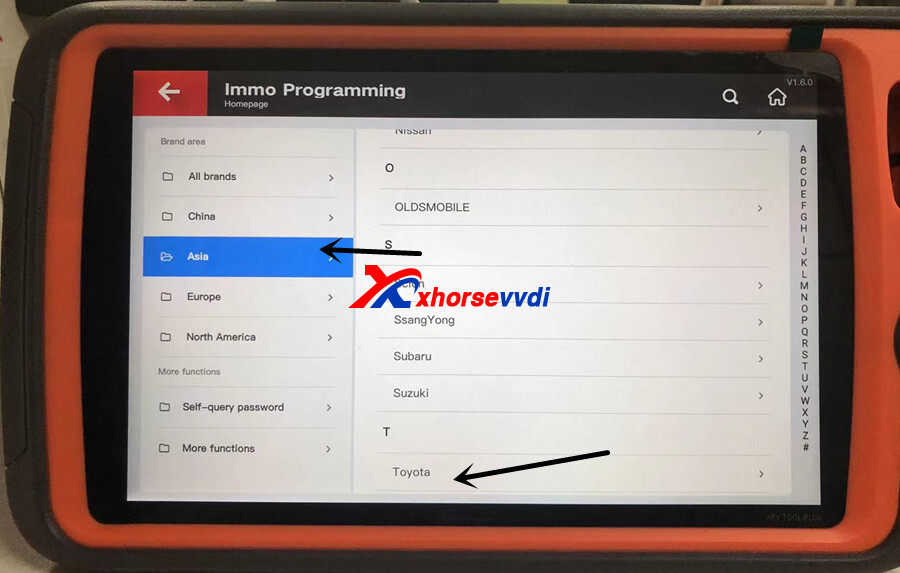
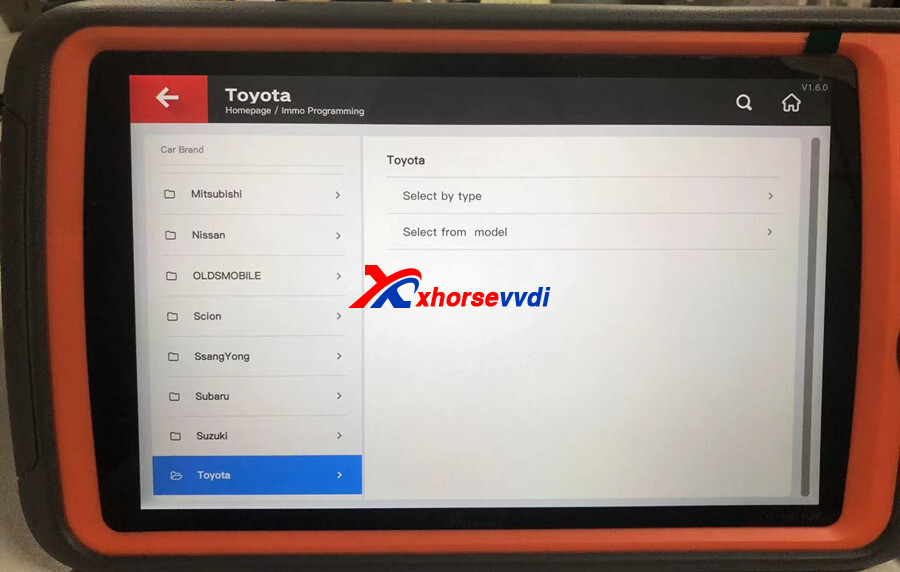
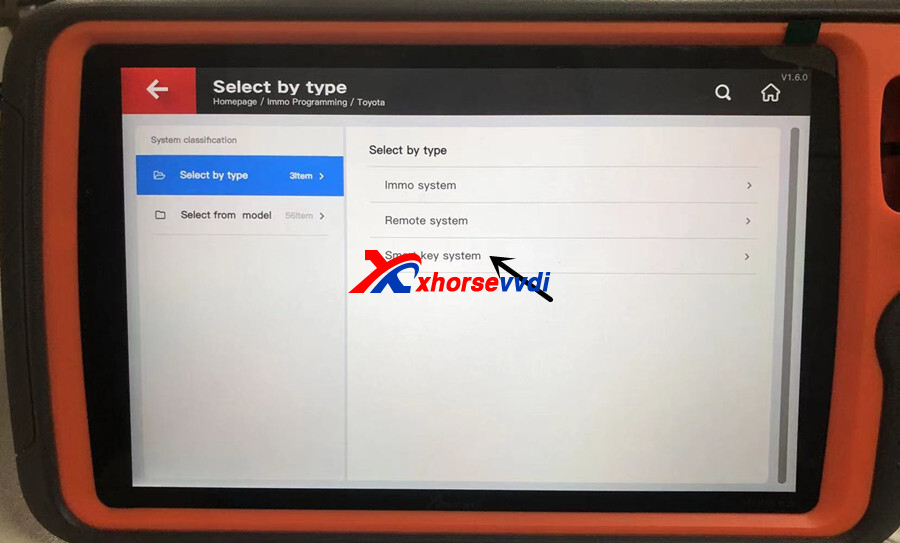
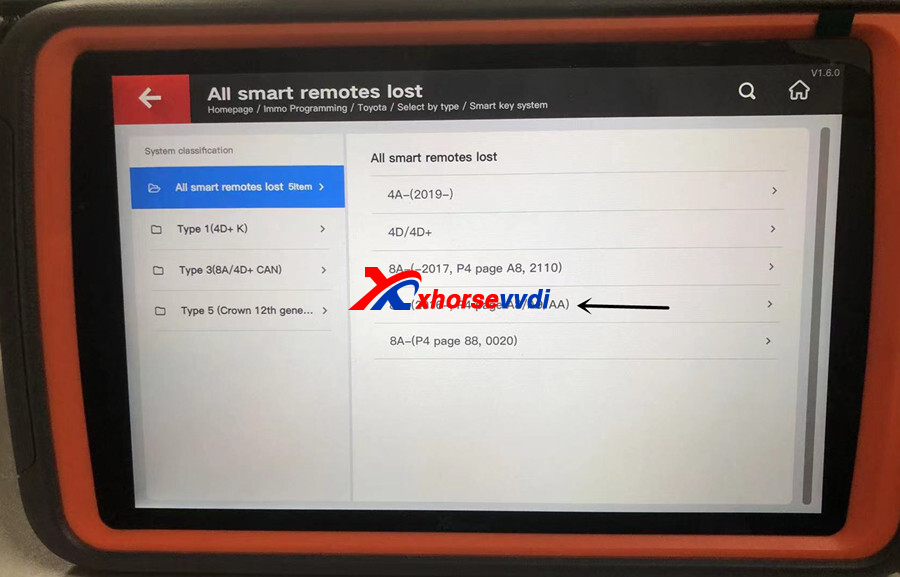
2. Choose IMMO Program>>Asia>>Toyota>>Select by type
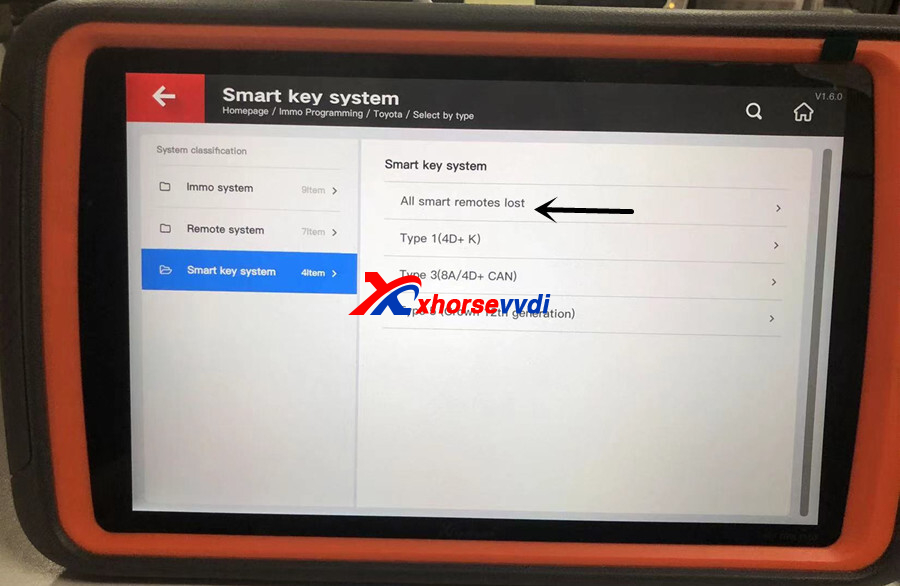
3. Then Smart key system>>8A-(2016-, P4 page A8/A9/AA)
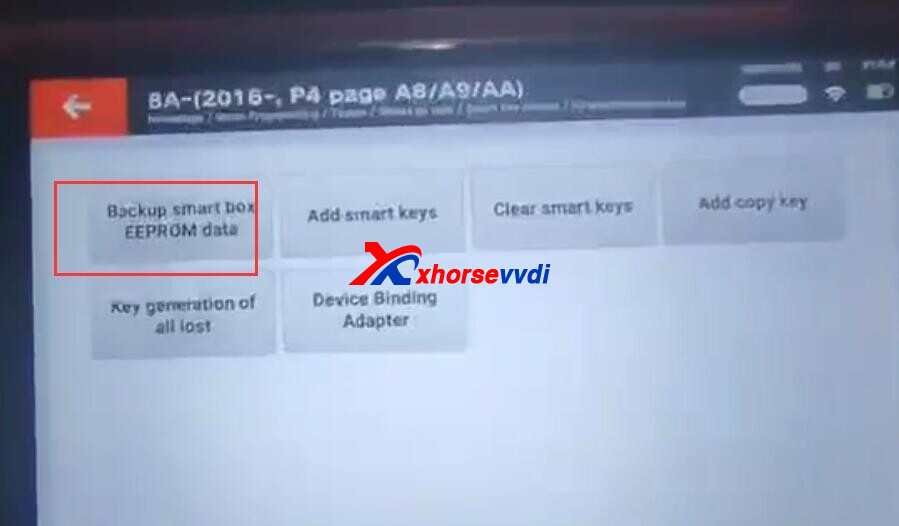
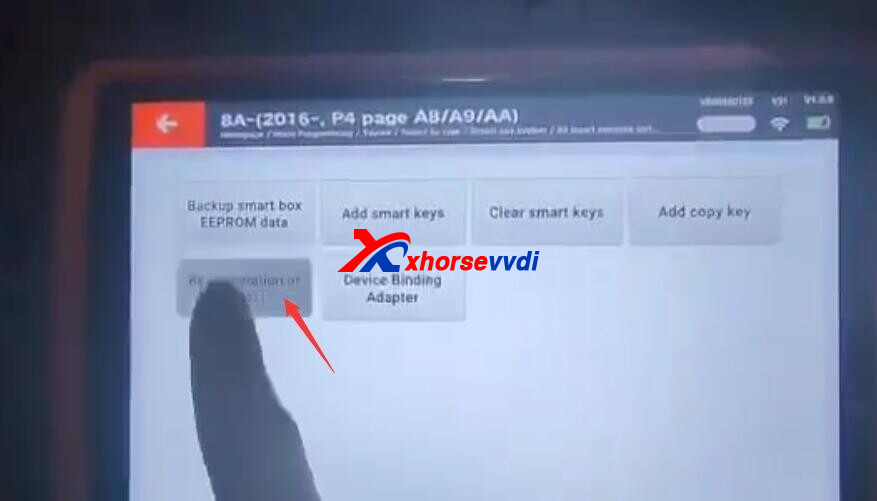
4. Programming steps
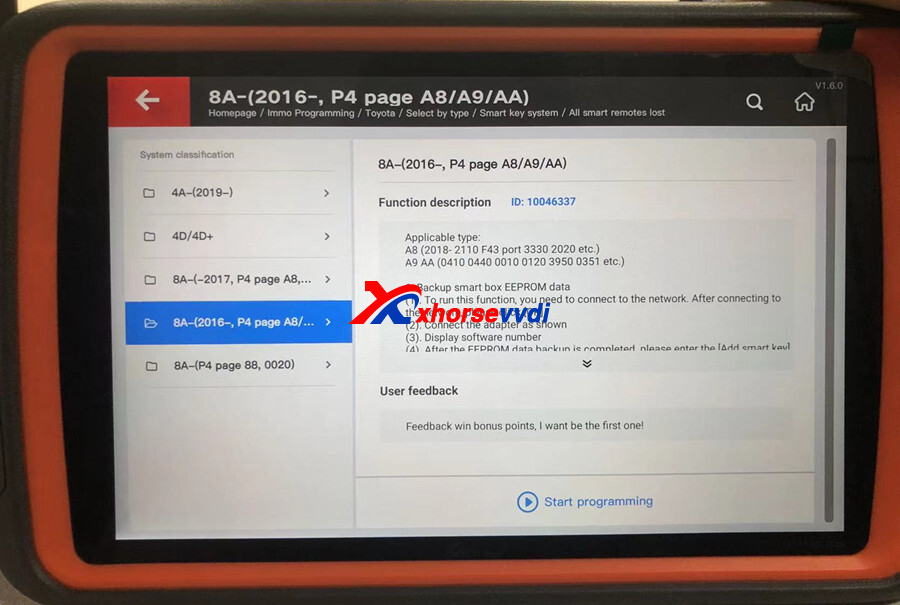
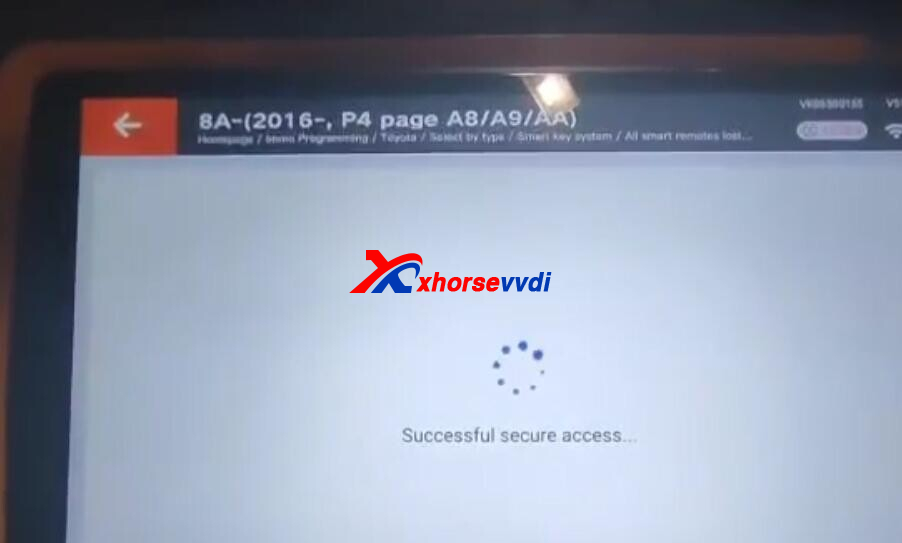
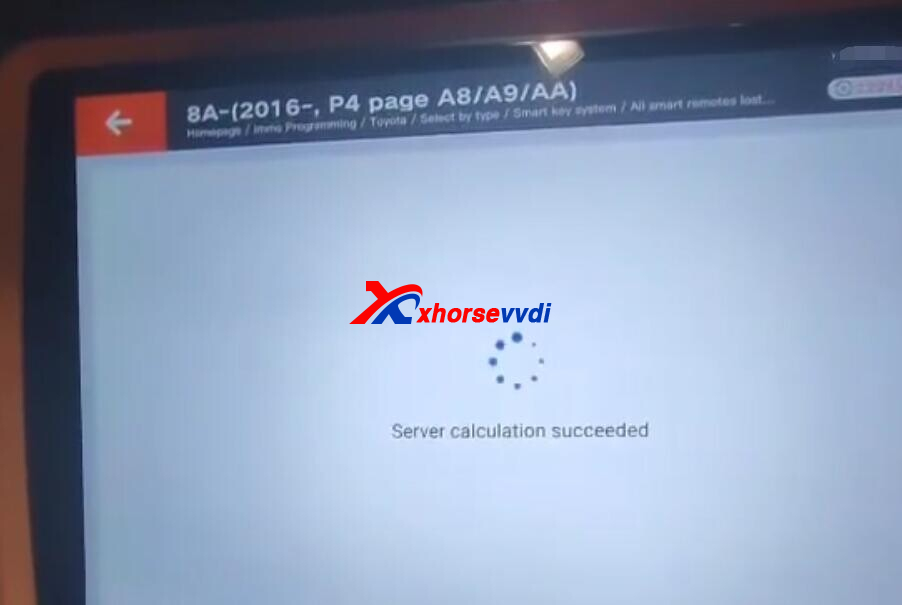
4.1. Backup smart box EEPROM data
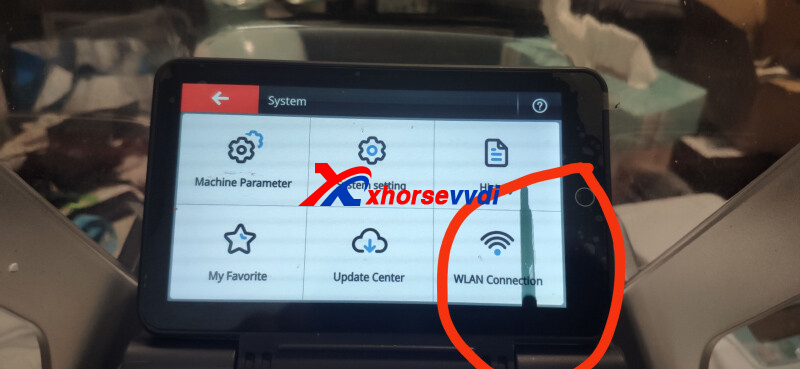
To run this function, you need to connect to the network. After connecting to the network, please click OK.

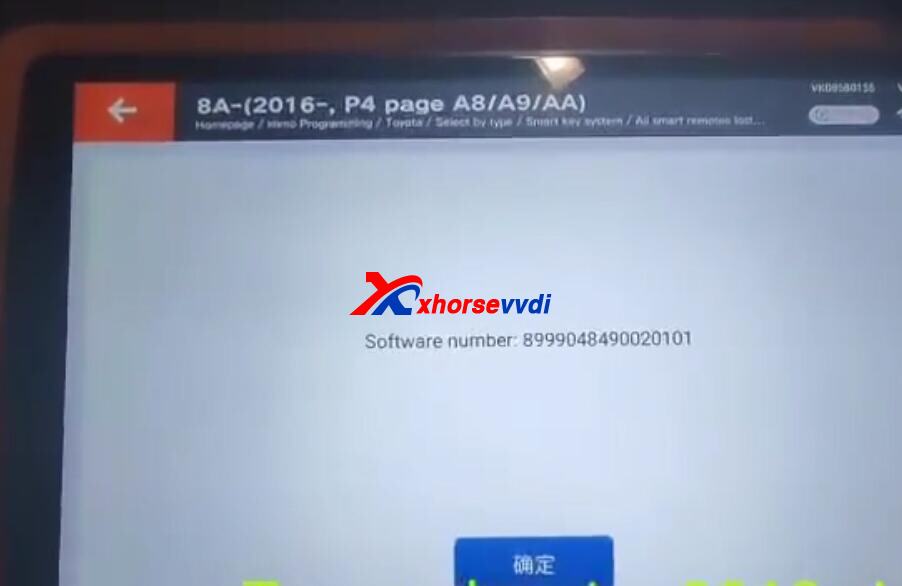
Connect the adapter like step 1 connection diagram.
Display software number.
After the EEPROM data backup data is completed, please enter the [Add smart key] function to generate a spare original car key.
4.2. Add smart key
It has two ways to add smart key.
4.2.1
(1). If the data has just been read using the backup function, please restore the vehicle before performing this function
(2). Please make sure that the device is connected to the Internet before executing this function. This function can use a registered original car key or emergency start key to add a new key
(3). Please switch ignition to ON.
(4). Display software number
(5). Turn off ignition, turn on double flash
(6). 1. If there are backup files, please click [OK]to perform password-free matching; 2. If there is no backup file, click [Cancel], and you need to query the password matching through a third party
(7). Display the number of registered key and number of keys remaining to be registered
(![]() . Put the matched smart key close to the start button, and take it away after the
. Put the matched smart key close to the start button, and take it away after the
buzzer rings
(9). Close all the smart keys to be registered to the start button in turn, stick each smart key to the start button, and remove the start button after the buzzer rings twice
(10). Please switch ignition to ON.
(11). Put the matched smart key close to the start button, and take it away after the buzzer rings
(12). Display the number of registered key and number of keys remaining to be
Registered
(13). Program completed!
4.2.2
(1). If the data has just been read using the backup function, please restore the vehicle before performing this function
(2). Please make sure that the device is connected to the Internet before executing this function. This function can use a registered original car key or emergency start key to add a new key
(3). Please switch ignition to ON.
(4). Display software number
(5). Touch the IG switch with a registered key with the logo face. Complete the operation within 30 seconds after [OK].
(6). Within 30 seconds, touch the Ig switch with the marked surface of a registered
key Display elapsed time
(7). Keep touching the IG switch with the side of a wanted registering key with a
sign, complete the operations within 30 seconds after pressing [OK].
(![]() . Within 30 seconds, keep a key to be registered with the marked surface in contact with the IG switch. Display the elapsed time
. Within 30 seconds, keep a key to be registered with the marked surface in contact with the IG switch. Display the elapsed time
(9). Key registration is successful!
4.3. Clear smart keys
Two ways
4.3.1
(1). If the data has just been read using the backup function, please restore the vehicle before performing this function
(2). Please switch ignition to ON.
(3). Display software number
(4). Turn off ignition, turn on double flash
(5).1. If there are backup files, please click [OK]to perform password-free matching; 2. If there is no backup file, click [Cancel], and you need to query the password matching through a third party
(6). Display the number of registered key and number of keys remaining to be registered
(7). Put the key to be kept close to the start button, after a beep, take it away from the start button. After the first key to be kept is pasted, the interval between the key to be kept next to the start button and the previous one that is close to the start button is only 10 seconds, more than 10 seconds will start to execute the clear
(![]() . Put the key to be kept close to the start button, display the number of keys function currently reserved, remaining close to the start button time: 10 seconds
. Put the key to be kept close to the start button, display the number of keys function currently reserved, remaining close to the start button time: 10 seconds
(9). Display the number of registered key and number of keys remaining to be
registered
(10). Clear completed!
4.3.2
(1). If the data has just been read using the backup function, please restore the vehicle before performing this function
(2). Please switch ignition to ON.
(3). Display software number
(4). Display the number of registered key and number of keys remaining to be registered
(5). Within 30 seconds, keep a key to be registered the ignition switch with the marked surface of a registered key
(6). Clear completed!
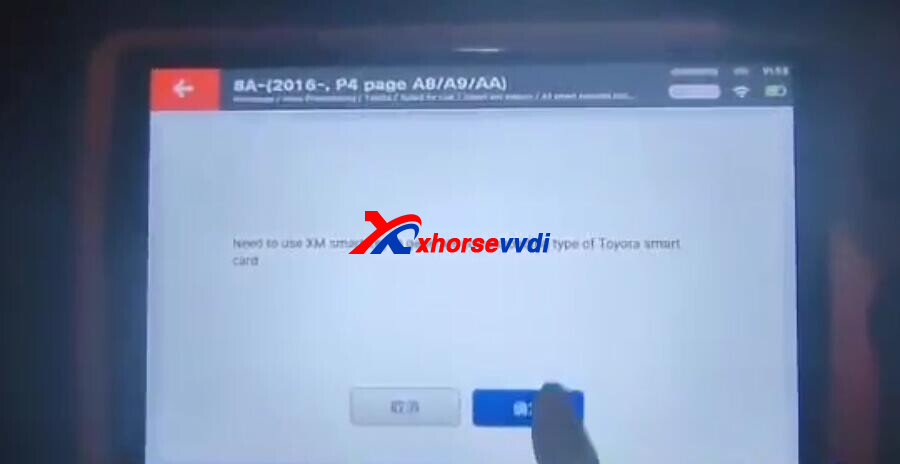
4.4. Add copy key
(1). Note: The collected key can only be the Toyota dedicated XM38 sub-machine, after the collection, it needs to be used as the generated key (the collection key and the generated key are the same one)
(2). Need to use XM smart key to generate corresponding type of Toyota smart card
(3). Please put the original car key in the card slot
(4). Please take out the original vehicle key from the card slot and put it into the collection key
(5). Click [OK]to start writing data
(6). Write complete
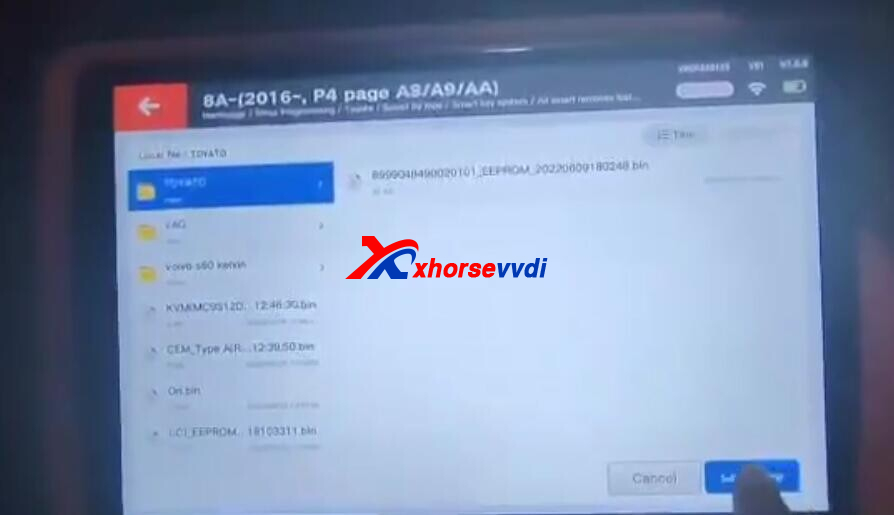
4.5. Key generation of all lost (execute after backing up the EEPROM data of the smart box)
(1) Click OK to choose the right backup data.
(2) Enter into smart key generation system, use the XM smart key to generate the right type.
(3) This function can generate a spare master key when all key lost, this key can replace the original key, it can open instrument enter key adding.
(4) Please put the key in the card slot
(5) Choose back up file
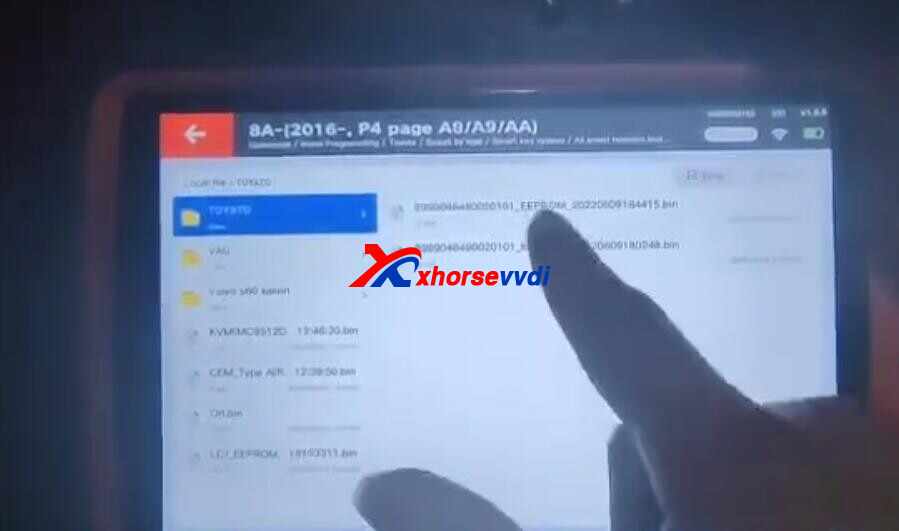
(6) Show keys that can be generated
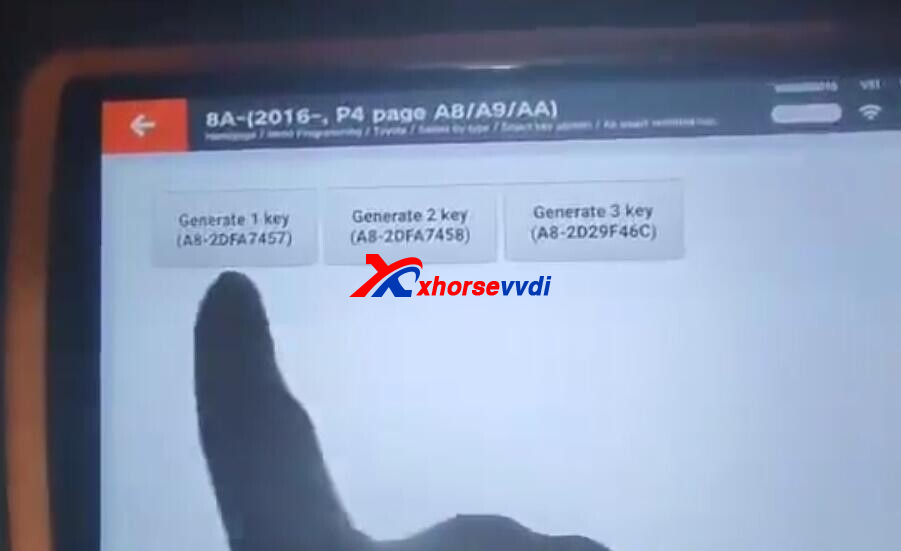
(7) Write complete.

4.6. Device binding adapter
(1) Connect the adapter
(2) Note: This function needs to connect with internet, and one key tool plus can bind with one Toyota 8A smart key adapter. Once bind, can not unbind.

http://blog.xhorsevvdi.com/how-to-use-key-tool-plus-and-toyota-8a-smart-key-adapter-program-alphard-2019-akl/
Posted by: xhorsevvdi at
10:06 AM
| No Comments
| Add Comment
Post contains 1044 words, total size 16 kb.
Question:
Tried 4 CAS's & 2 EWS with CAS PLUG, Xhorse Bim Tool shows "Connect failed"?

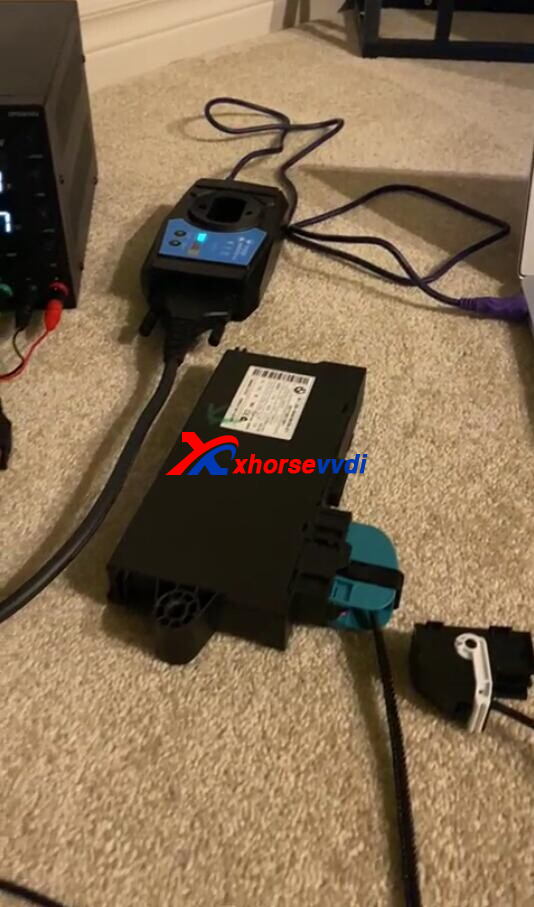
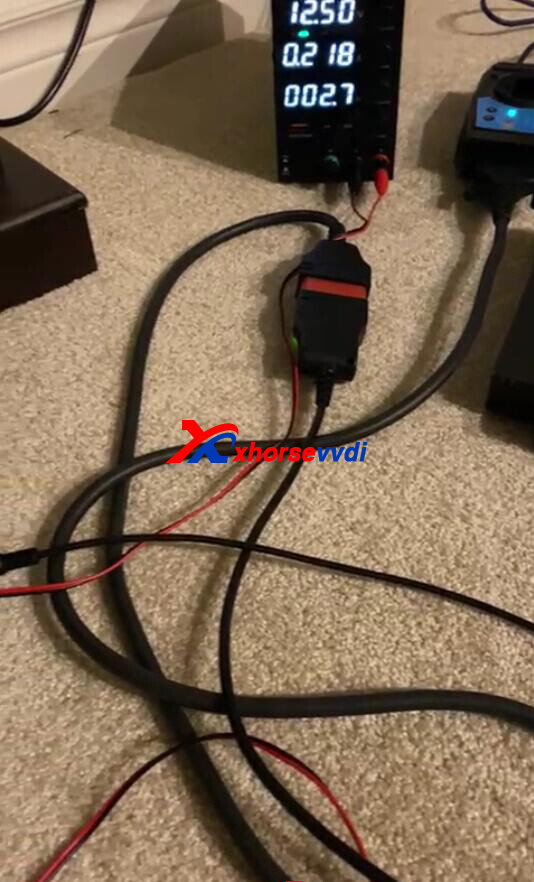
Here Xhorsevvdi tech shares the
Solution:
Connect with CAS Plug, users need to select Car Type instead of Auto Detect.
Select "OBDII-KWP-CAN bus 100Kbps" for CAS
Select "KLINE-EWS3/EWS4" for EWS
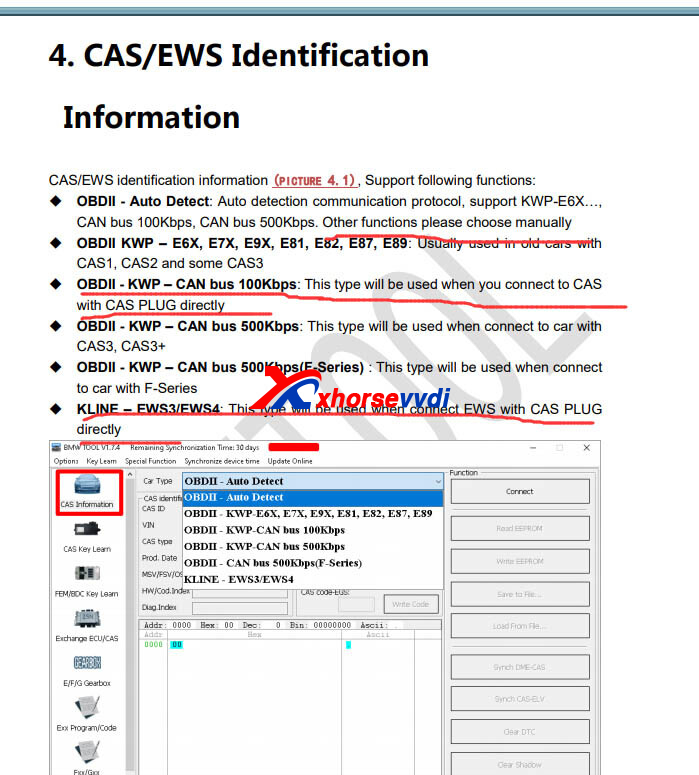

Besides, 12V 3-5A power supply is required.
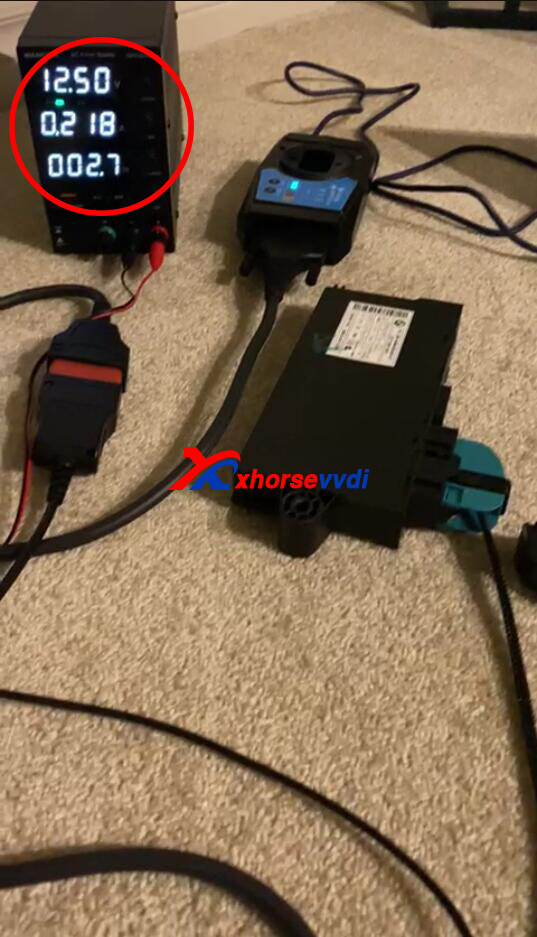
If still failed, this cable or module may have a problem
Note:
CAS Plug works with Xhorse VVDI2/BIM Tool.
For how to use CAS Plug, please check VVDI2/BIM Tool user manual in software package.
Software Package you may need (click to download):
Hope this could help!
http://blog.xhorsevvdi.com/xhorse-bim-tool-with-cas-plug-connect-to-cas-ews-connect-failed-solution/
Posted by: xhorsevvdi at
10:05 AM
| No Comments
| Add Comment
Post contains 119 words, total size 3 kb.
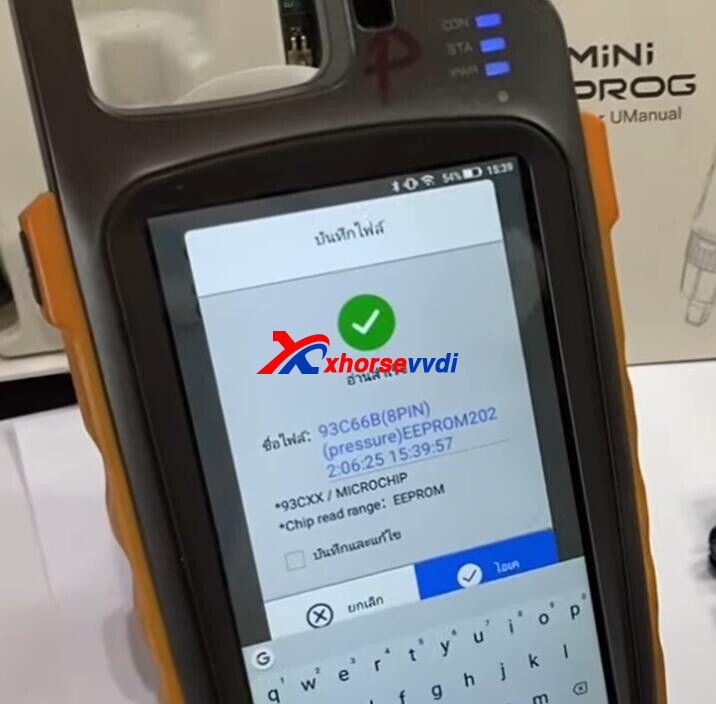
This article is a review on Mini Prog with Key Tool Max. Here we will how to use these tools to program Toyota Vios 2012 when all key lost.
EEPROM: 93C66B
Simple Guide:
1.Read EEPROM by Mini Prog
2.Write Chip via Dump by VVDI Max
Procedures:
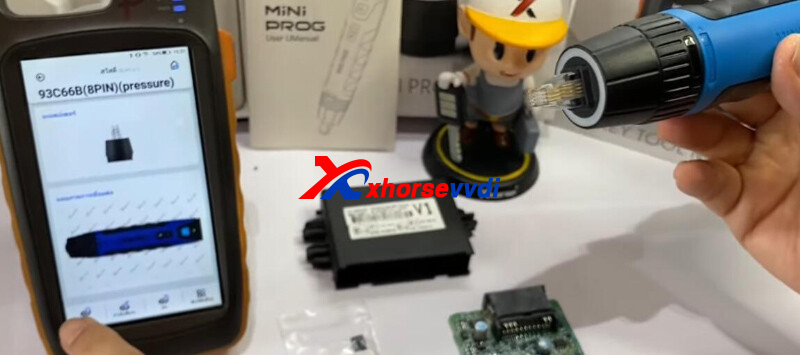
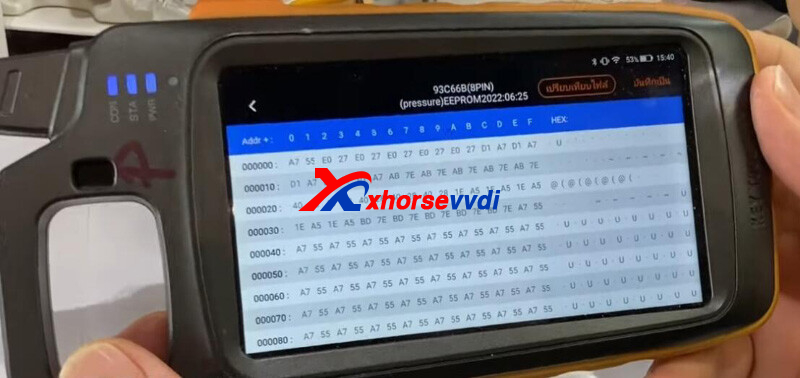
Step 1. Read EEPROM
Remove immo box and find 93C66B chip.

Connect Mini Prog to Key Tool Max.
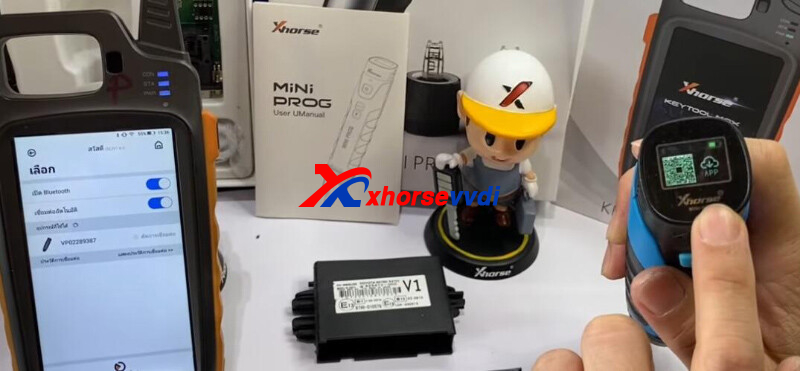
On VVDI Max, switch to mini prog page,
Select
EEPROM&FLASH>>Microchip>>93CXX>>93C66B(8PIN)
We choose "Pressure" way to read it.
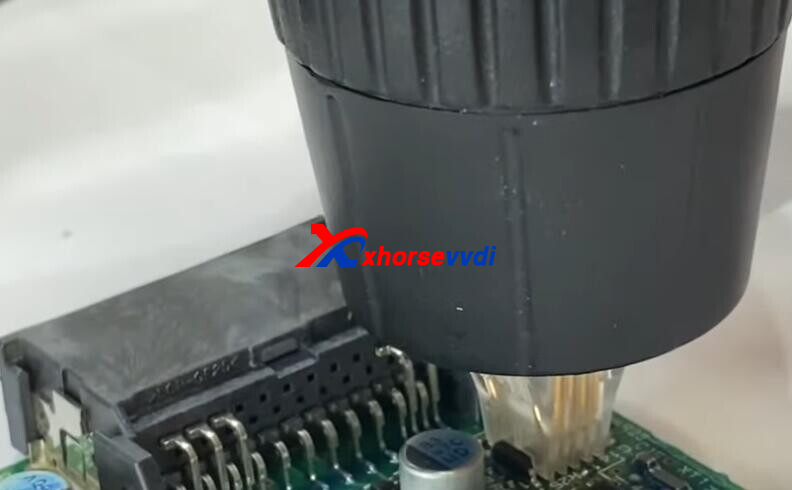
Install Mini Prog head by prompts.
Select
Read>>EEPROM
Clean pins and then hold it down to connect to chip.
Pin detection fails and try again.
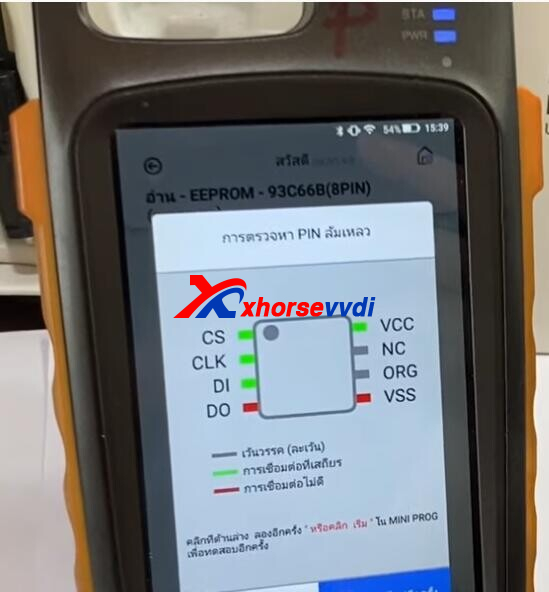
Save EERPOM file.
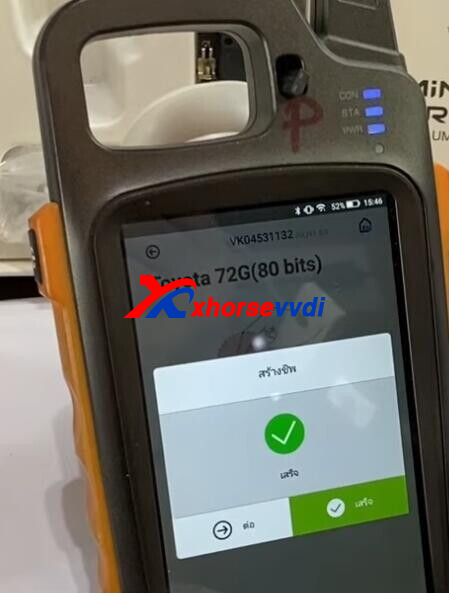
Step 2. Generate Chip
Switch to Key Tool Max page, select
Generate Transponder>>ID70~ID83 (80 bits)>>Toyota 72G (80 bits)
Put a VVDI Super Chip into coil.
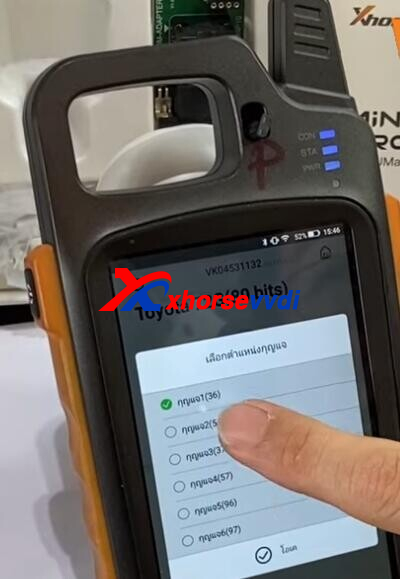
Generate success.
Put 2nd Super Chip, and select "Key2(56)" to generate.
Step 3. Write Chip
Back to homepage, select
Special Function>>IMMO Data Tool>>Asia>>Toyota>>G-Transponder>>G-Transponder - 93C66
Load EEPORM file we just read.
Select key 3, and put new chip into coil.
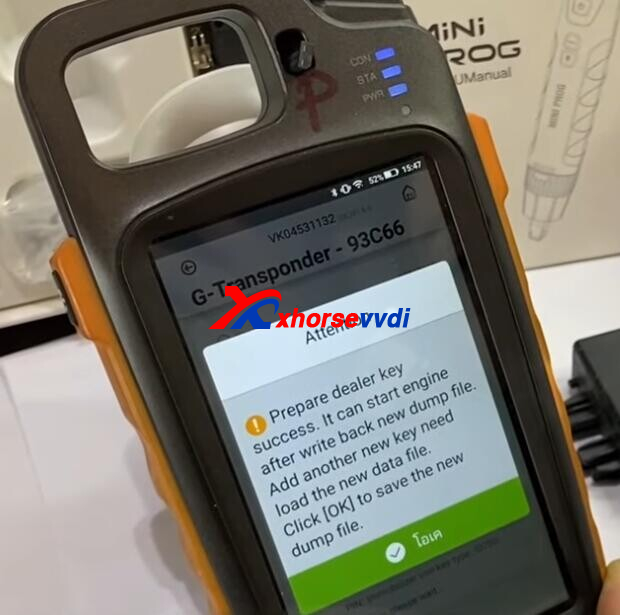
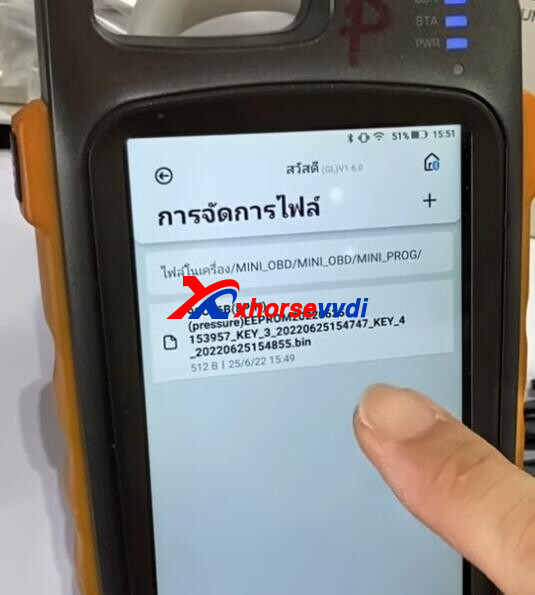
Save new dump file (key3).
Go back and load new dump (file key 3).
Write key 4, and put another chip into coil.
Save new dump file (key3 + key4).
Step 4. Write EEPROM
Switch to mini prog page,
Select
EEPROM&FLASH>>Microchip>>93CXX>>93C66B(8PIN)
Load dump file (key3 + key4), and write it to 93C66B chip.
Done! That's Toyota Vios 2012 AKL programming using Xhorse Mini Prog + Key Tool Max.
http://blog.xhorsevvdi.com/mini-prog-key-tool-max-program-toyota-vios-2012-akl-success/
Posted by: xhorsevvdi at
10:04 AM
| No Comments
| Add Comment
Post contains 255 words, total size 5 kb.
This article is about to show you how to add two 4A keys for Renault Duster using Xhorse Mini OBD.
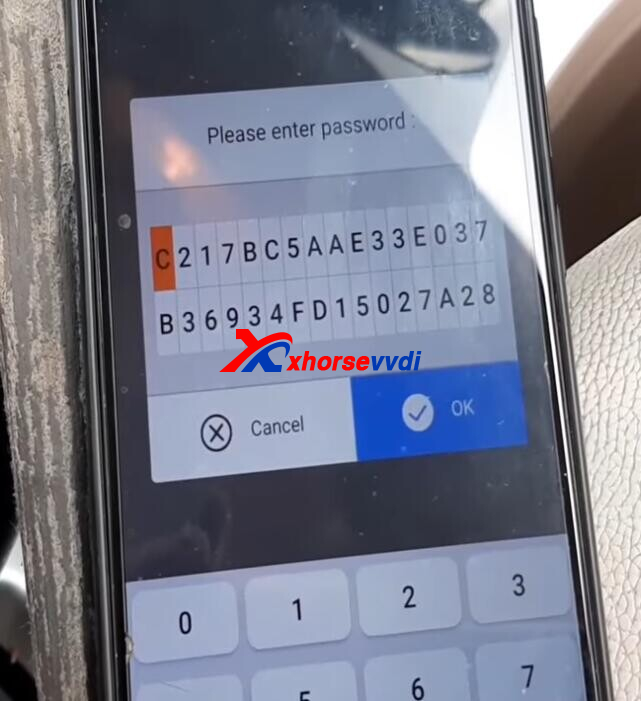
Step 1. Read Password
Plug Xhorse Mini OBD into OBDII port.
Open Xhorse app, and switch to MINI OBD page.
Select
Immo Programming>>Renault>>Immo system>>INDIA>>Triber>>Flip-key>>Read password
Switch ignition on.
Then it starts to read password.
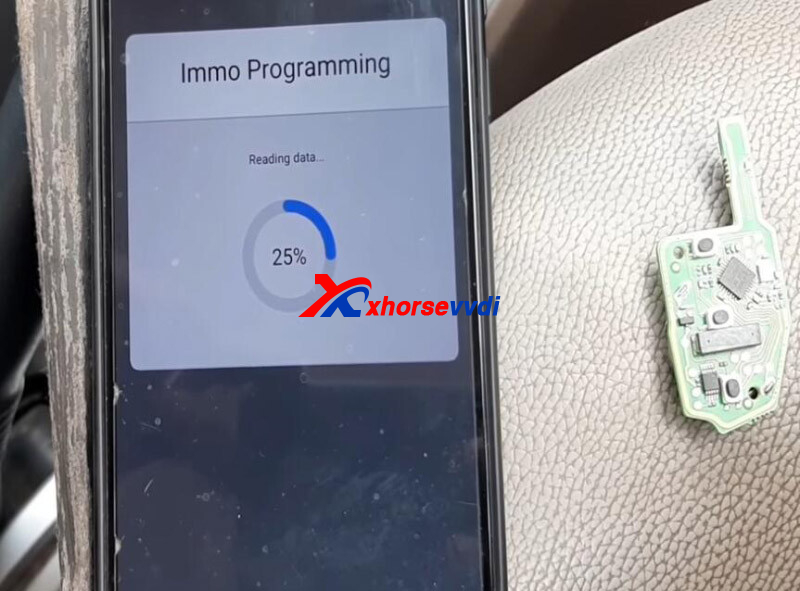
PIN code display.
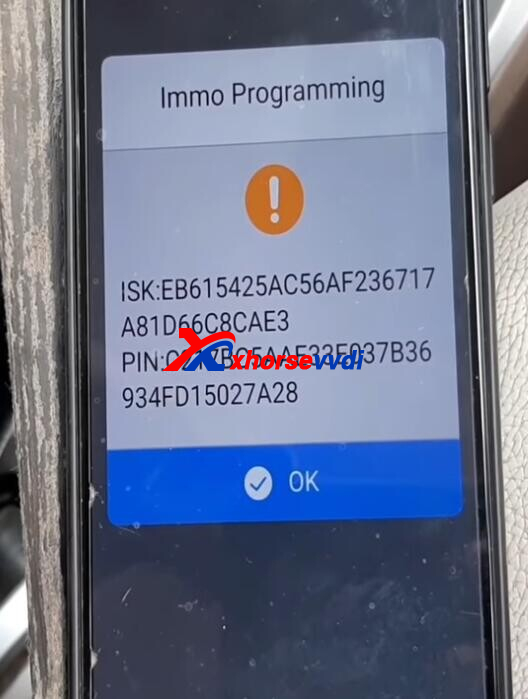
Step 2. Program Key
Then enter "Program keys".
Switch ignition off and remove key.
PIN code is automatically input.
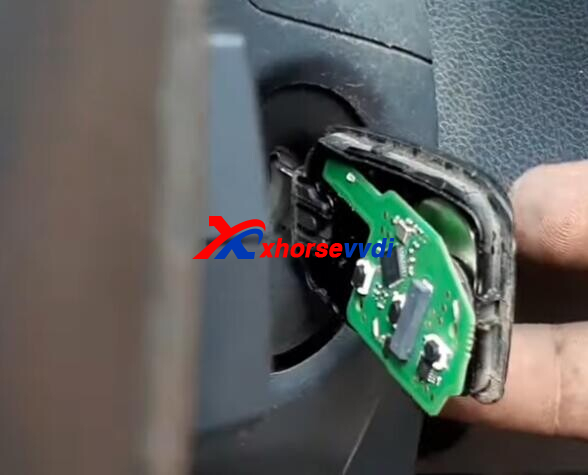
Insert new key to switch ignition on.

Program success.
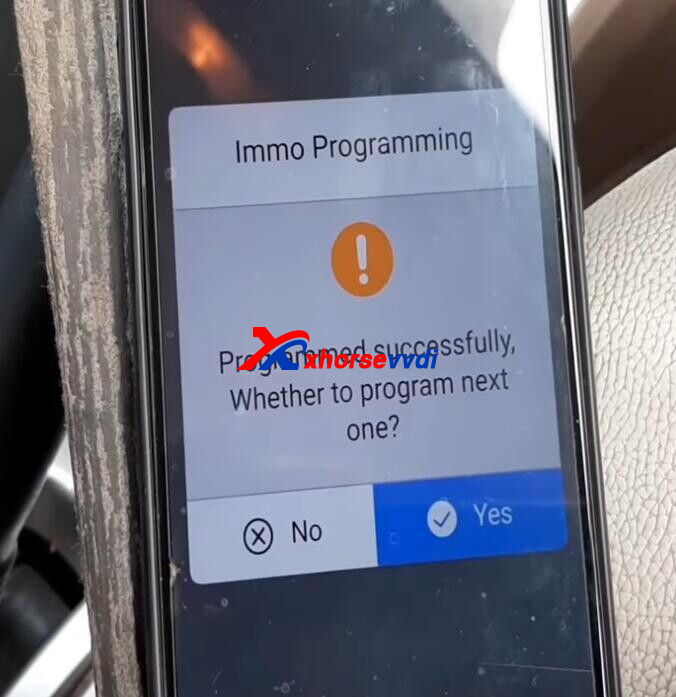
Click "Yes" to add another key.
Then select "No" to "Whether to program next one?".
Switch off ignition, and switch on after 5 seconds.
Program complete!
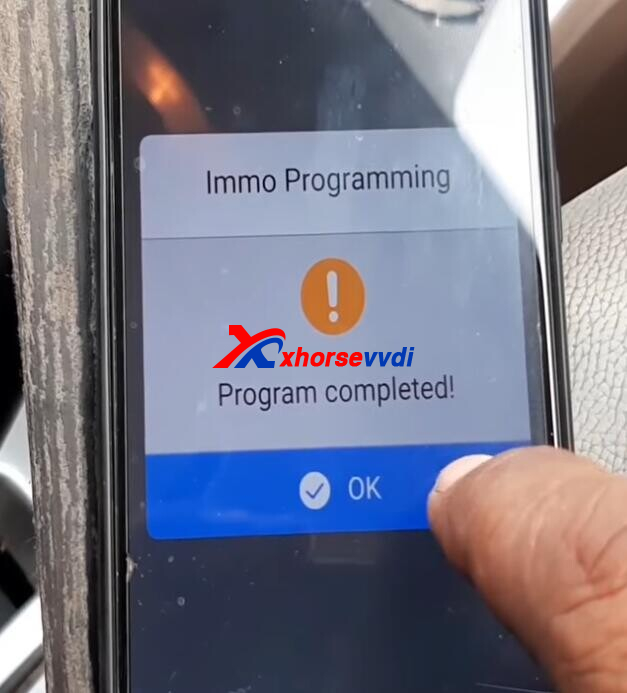
That's how Mini OBD program Renault Duster 4A key.
http://blog.xhorsevvdi.com/how-xhorse-mini-obd-add-4a-key-for-renault-duster/
Posted by: xhorsevvdi at
10:04 AM
| No Comments
| Add Comment
Post contains 131 words, total size 3 kb.
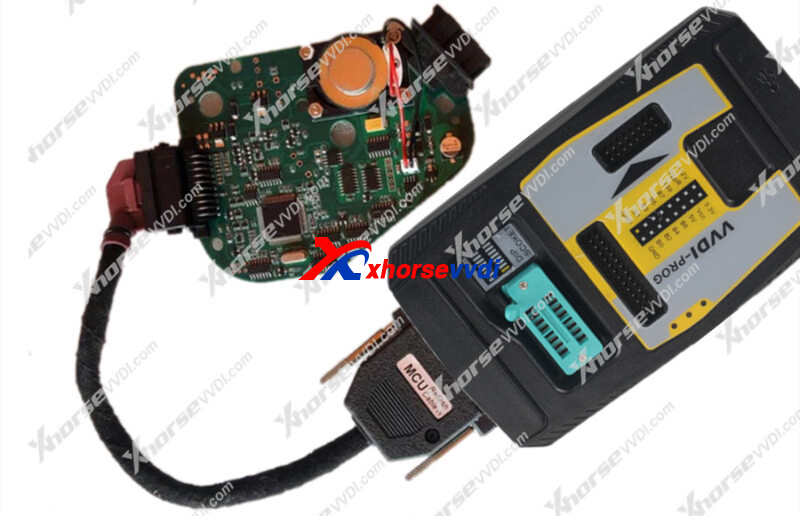
Audi J518 ELV Emulator, works with Xhorse VVDI PROG is designed for repairing Audi 6th-generation J518 ELV module of C6 Q7 A6. Here is the instruction of how to program 128 256 Audi EZS.
Part 1. Audi 9S12DG 128 EZS
1.Read and save original data (always backup data first)
2.If original EEPROM data file size is 2KB, then users need to send file to us for converting it to a 4KB file
3.Connect VVDI PROG to J518 Emulator, and write edited EEPROM file.
Note: Select J518(2010)(0L01Y) for 256 chip
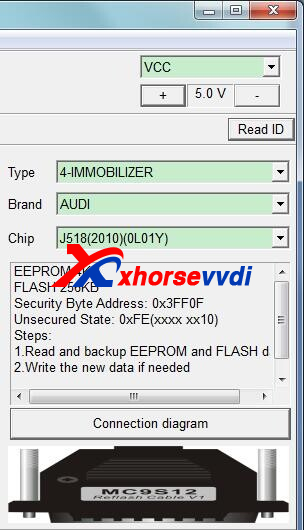
Generally, users write only edited EEPROM data, writing FLASH is not required.
Part 2. Audi 9S12DG 256 EZS
Read and save original data, and write original data into J518 ELV Emulator.
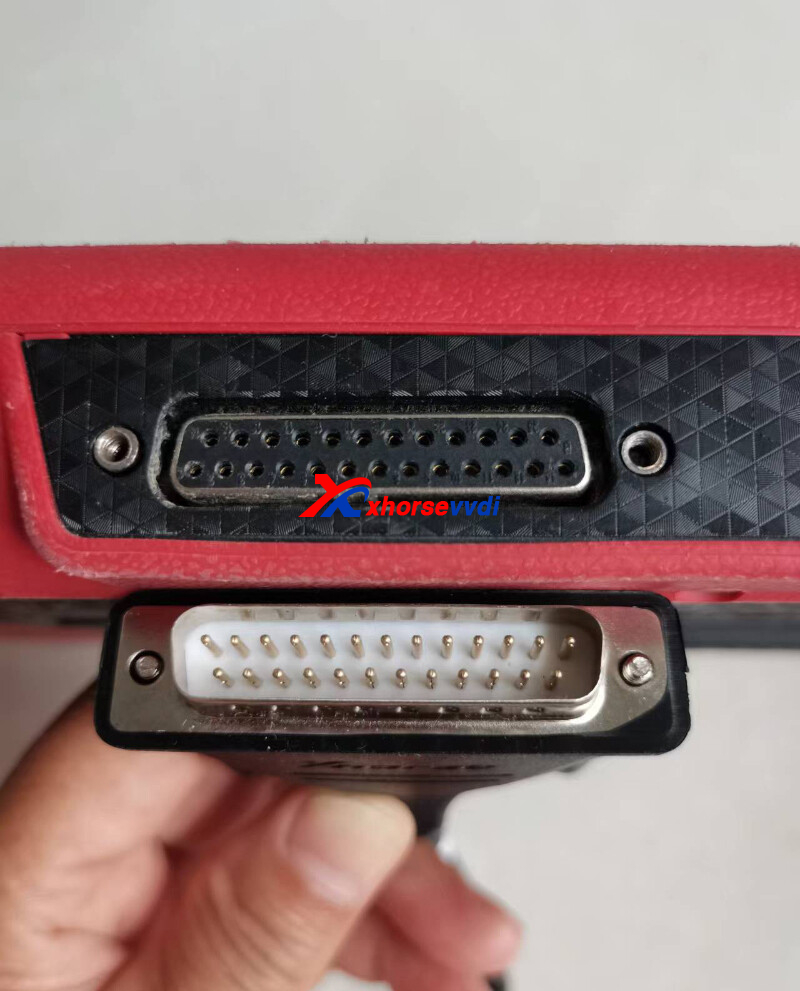
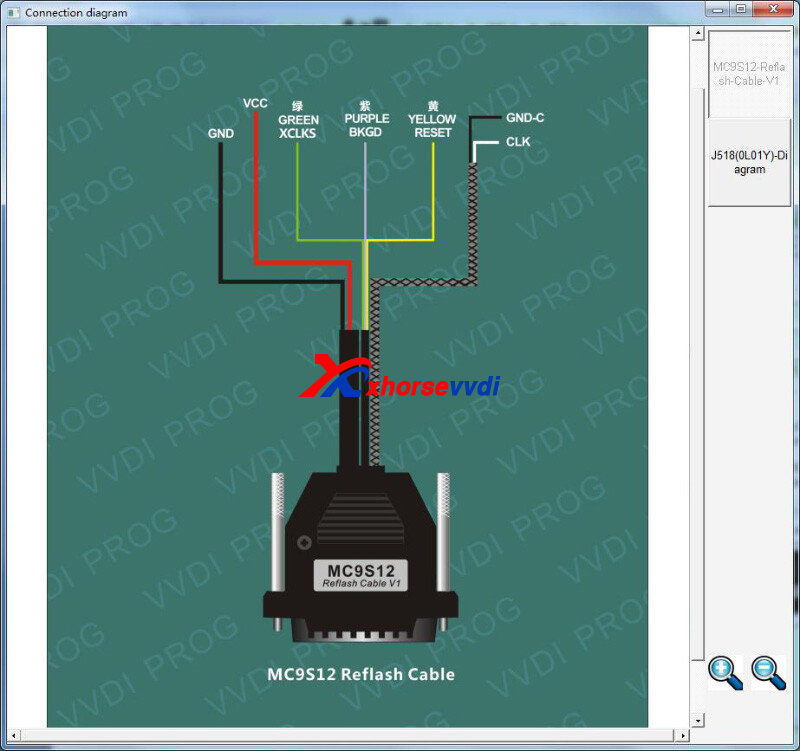
PINOUT
MC9S12 Reflash Cable:
Red=VCC, black=GND, yellow=RST, purple=BKGD, green =XCLKS, White=CLK, black=GND-C
J518 module has 2 types: with/without a buzzer.
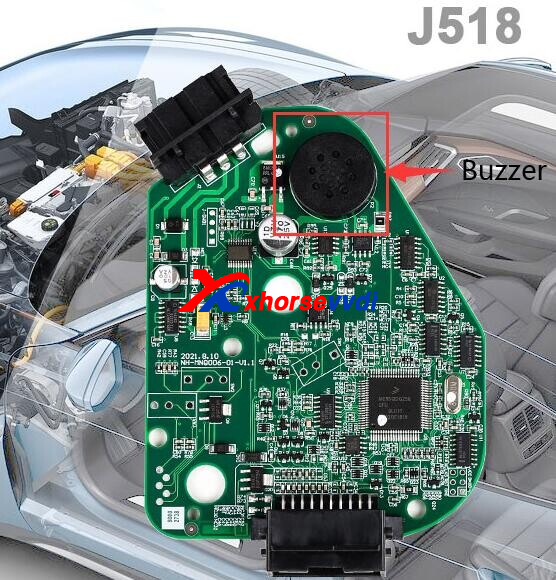
1)PCB with a buzzer
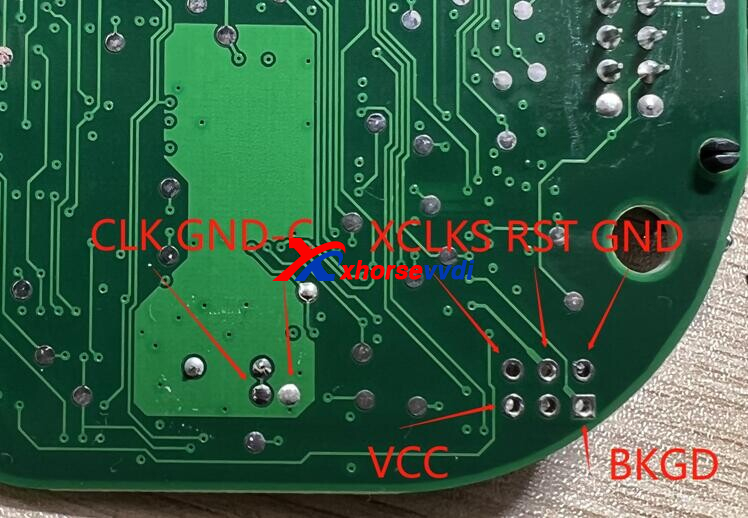
2)PCB without a buzzer
Solder as PCB prints, same to that with a buzzer.
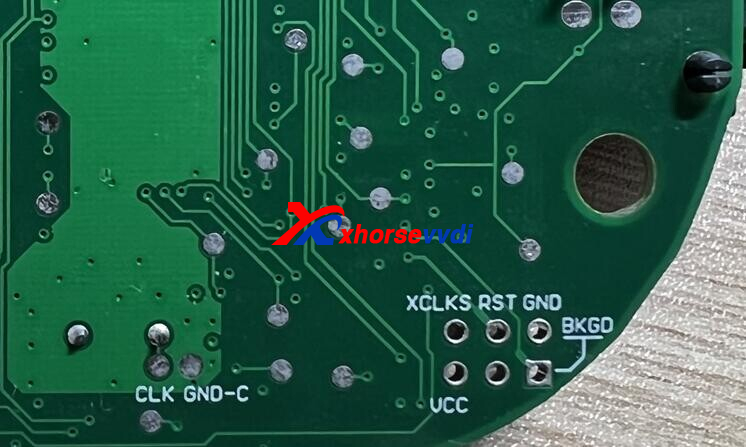
Note: VVDI programming cable can connect J518 module to VVDI PROG via 20pin port without soldering.
Notice:
When programming is done, better tested on vehicle instead of on bench.
Reason:
To test on bench, check wires in 20pin port before any test, or it may damage emulator chip.
Incorrect wiring:
Cable in PIN10 (Red) should be in PIN20(Blue)
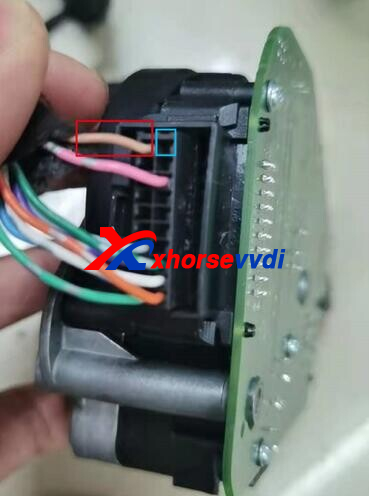
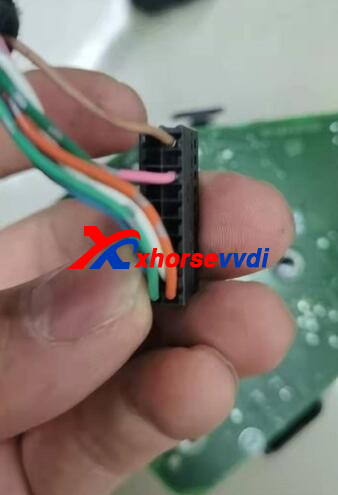
Alright, that's how to program Audi J518 128/256 EZS by J518 ELV Emulator.
http://blog.xhorsevvdi.com/audi-j518-elv-emulator-program-128-256-ezs-instruction/
Posted by: xhorsevvdi at
10:03 AM
| No Comments
| Add Comment
Post contains 239 words, total size 4 kb.
Question:
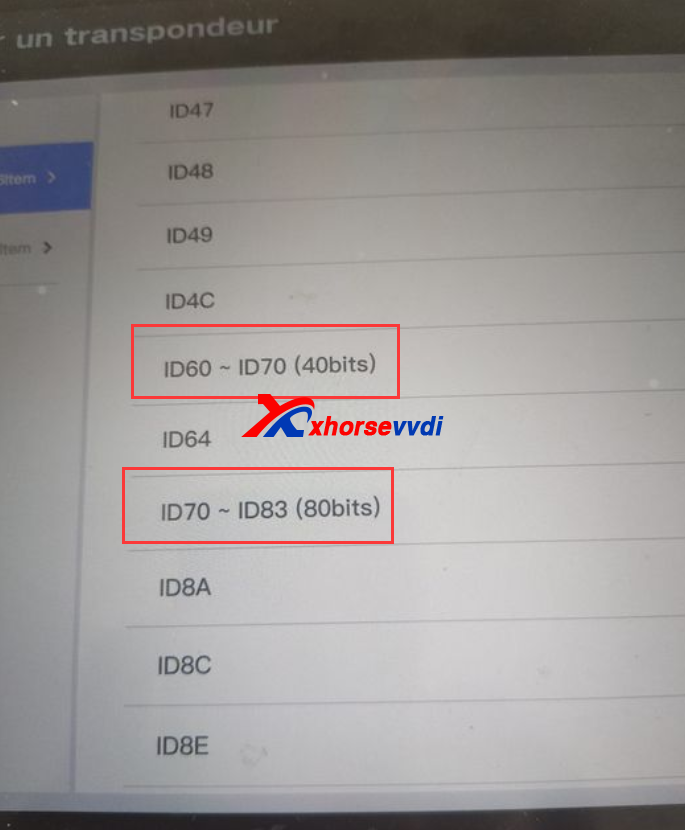
VVDI Key Tool Plus, How generate id63 80bits for ford?
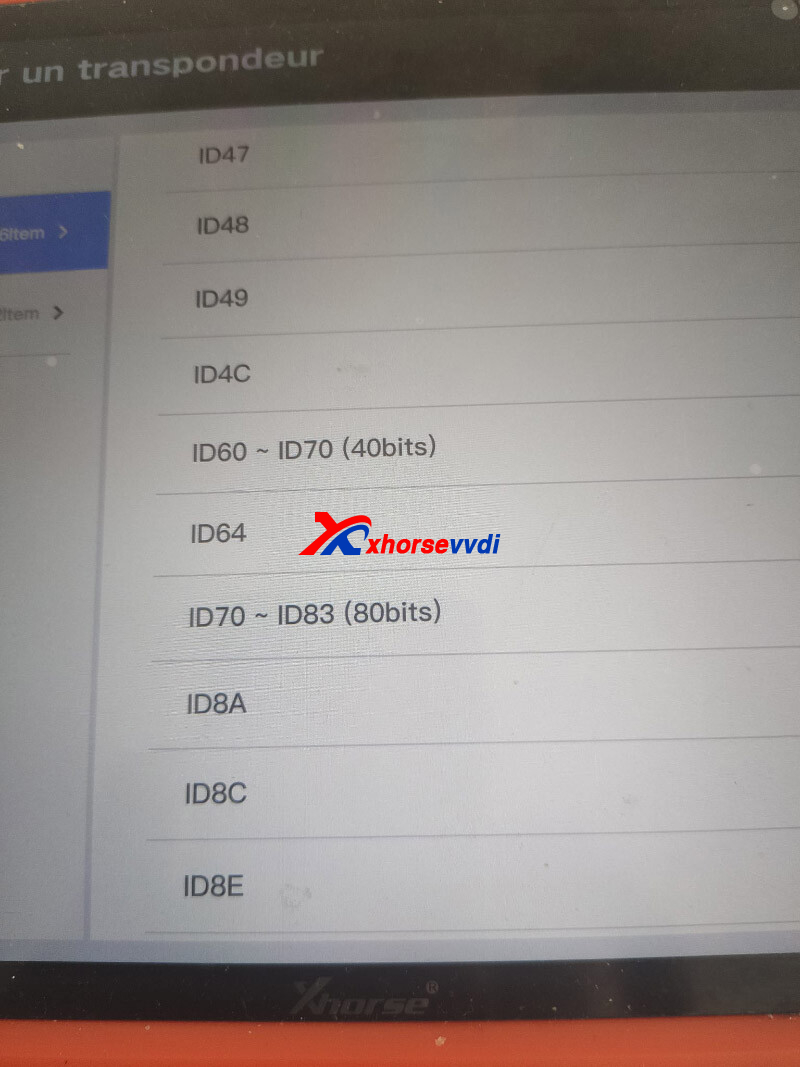
Here we have 2 control options:
1 - Generate ID63 40bits in "ID60 ~ ID70 (40bits)"
2 - Generate ID83 80bits in "ID70 ~ ID83 (80bits)"
Xhorsevvdi Tech gives the
Solution:
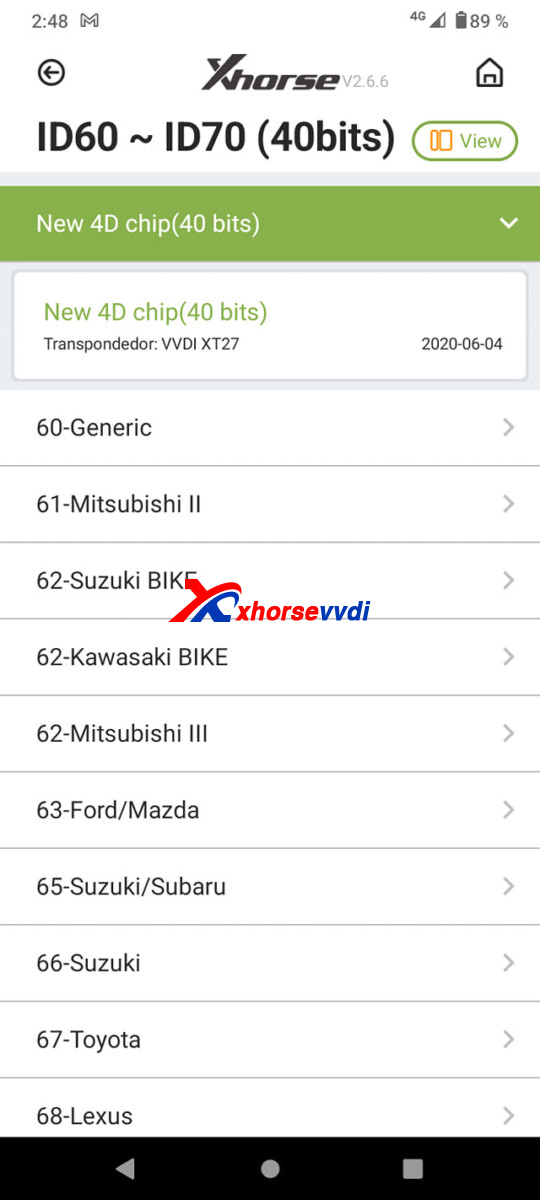
Enter "ID60 ~ ID70 (40bits)".
Select "63-Ford/Mazda".
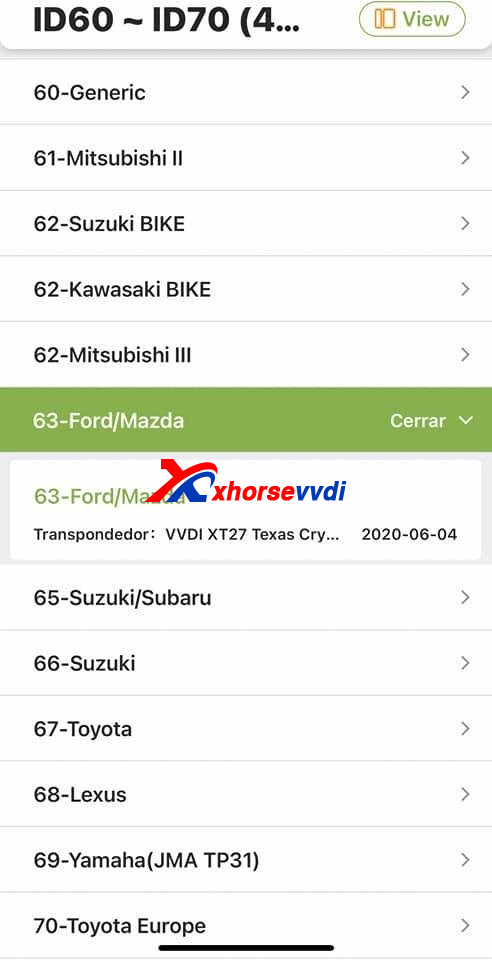
Or select "New 4D chip (40 bits)"
Notice: VVDI Mini / Key Tool Max can convert ID63 40bits to 80 bit by Super Chip, vice versa.
Hope this could help.
http://blog.xhorsevvdi.com/how-to-generate-id63-80bits-for-ford-by-vvdi-key-tool-plus/
Posted by: xhorsevvdi at
10:02 AM
| No Comments
| Add Comment
Post contains 92 words, total size 2 kb.
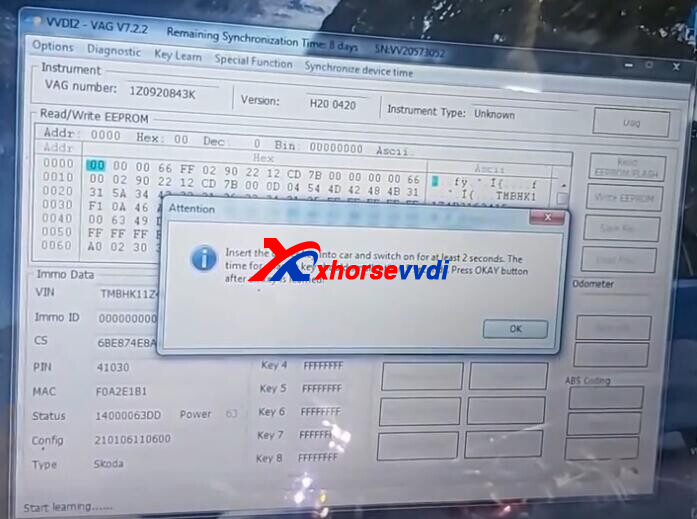
Here is an Xhorse VVDI2 review:
Add a key when all keys lost or at least accessing immo data ... for newer vag nec clusters by pogo pin ground cable ... with vvdi2 programmer ...
Here are the steps:
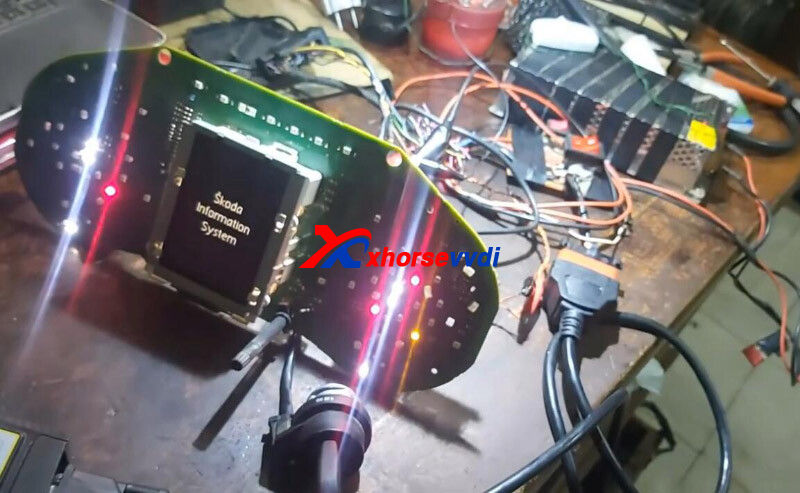
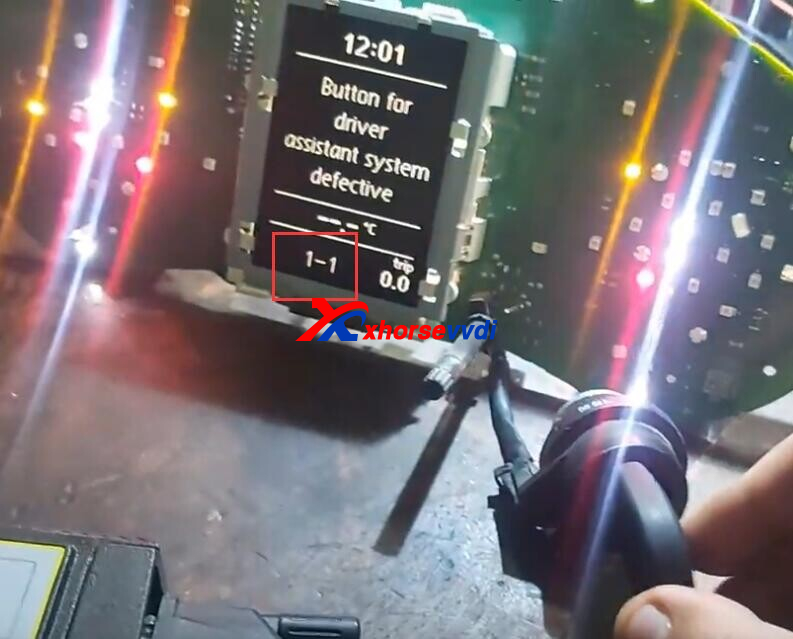
Turn on dash, and it displays "Key not in range".
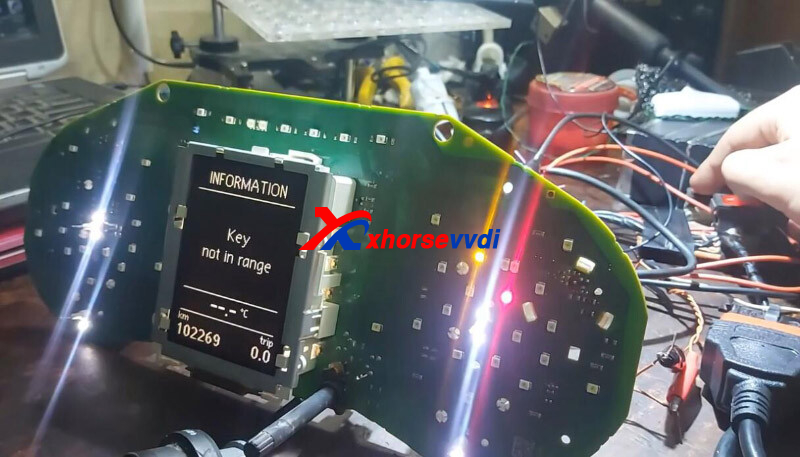
That's the connection.
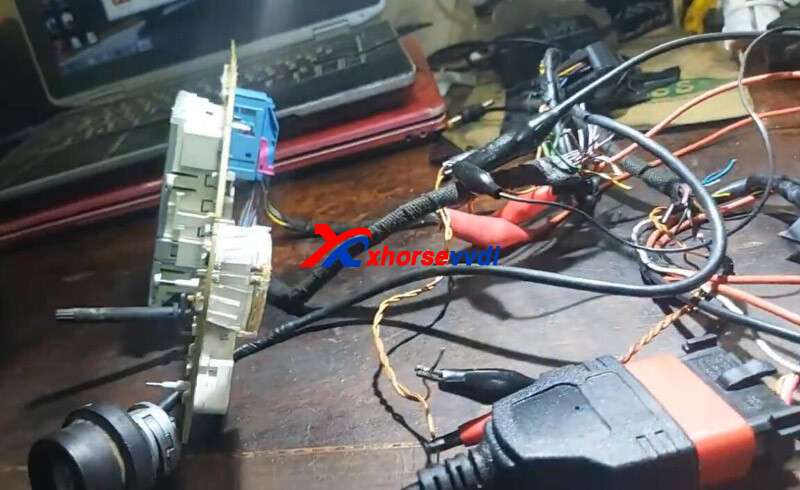
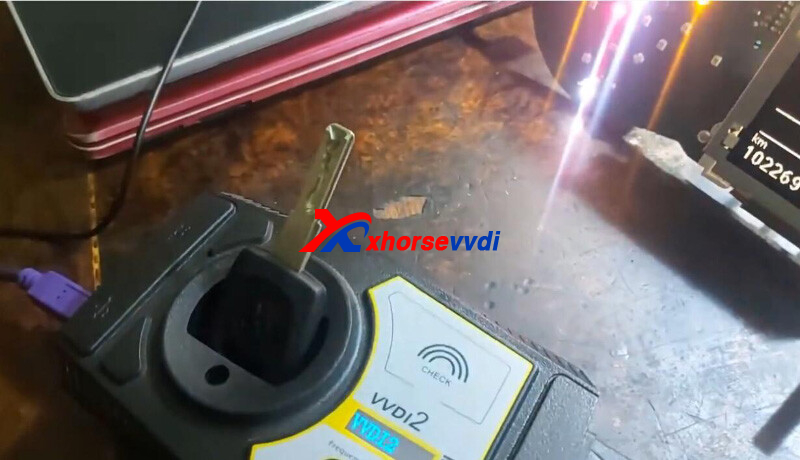
The key, Megamos 48.
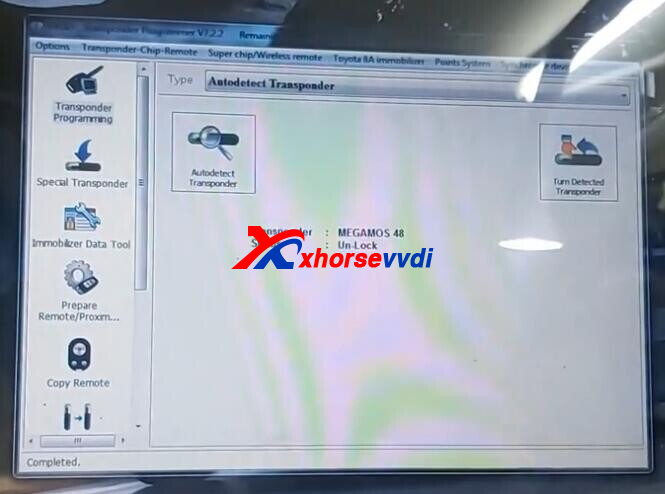
Turn on dash again, and in VVDI2 enter "Skoda".
Auto detect failed.
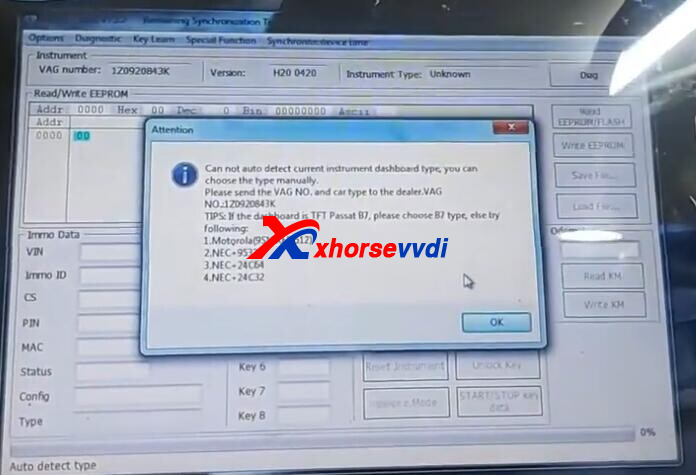
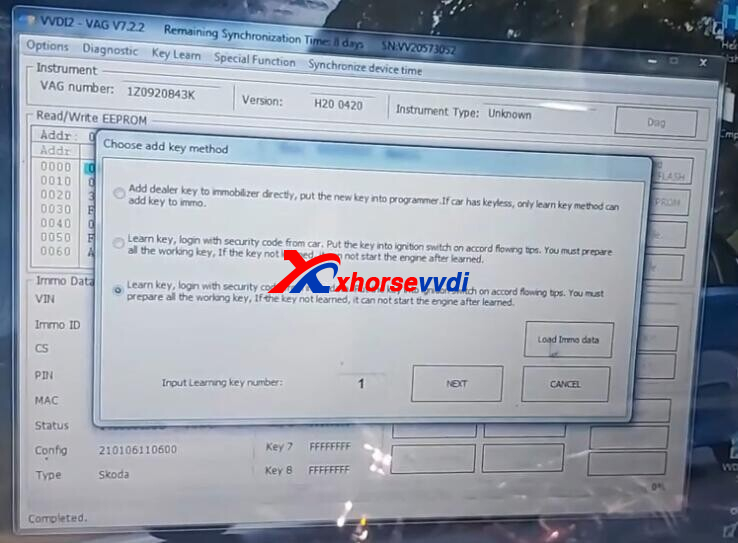
So we select
Key learn>>4th Immobilizer system - VW/Skoda/Seat>>Instrument with NEC+ 24C64
Read immo data via Login Method 2.
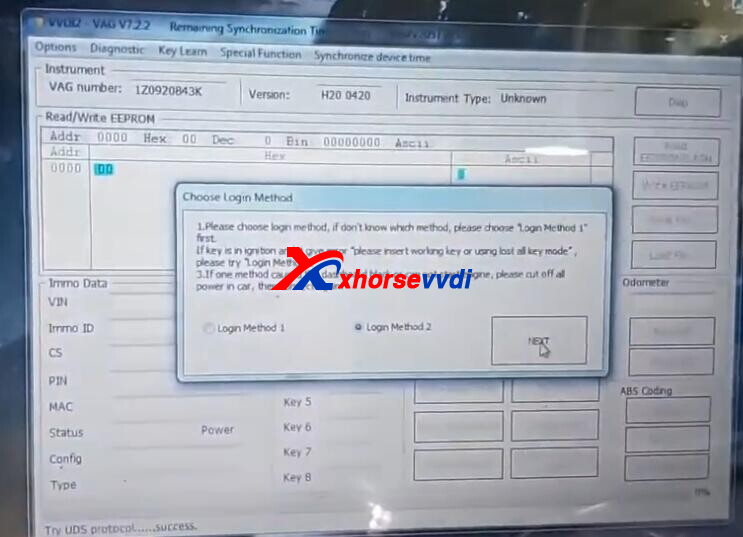
We have no working key so we failed.
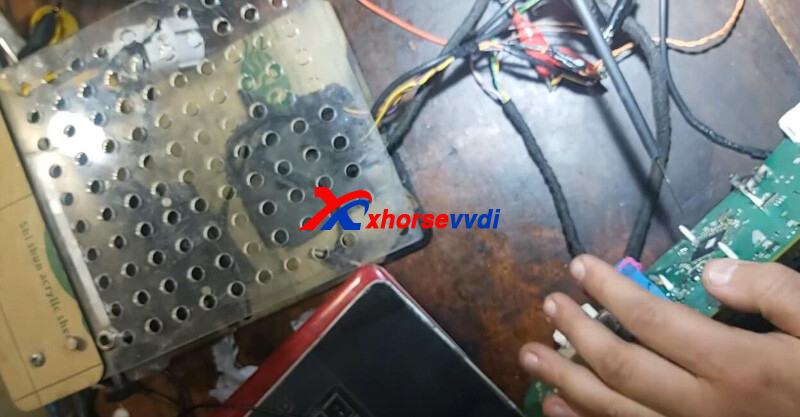
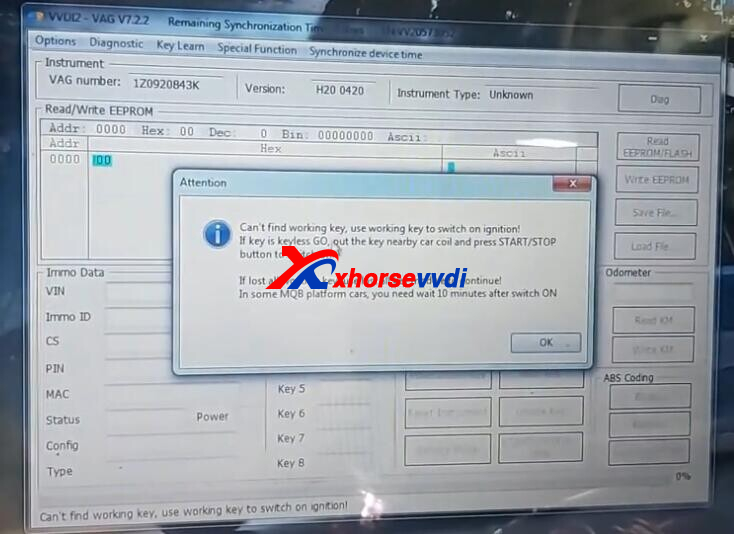 Xhorse Vvdi2 Program Skoda Octavia 1z Akl Via Pogo Pin Success 6
Turn off ignition. Put the pogo pin on the chip and turn on ignition again.
Read immo data again, success!
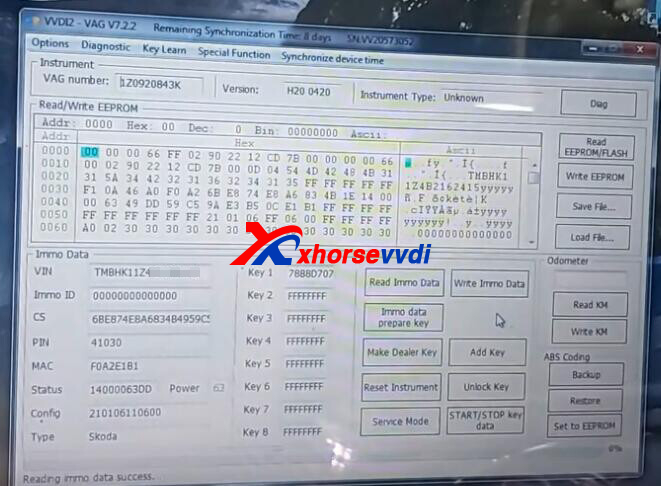
Save immo data.
Put a new key into VVDI2 Key Programmer coil.
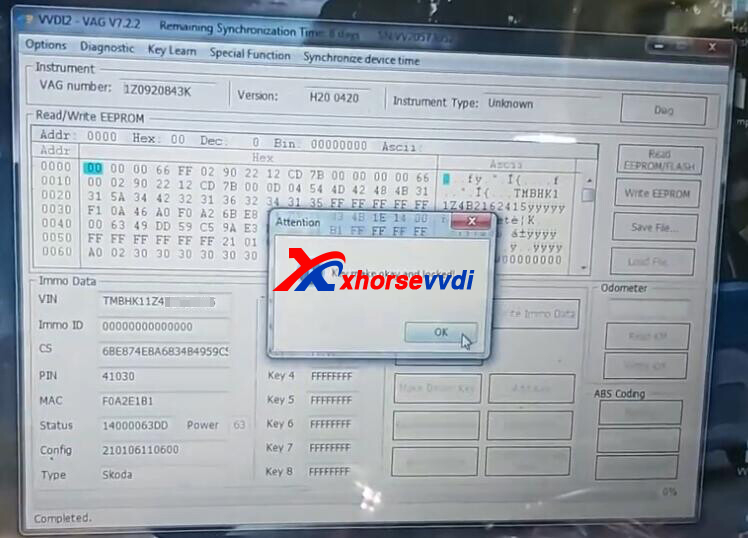
Click "Make Dealer Key".
Key make complete.
Use new key to turn on dash, then VVDI2 automatically enter Add key steps.
Load immo data we just got.
Learning.
Success.
Reset instrument.
New key to turn on dash.
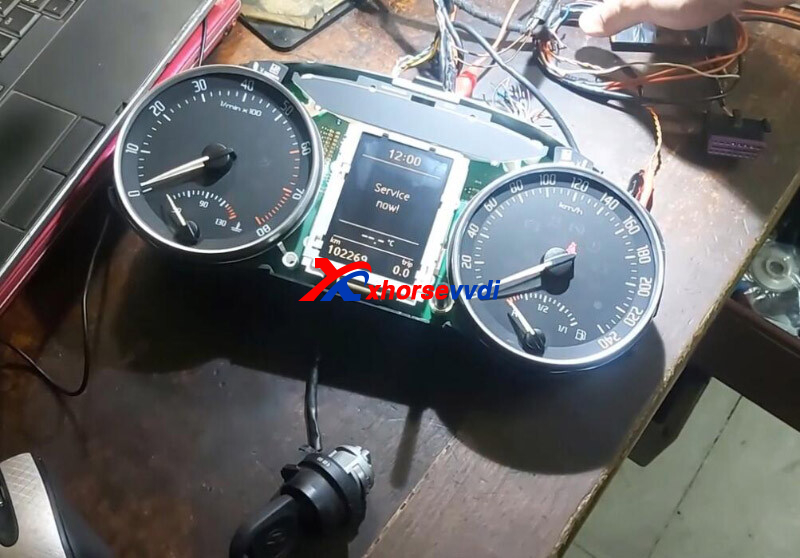
Credits to hesham essam.
http://blog.xhorsevvdi.com/xhorse-vvdi2-program-skoda-octavia-1z-akl-via-pogo-pin-success/
Posted by: xhorsevvdi at
10:01 AM
| No Comments
| Add Comment
Post contains 192 words, total size 5 kb.
In this article, we are going to show you how to repair a centralization for BMW X5 Accus by Key Tool Max.
Faulty Key:

Step 1. Replace Battery Compartment
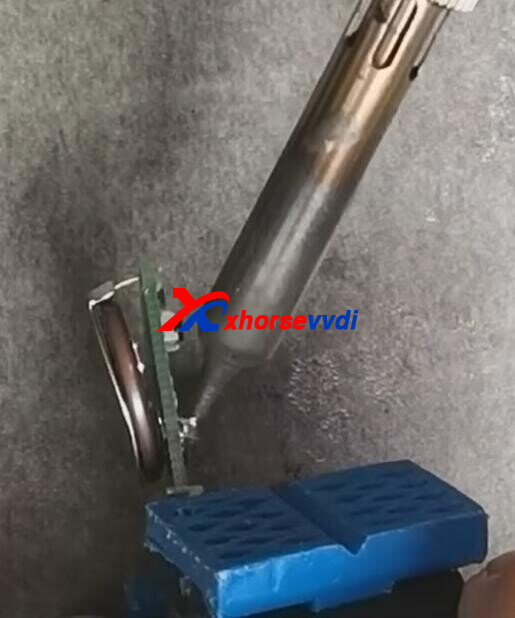
Extract PCB.
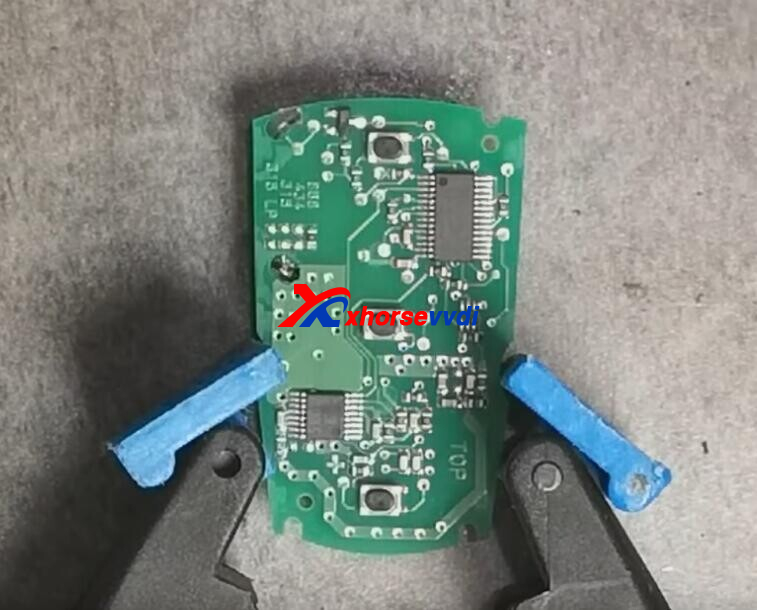
Desolder these 2 points that match two closed legs on battery compartment.
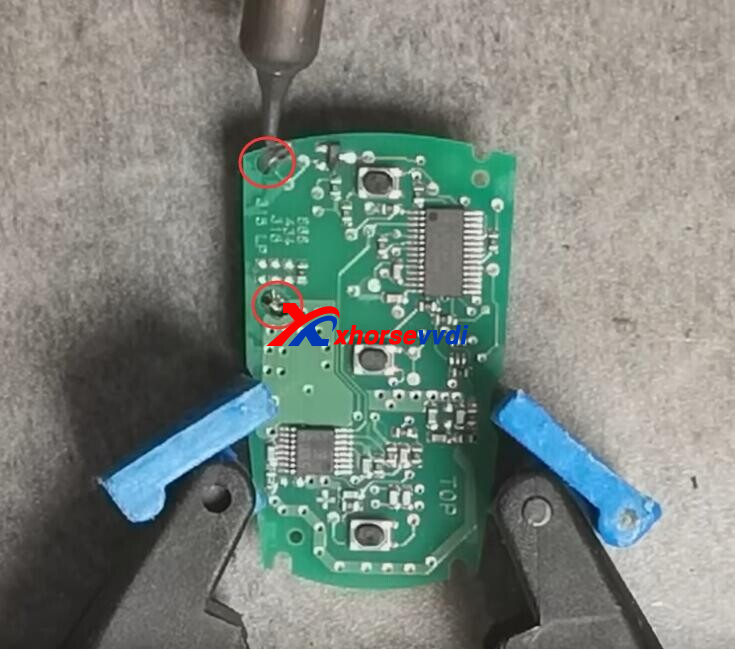
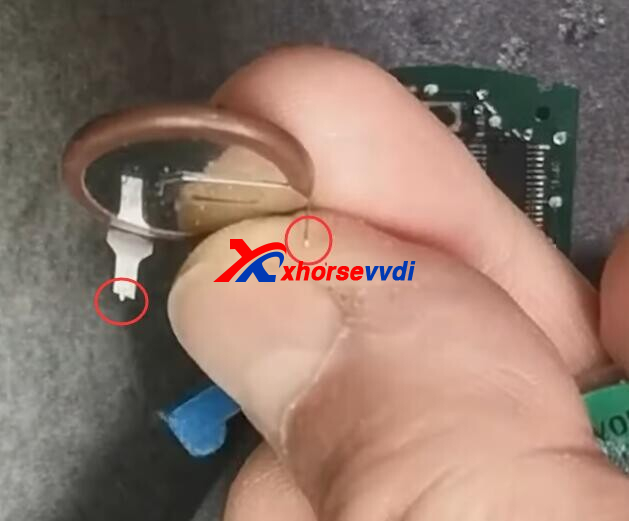
Turn it around and remove battery compartment.
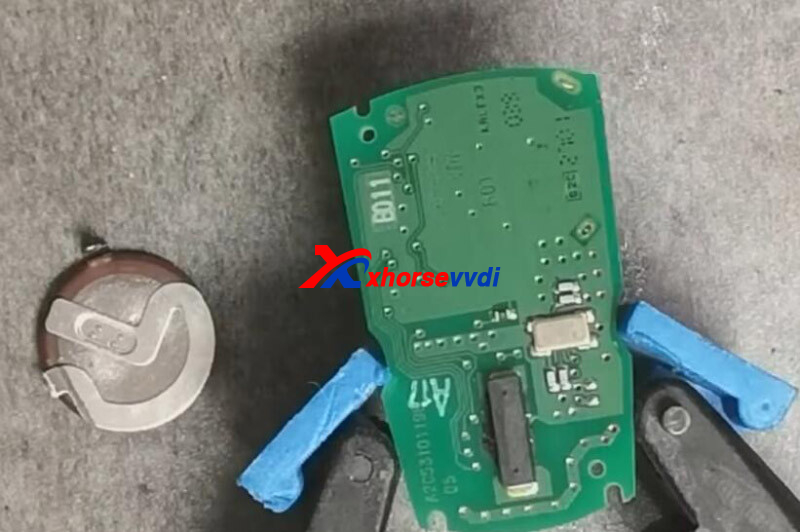
2 holes.
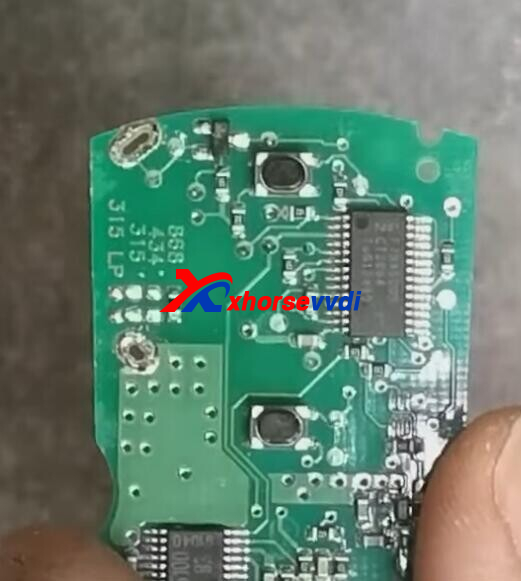
Install and resolder new battery compartment.
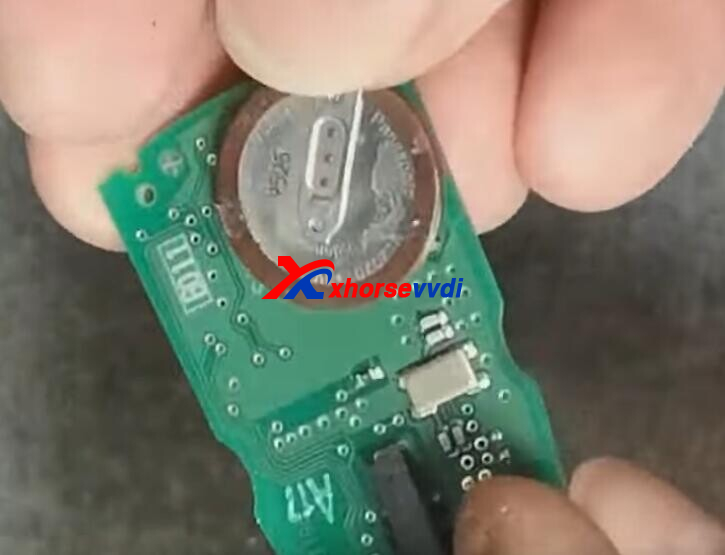
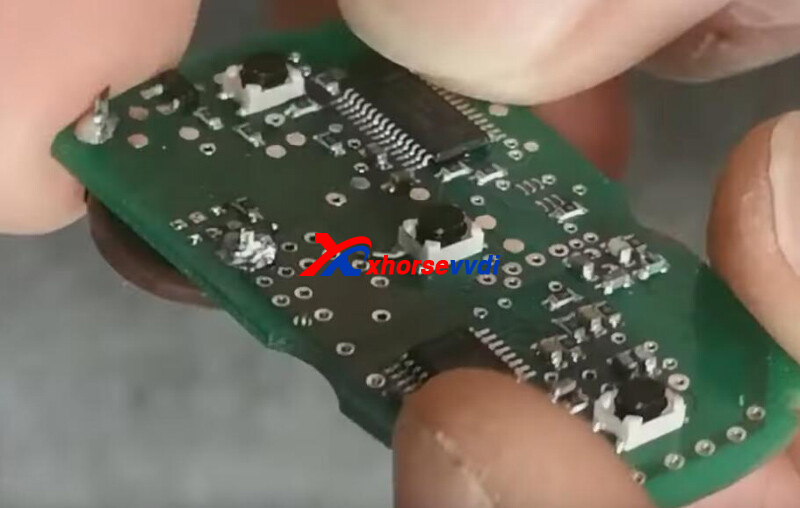
Install new PCB to new key shell and test buttons.
Step 2. Recharge
Turn on VVDI Max, select
Special Function>>Remote Charge Battery
Put key into the coil, and it starts to recharge battery.
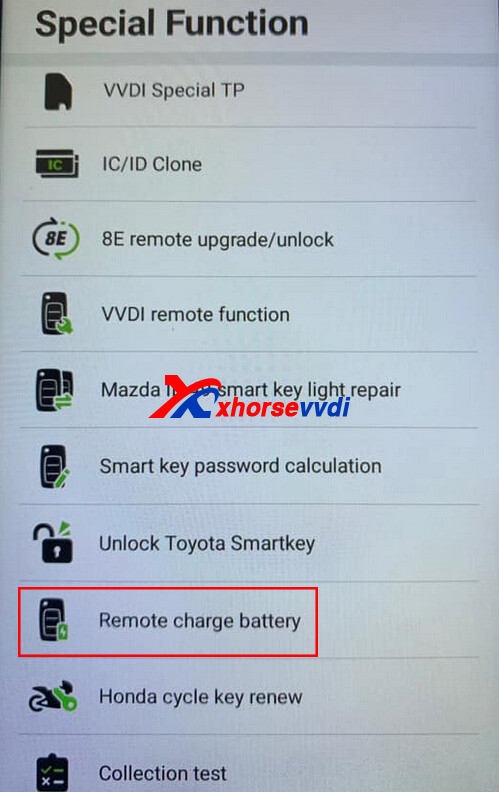
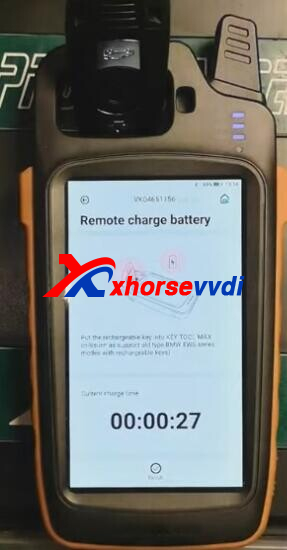
Alright, that's how to fix a faulty BMW X5 key.
http://blog.xhorsevvdi.com/how-xhorse-vvdi-key-tool-max-repair-bmw-x5-accus-key/
Posted by: xhorsevvdi at
10:00 AM
| No Comments
| Add Comment
Post contains 113 words, total size 4 kb.
V7.2.5 VVDI2 software is the vvdi2 newest version, here is the V7.2.5 VVDI2 free download link from xhorsevvdi.com
1.Free Download V7.2.5 VVDI2 Software (Click to Download)
2.V7.2.5 VVDI2 Update(2022-07-27)
Require firmware V7.2.5!!!
************************************************************************
===== VAG V7.2.5 =====
1. Improvement autodetect for VAG immobilizer system
2. Bugfix
===== BMW V7.2.5 =====
1. Bugfix
===== Porsche V7.2.5 =====
1. Bugfix
===== PSA V7.2.5 =====
1. Bugfix
===== Transponder Programmer V7.2.5 =====
1. Improvement prepare remote function
2. Immobilizer data tool: Euro->BMW->Bikes->Texas DST AES
3. Bugfix
===== Copy 48 (96 bits) V7.2.5 =====
1. Bugfix
===== J2534 V7.2.5 =====
1. Bugfix
===== Online Upate Tool V7.2.5 =====
1. Bugfix
===== Quick Start V7.2.5 =====
1. Bugfix
https://www.xhorsevvdi.com/
Posted by: xhorsevvdi at
09:59 AM
| No Comments
| Add Comment
Post contains 127 words, total size 2 kb.
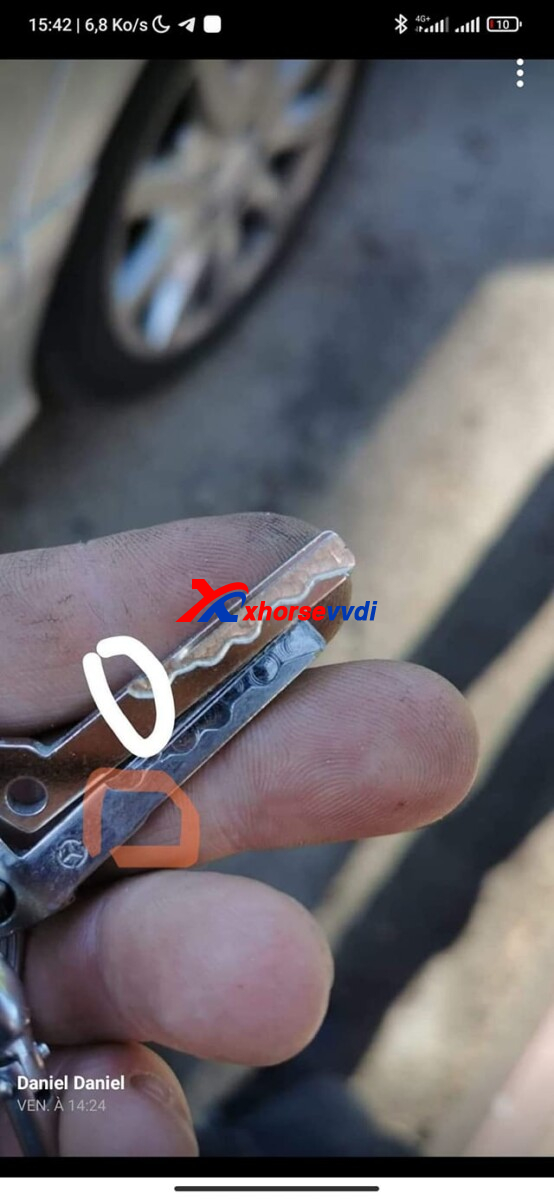
One customer gave feedback that he cut VVDI MB Key via HU64 option using Xhorse Key Cutting Machine but key didn't work.
So, how to cut Benz HU64 key? Here we have collected several tips on it.
There are 3 HU64 options for Benz, what is the difference?
1.HU64-1/ -2/ -3 and the years before and after 2010, a different distance in first bitting
2.Before 2010, the first step at a distance of 580 means 5.8mm; same on others, HU64-2 4.5mm, hu64-3 3.8mm
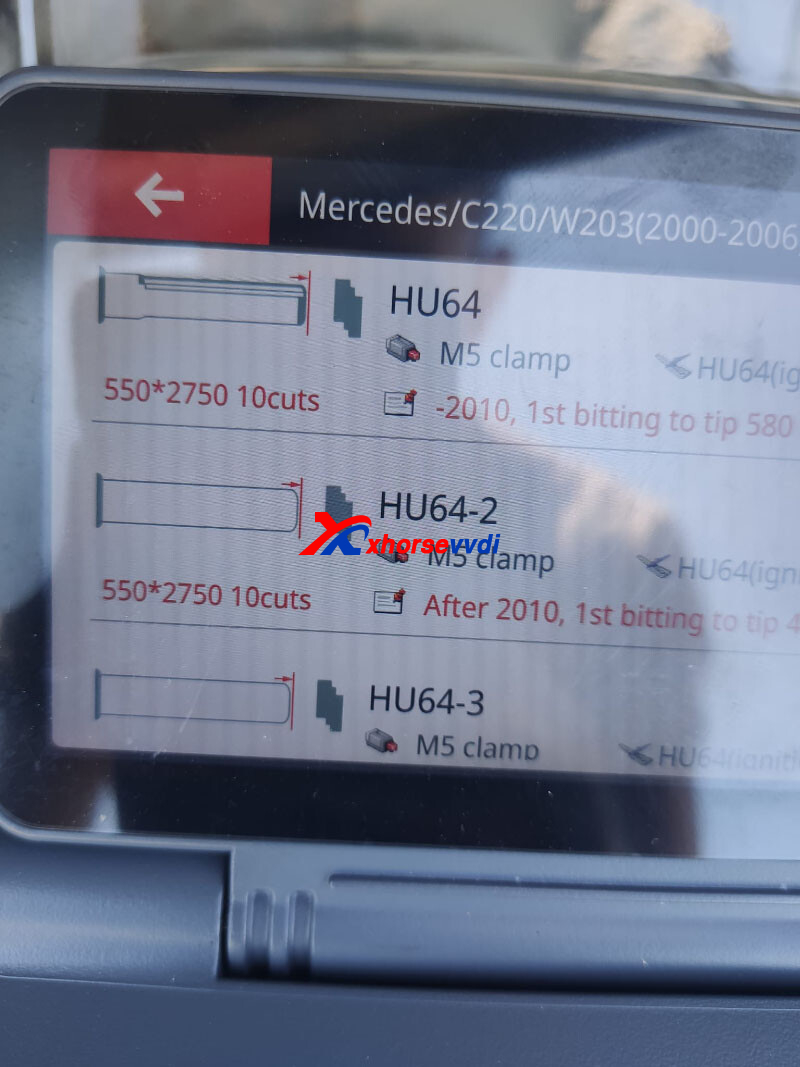
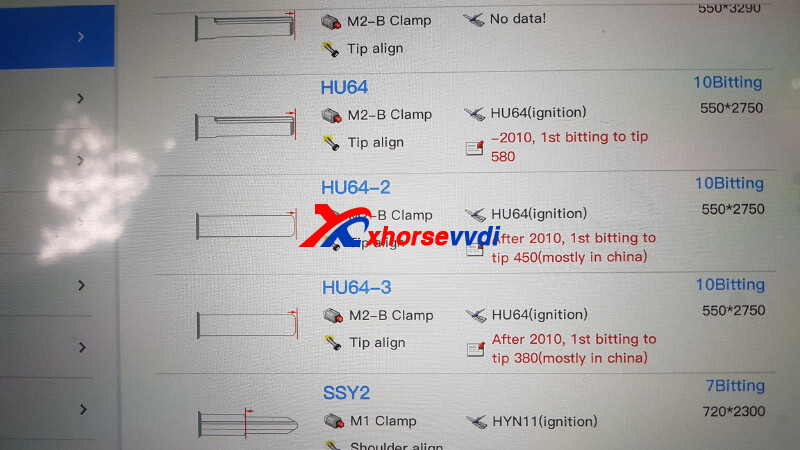
Then how to select different HU64 options?
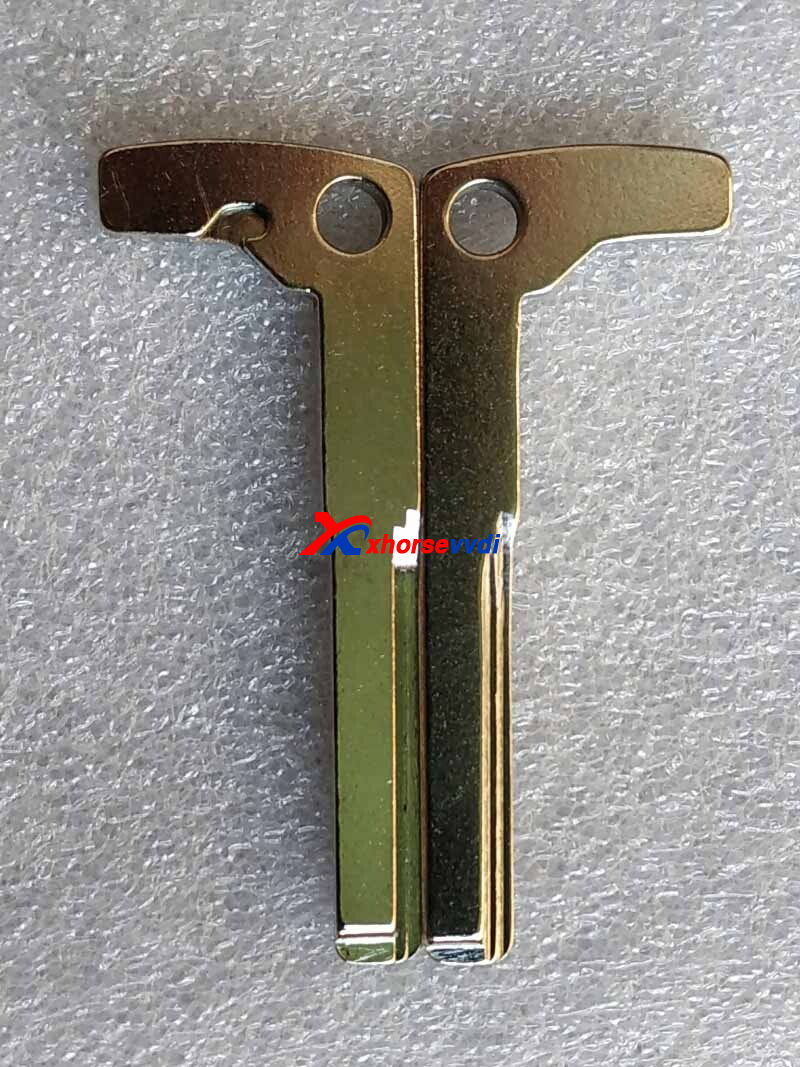
1.Check shoulder
Single shoulder or double, single shoulder is hu64-3; if not, the others.
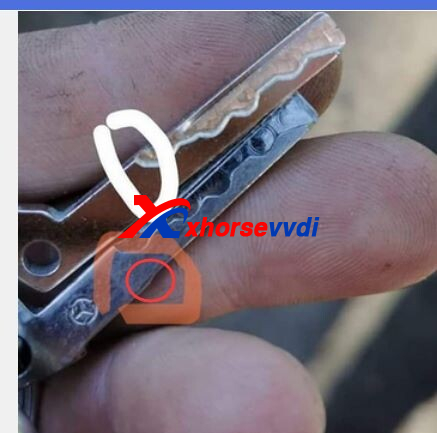
2.Lishi door
If 9 wafers, it's hu64-3 if 10 it's hu64-1 or 64-2.
Experience from Liudmil Docev:
I'm cutting it all off at 64.
Basically all Chinese BGA are intended for 64-3, however, there are those that are not nice and when you cut it into 3, it cannot enter because it does not let the plates down. 64-3 is on the new locks 2011+
If you can see a big beak in front, cut at 64-3 goes in well.
CGDI vs XHORSE. If you cut the left CGDI like 64-3 it won't go in. At Horse's, it's good.
Xhorse Key Cutting Tool on Sale:
https://www.xhorsevvdi.com/wholesale/key-cutting-tool/
Credits to Rudy, Mateusz, Simon...
http://blog.xhorsevvdi.com/xhorse-key-cutting-machine-cut-mercedes-benz-hu64-key-tips/
Posted by: xhorsevvdi at
09:58 AM
| No Comments
| Add Comment
Post contains 226 words, total size 3 kb.
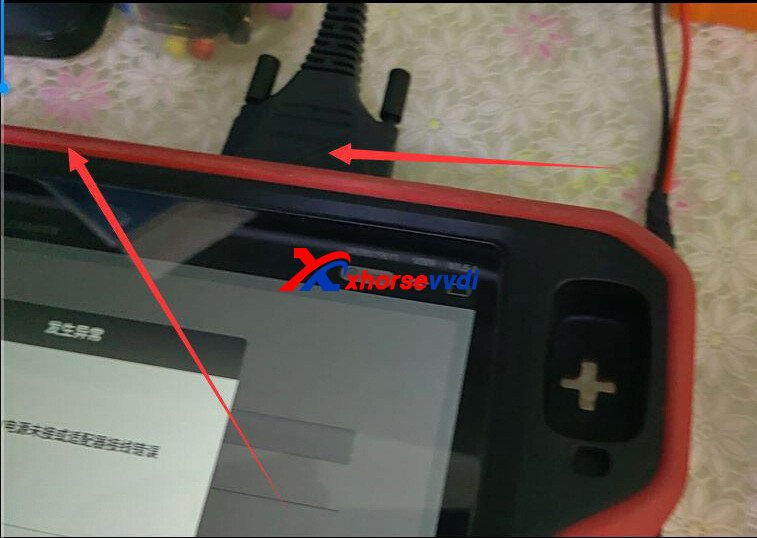
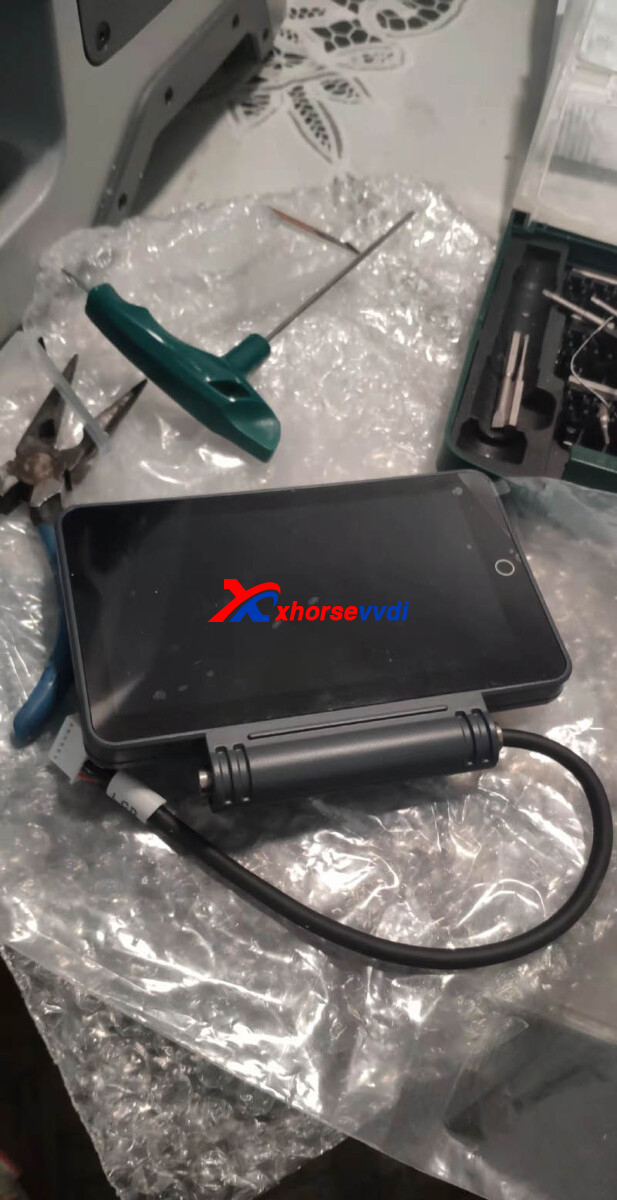
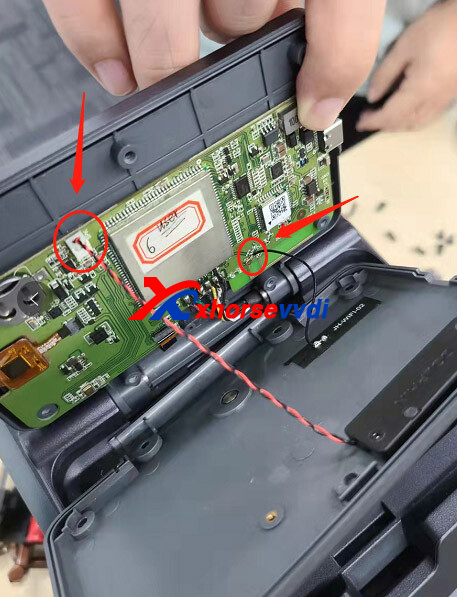
One customer fed back that his Dolphin XP005L had a problem on the screen.
Later this customer got a new screen, but how to replace the screen? Here is the procedure.
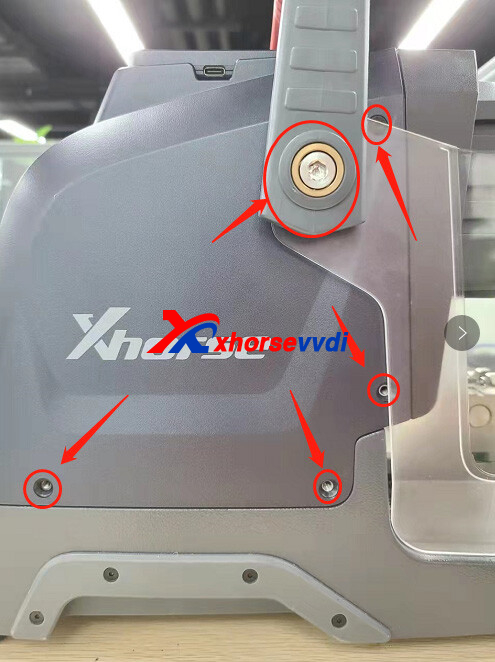
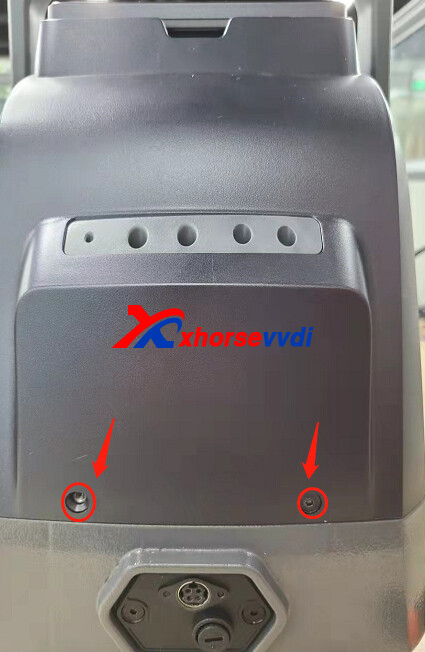
Step 1. Remove back case and handle
Remove all screws marked to take out back case and handle of XP005L.

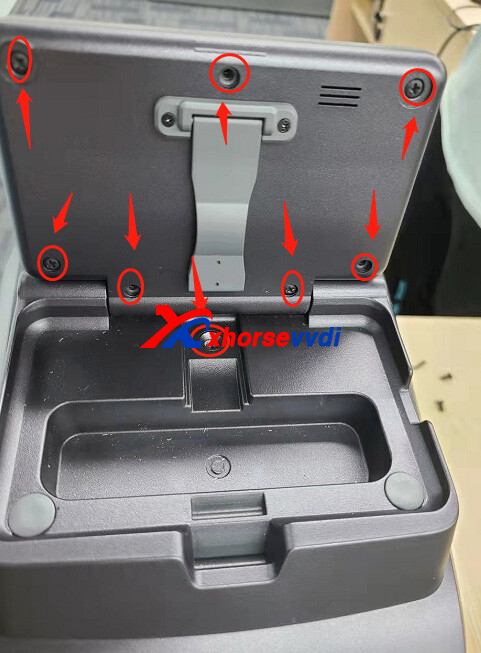
Step 2. Remove back case of screen
Remove all screws marked and unplug 2 cables to take out back case of screen.
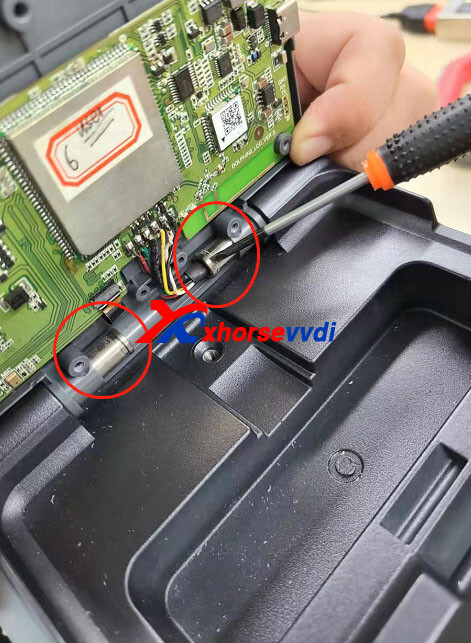
Step 3. Remove screen
1)Push out mount for fixing screen using a flat head screwdriver to remove screen off back case.
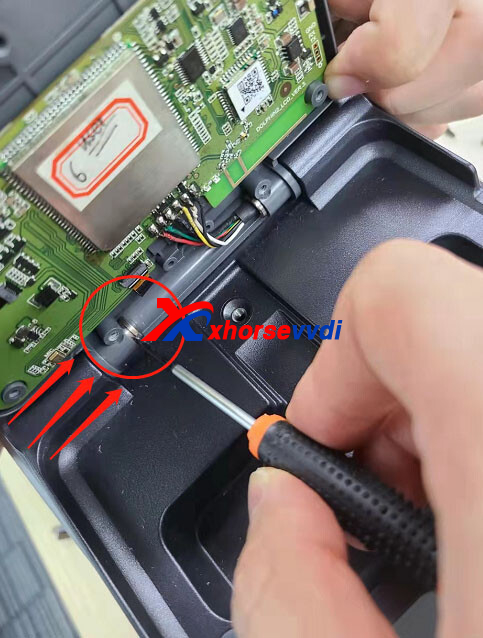
2)Remove plastic pin socket off screen cable using a sharp tweezer to completely remove old screen
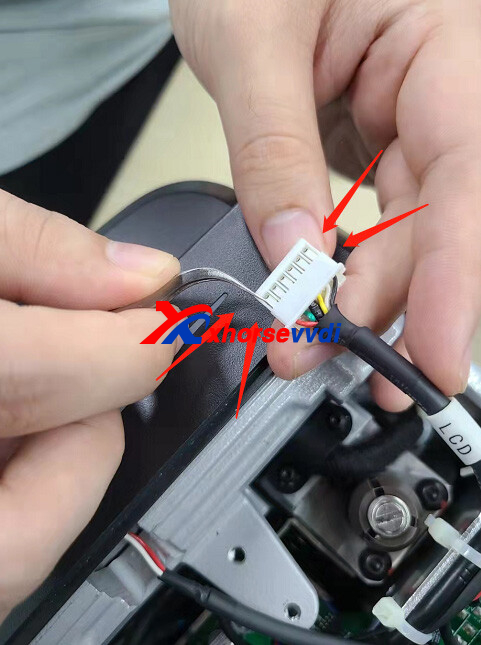
Notice: please take a photo of pin socket before removing it, because all pin should be in the exactly same position as before.
http://blog.xhorsevvdi.com/xhorse-key-cutting-machine-cut-mercedes-benz-hu64-key-tips/
Posted by: xhorsevvdi at
09:56 AM
| No Comments
| Add Comment
Post contains 144 words, total size 4 kb.
32 queries taking 0.0673 seconds, 131 records returned.
Powered by Minx 1.1.6c-pink.

